Staff/Users - Policy Access Level (PAL) Accounts
Placing & Receiving Agency Related Guide (PARG RARG)
Summary:
Policy Access Level (PAL) access addresses the needs of Lead Agencies to access high level placement data and to communicate with HSPnet sublicensees in their province. PAL access protects proprietary and personal information by excluding all student identifiers, and in general provides aggregate data only to support Lead Agency activities such as committees, budget management, and local communications.
Access to aggregate data, via PAL access, is authorized by a Data Stewardship Committee as outlined in Policy 3.6 of the National HSPnet Policies https://hspcanada.net/p-s-resources/.
Background
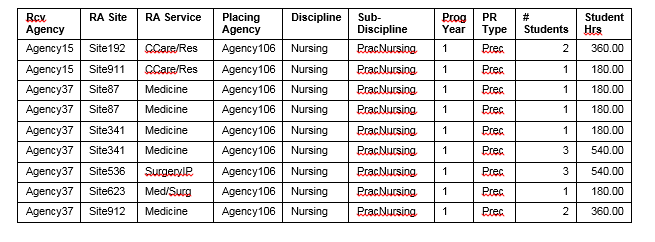
PAL report wizards generate aggregate data that is "de-identified" and all Agency, Program, and site names displayed without identifiers (Site 1, Site 2, etc.) as per the sample below. If identifiable data is required, a custom report request should be submitted for approval by the National Director or Data Stewardship Committee as required per the Data Access Guidelines of Policy 3.6.
First Login to HSPnet
- Once your user account is created, you will receive a "Welcome to HSPnet" email message with your user ID and temporary password.
- Visit the HSPnet website at www.hspcanada.net and click your province on the map of Canada.
- On the login page, enter your user ID and temporary password. Follow the instructions to enter a new password and forgotten password question, and to accept the user responsibilities as per the National HSPnet Policies. You will then be directed to the eLearning site to complete a 5-minute orientation that is mandatory for all new users.
|
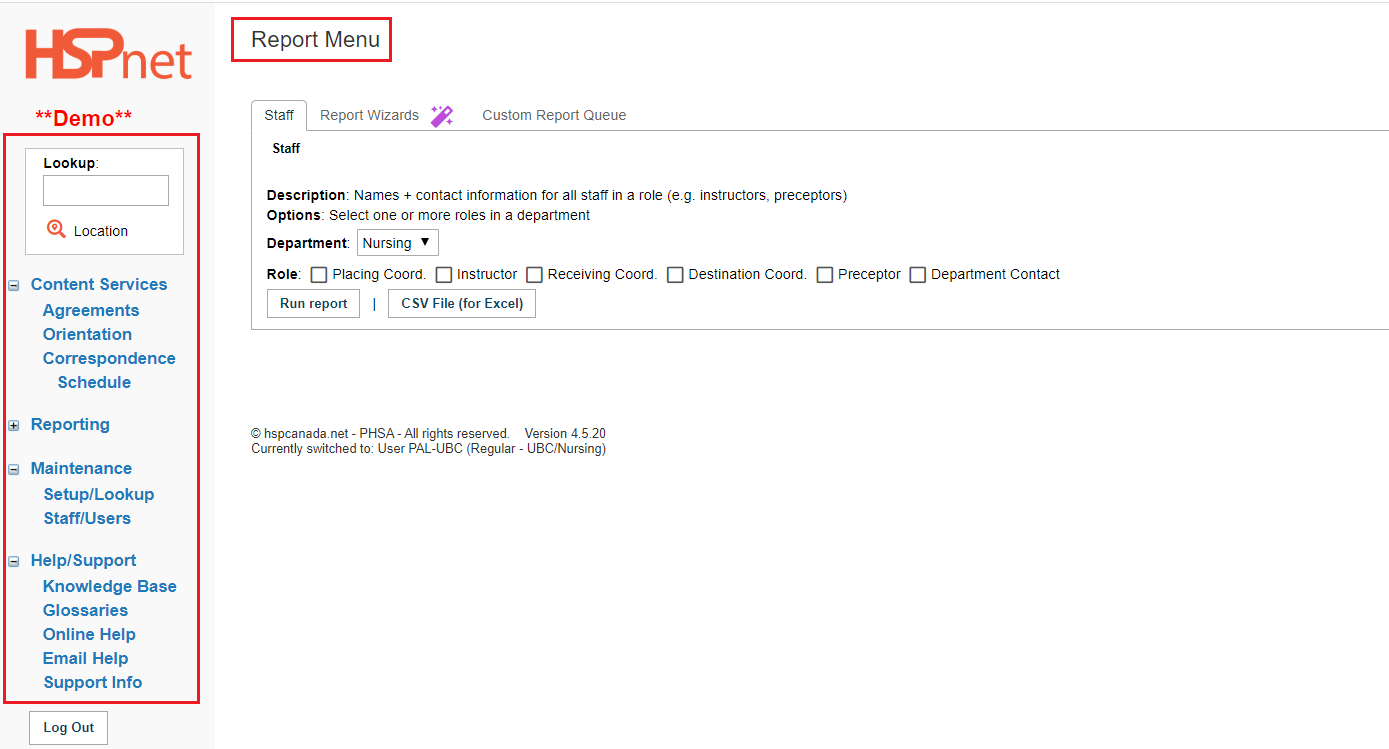
Default Screen: Upon successful login you will be greeted by the Report Menu screen.
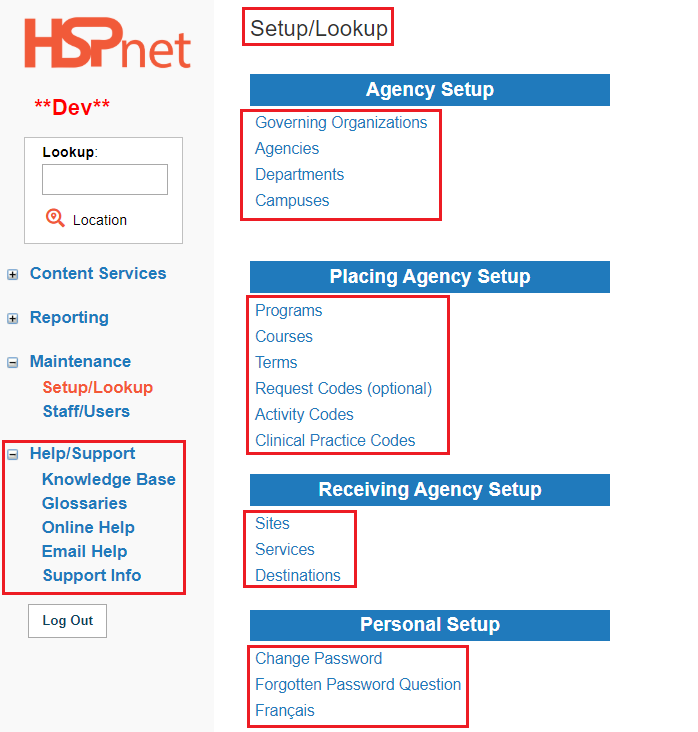
Screen Navigation: PAL Features
PAL users have access to the following features in your left navigation:
|
|
|
Generating Reports
PAL users have access to three types of reports listed under 3 tabs:
Reports generated from the Report Menu are submitted to your Queue, where a national Report Server processes submitted reports every 1-2 minutes. Once processed, a report's status will change from "Submitted" to "Ready".
Additional Guides to using the report features are available in the HSPnet knowledge base.
For a video on best practice reporting and making use of the data: Reporting Webinar Recording - Using HSPnet Data for Managing Practice Education (Receiving Agencies).
|
|
|
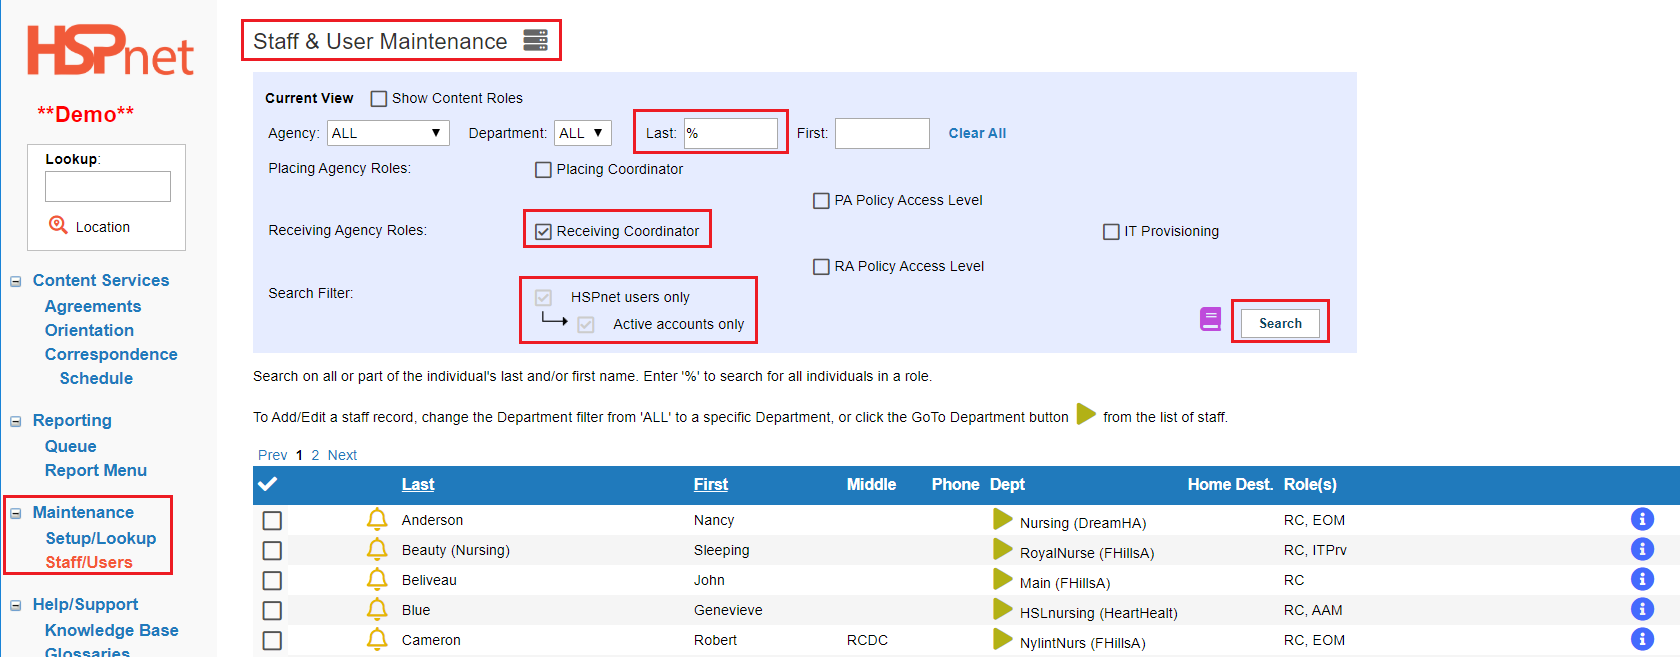
Looking up and Communicating with Users
The Staff & User Maintenance screen allows you to search for a specific user by first or last name, or to enter "%" to search for all users in a role. The adjacent example shows how to search for all Receiving Coordinators in ALL agencies across the province. The search filters are automatically set to show only HSPnet users with an active account. The search results provide a read-only list of matching users.
|
|
|
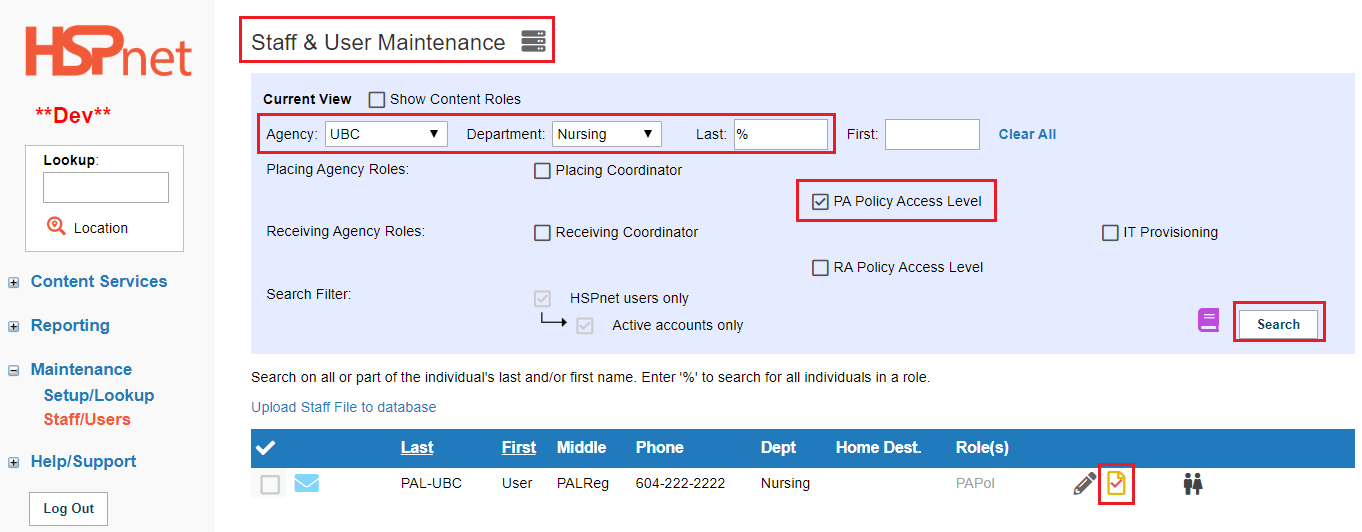
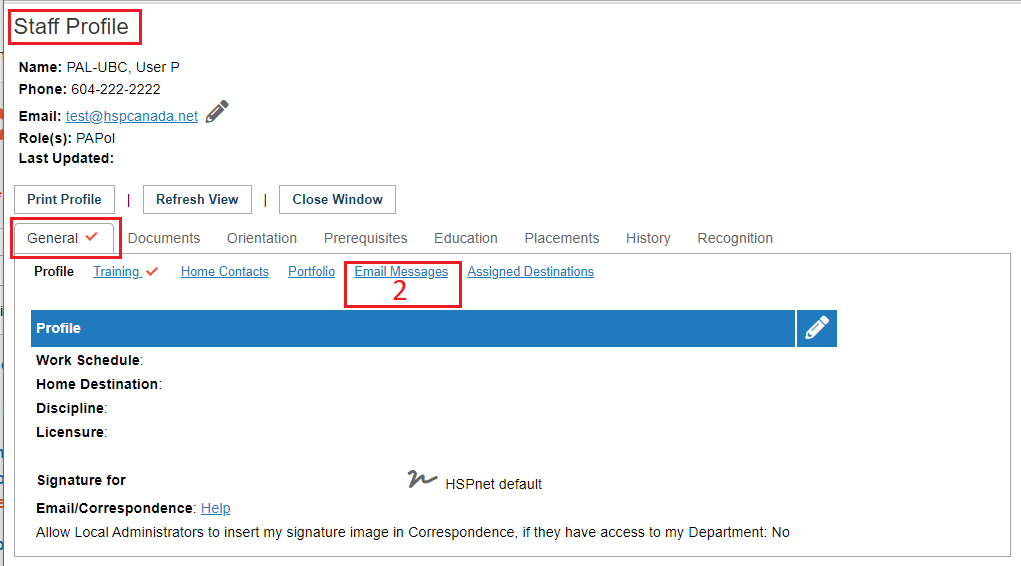
Look up your own profile to customize it for communications:
|
|
|
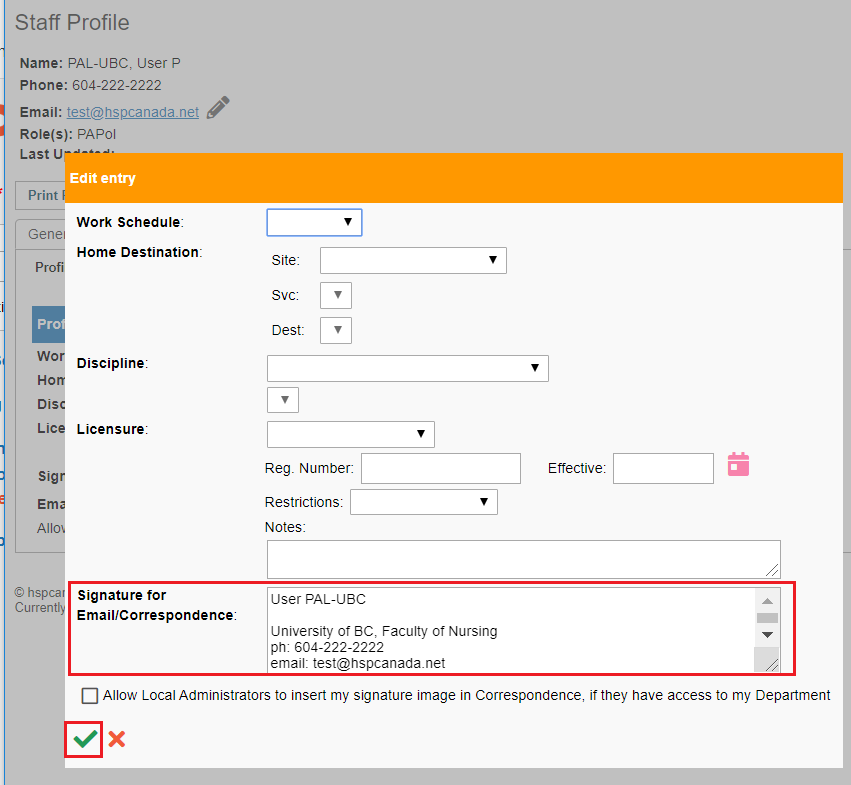
Edit your closing signature.
Please stay on this screen if you wish to create any stock e-mail messages as described in the next set of instructions. |
|
|
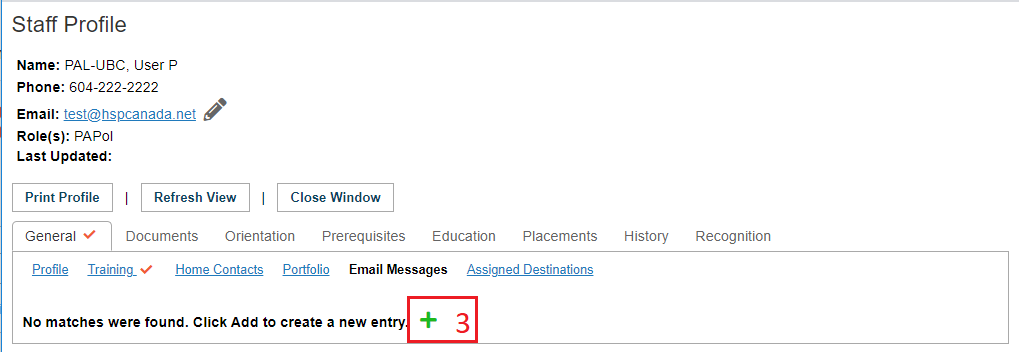
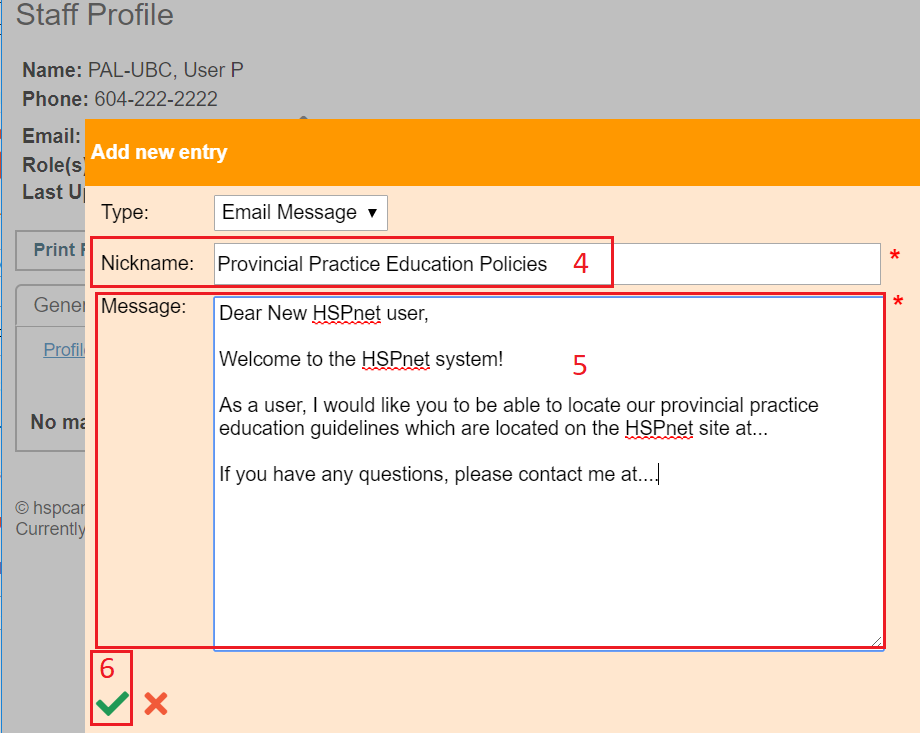
Create stored Message scripts: (Optional tool).
In your profile you can also create and store messages that you may reuse multiple times.
|
|
|
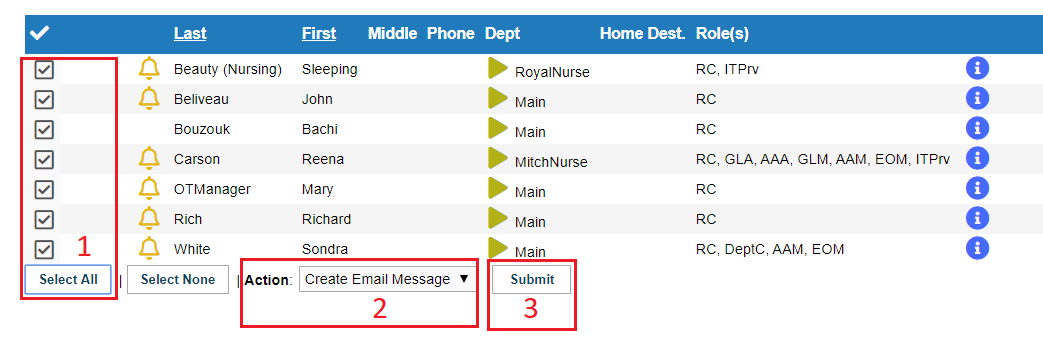
Message Multiple Users:
The Send an e-mail window should open. If that window does not open, most likely it will be due to your pop up blocker in your browser. |
|
|
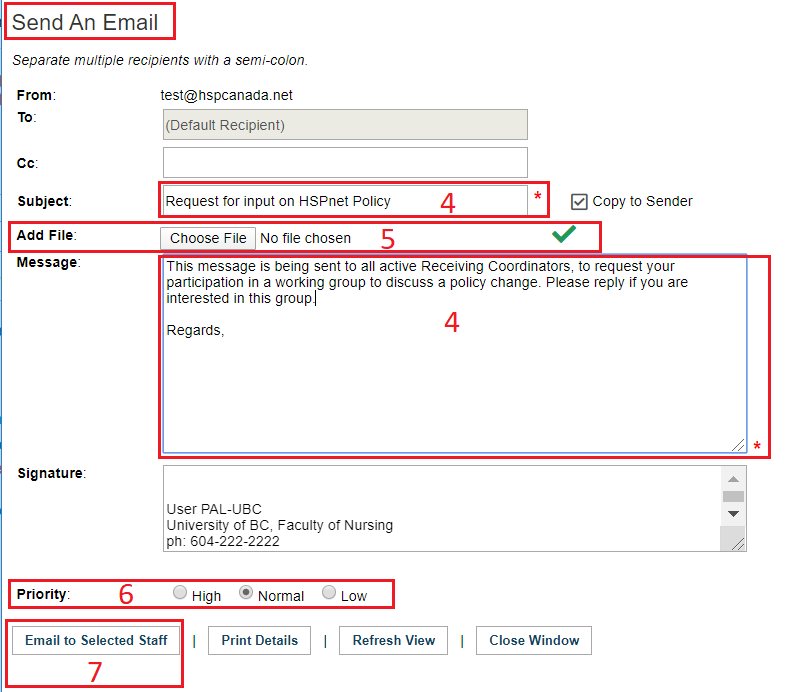
Send an Email Message screen:
If you leave the "Copy to Sender" checkbox marked (recommended), you will receive a copy of the email as sent. |
|
|
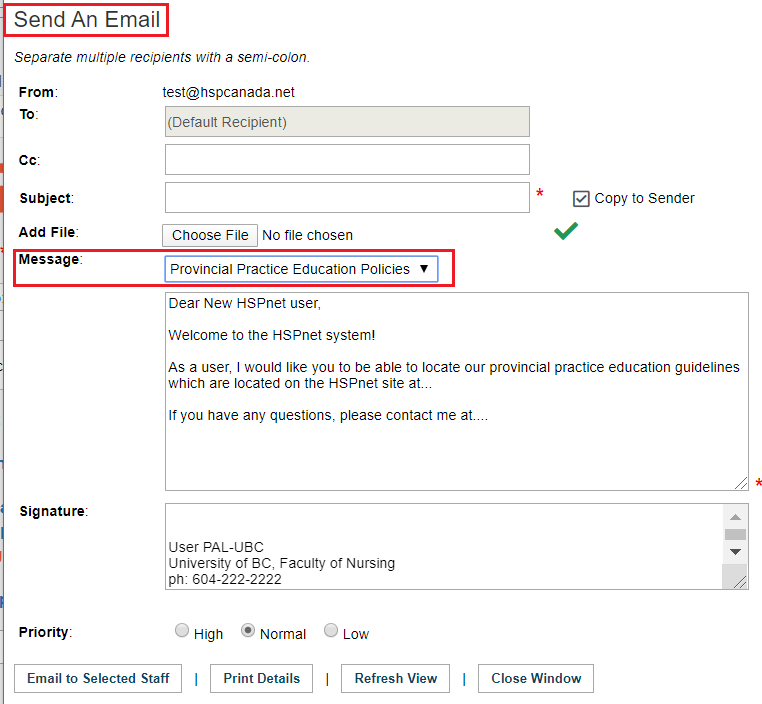
Use a stored e-mailed message script:
All of the directions above apply. The only difference is a new drop down list that appears under Add File and now next to Message.
|
|