
Student Admin - Automated Student Matching Part 2 (Student Site Selector)
Placing Agency Related Guide (PARG)
Summary:
Automated Student Matching (ASM) can be used to randomly assign your students or used to match students using Student Site Selector (SSS) to placements.
This knowledge base page is for only doing Student Site selector matching.
Click to view Automated Student Matching part 1 - Random Match only
Student assignment can be streamlined through the ASM feature that assigns students based on student preferences (ranked choices) or other rules. The ASM feature allows Placing Coordinators to use a combination of automated and manual assignments in any course.
Contact HSPnet Help Desk to request that the automated matching feature be enabled for your educational program(s).
Appendix, below, provides a list of the available matching algorithms and sample scenarios for their use if using SSS.
Refer to the Student Site Selector knowledge base page for set up of that feature and functionality.
|
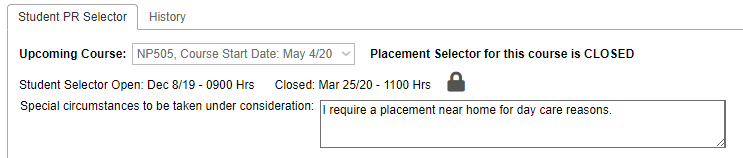
Step 1 – Review status of the Student Site Selector
To prepare for automated matching based on student choices:
|
|
|
|
|
|
|
Step 2 – Manage Exceptions
It is recommended that you manage exceptions to automated matching before using the ASM feature. See the Knowledge base page entitled Student Site Selector for the detailed steps to withhold a site from matching. Exceptions may include:
|
|
|
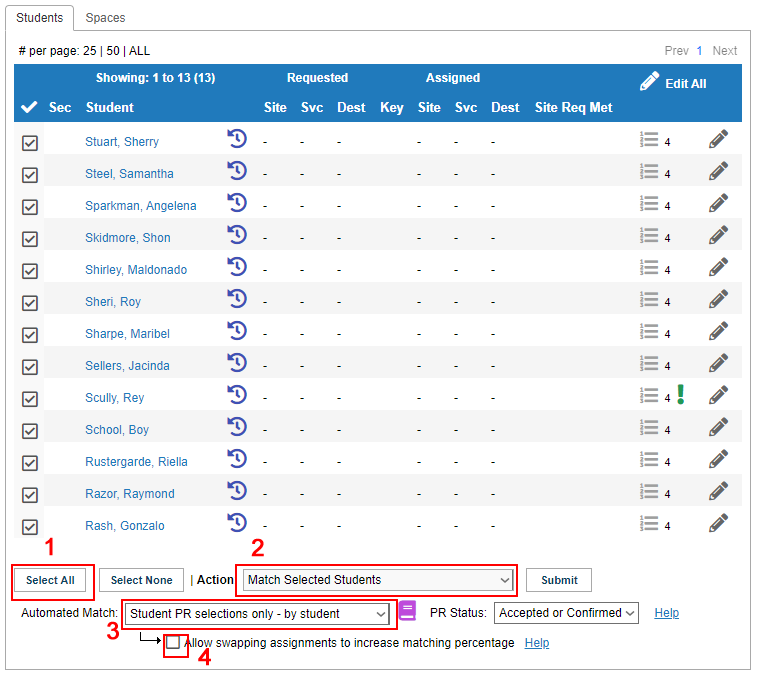
Step 2 – Click Cohorts / Assignment Worksheet
PR Status: Select which statuses of requests should be matched to students:
Allow swapping assignments to increase matching percentage To view all Automated Match algorithms see the Appendix at the bottom |
|
|
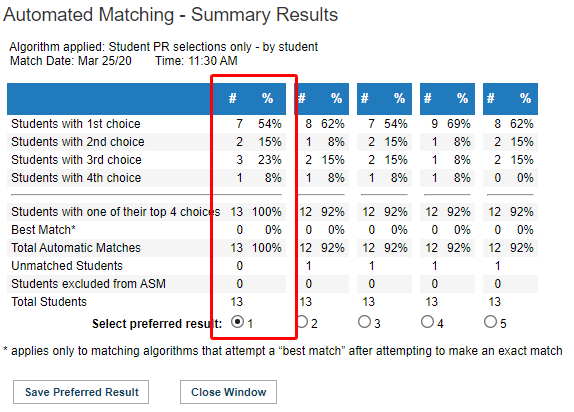
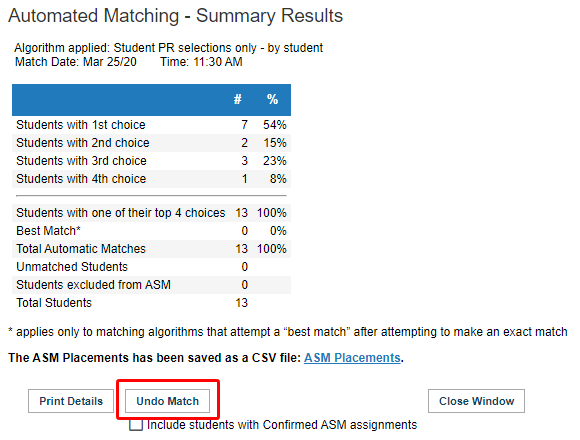
Upon Submit, you will present with a popup window of the ASM Match Results.
At this point you want to look through the results and see what is the best match.
#4 looks like a good match as 9 of the students have their first choice. What you want to make sure of is are all the students accounted for. Look at total automatic matches row for that. Since there was 13 students and only 12 were matched with #4, that is not a good match.
#1 is the good match as all students were matched and the majority received their 1st choice.
Click Save Preferred Result
|
|
|
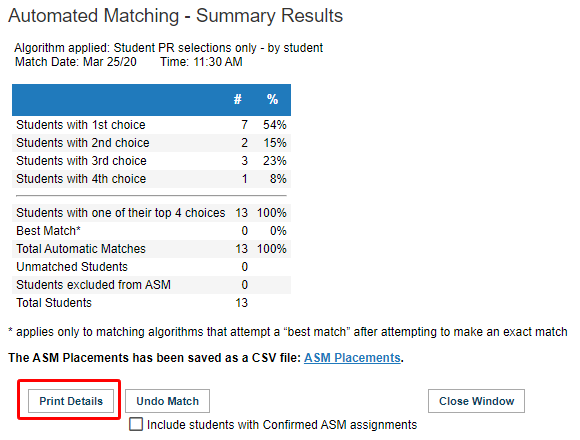
The next screen will give you the option to create a CSV file of the match results. Click Print Details if you require that report. Your report will be generated and displayed in the same screen. Click the ASM Placements link to download your report.
Click Close Window to see the results on the Assignment Worksheet. |
|
|
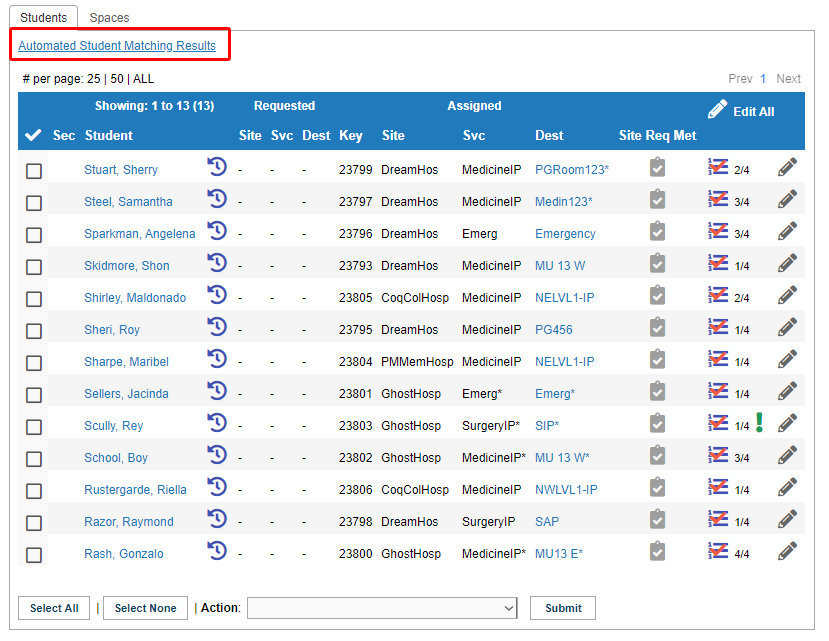
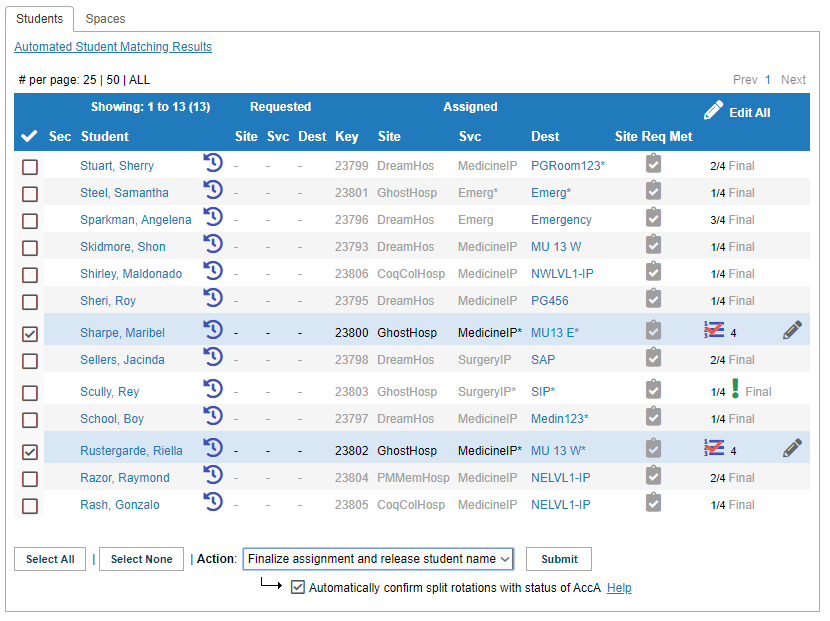
You will now see the match results on the Students tab of the Assignment Worksheet.
You will see the number 2/4, 1/4 on the far right of each student. This tells you that the student received his 2nd or 1st choice out of the 4 that they had chosen.
REMINDER: at this point the assignments are "draft" only, and are not confirmed (or visible to sites or your students) until you finalize them.
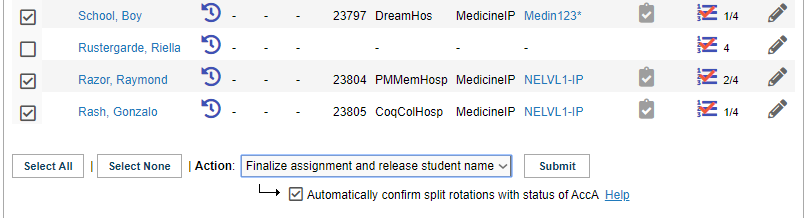
Finalize Assignments
2. If you need to manually change a student's automated match at any time, click Edit
To Undo the Match, click the Automated Student matching Results link
When the Summary results window opens, click the Undo Match button. Your results will now be removed from the Assignment Worksheet. |
|
|
Multiple ASM Results
In the example, some students were matched successfully, but the remaining students were not matched because their choices were not available. Perform these steps for running ASM again to assign the remaining students to placements that are still available.
|
|
|
2. Confirmed students will disappear from view; mark the checkbox to "Show confirmed students" if you want to view all students.
3. Open the Automated Student Matching Results window and click Undo Match to clear the current match results. If you want to retain the first set of confirmed matches, do NOT mark the checkbox to "Include students with Confirmed ASM assignments".
4. Students that were confirmed after the first match will now display of 1/4 Final or as such.
5. Select the remaining unmatched students and run ASM again, using the same or a different algorithm.
6. Select one of the five match results and click Save match Results to assign the selected students.
7. The second set of randomly matched students will now display "Current match results" icon
8. Repeat steps 1 to 7 to run another partial match, or apply the action "Un-assign students" to clear assignments for any student. |
|
|
Reporting
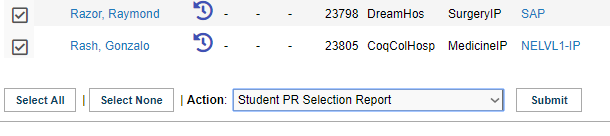
To run the Student PR Selection Report, select all students and in Action, choose Student PR Selection Report and Submit.
This report will only show once Site selector is closed.
Your report will generate at the top of the Students tab. |
|


Things to Remember
- All students in the worksheet should have either a manual or automated assignment. If any students in the worksheet are not to be assigned in the course, they should be removed from the Assignment Worksheet (via the Action dropdown) and waived from the course or removed from the Cohort (via Enrollment) if they are not continuing with their classmates.
Appendix - Algorithms Based on the Student Site Selector
NOTE:
- All algorithms will match a student to a specific placement ONLY if the placement request (PR) is Accepted or Confirmed AND it is not yet assigned to another student (manually or via ASM).
- For any algorithm, students will remain unmatched after running ASM if there were insufficient spaces for the students who were included for matching.
|
Algorithm Name |
Worksheet |
Uses and Results |
|
Student Selections only |
Individual or Group |
Used when an exact match based on PR Reference # is desired. |
|
Student Selections + City/Date/Zone |
Individual or Group |
Used when an exact match or a "next best" match is desired based on placement location and dates. |
|
Student selection or same destination |
Individual or Group |
Used when there may be multiple placements available in the same destination (e.g. Unit 4 north). |
|
Student selection or same Experience at the selected site |
Used when there may be multiple placements available at a site in the same experience area (HSPnet Request Code). This is commonly used in Rehabilitation Sciences where sites offer an experience such as CardioResp or Neuro. |