
Student Admin - Automated Student Matching Part 1 (Random Match Only - No Student Site Selector Needed)
Placing Agency Related Guide (PARG)
Summary:
Automated Student Matching (ASM) can be used to randomly assign your students or used to match students using Student Site Selector (SSS) to placements.
This knowledge base page is for only running a Random Match - No Student Site selector needed.
Click to view Automated Student Matching part 2 - For Site Selector
**(If you do not see the Match Selected Students choice in the Action drop down in the Assignment Worksheet, please see that information at the bottom of this page)
Contact HSPnet Help Desk to request that the automated matching feature be enabled for your educational program(s).
Appendix below, provides a list of the available matching algorithms and sample scenarios for their use if you want do a random match of your students.
|
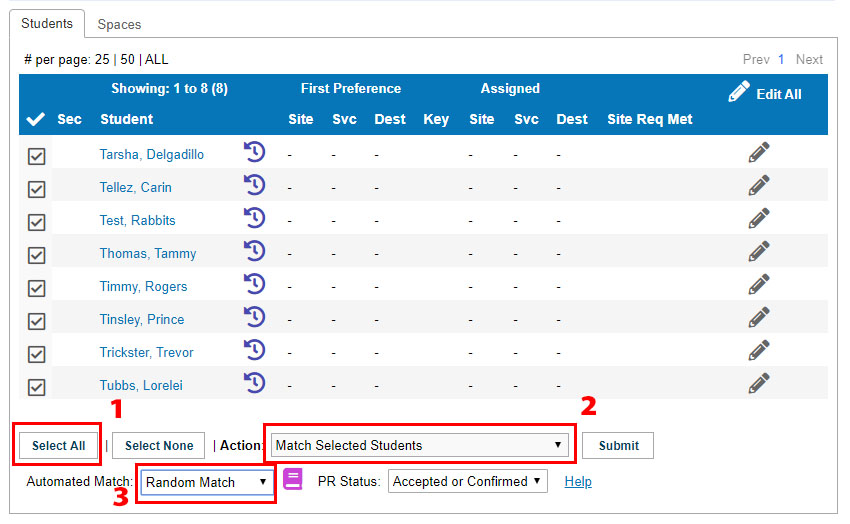
Random Matches (No Student Site selector needed) Use this for a true random match of students to placements. Step 1 – Click Cohorts / Assignment Worksheet
PR Status options: Select which statuses of requests should be matched to students:
(If you do not see the Match Selected Students choice in the Action drop down in the Assignment Worksheet, please see that information at the bottom of this page) |
|
|
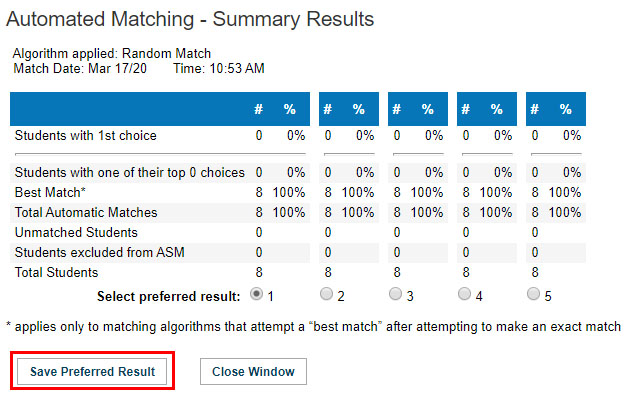
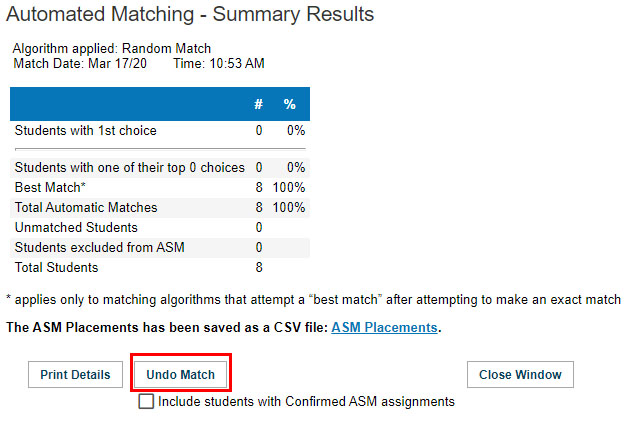
Upon Submit, you will present with a popup window of the ASM Match Results.
Click Save Preferred Result |
|
|
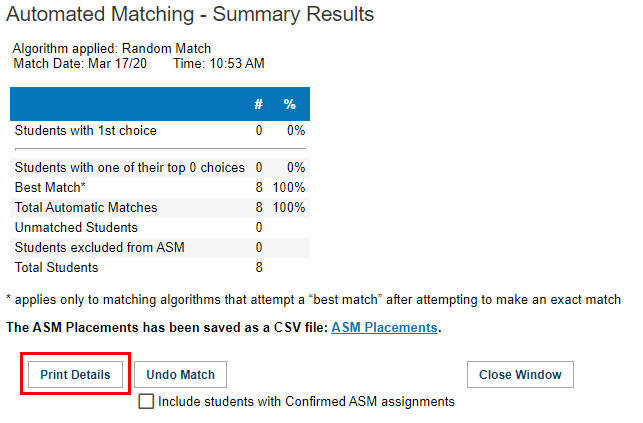
The next screen will give you the option to create a CSV file of the match results.
Click Print Details if you require that report. Your report will be generated and displayed in the same screen. Click the ASM Placements link to download your report.
Click Close Window to see the results on the Assignment Worksheet. |
|
|
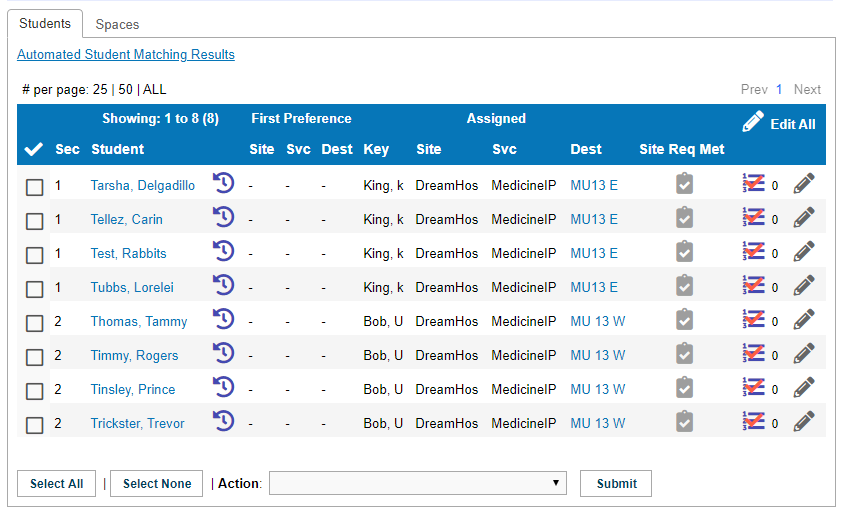
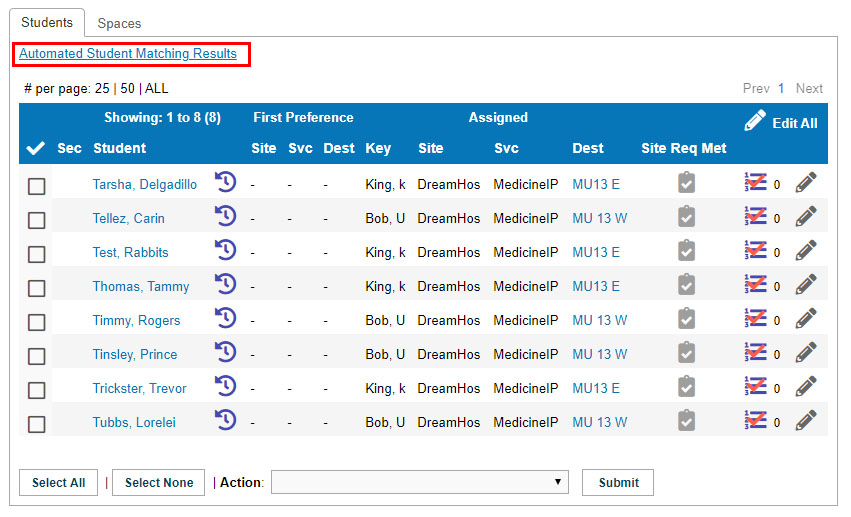
You will now see the match results on the Students tab of the Assignment Worksheet. If you need to manually change a student's automated match at any time, click Edit To Undo the Match, click the Automated Student matching Results link. When the Summary results window opens, click the Undo Match button. Your results will now be removed from the Assignment Worksheet. |
|
|
Other Match Choices
The other match choices only work with Sections and in the Group Assignment Worksheet. If you use Sections to break the Cohort into sub-groups, review the Section assignments to ensure they are up-to-date for students in this course.
To use Sections see the related knowledge base page: Student Management: Sections Feature
Random Match – Mix sections Used when group assignments should represent a mix of characteristics such as learning style or experience level. |
  |
|
Random Match – Combine sections
Used when group assignments should represent similar characteristics such as geographic preference or experience level. |

|
|
To Exclude Destinations from Automated Student Matching (for Rotations):
For example, you may have rotations and only wish to match the first destination in that rotation, or match each rotation one at a time).
More about Multiple Matches for Rotations
Multiple matches may be run with the site selector, but the limitation is that only one can be run at a time. When you run a first match (e.g. by excluding the block 2 placements), you need to finalize the assignments on that first match, then undo the match. The finalized assignments will be maintained, and a second match can then be run in the same way using the remaining placements. Steps:
|
|
|
Finalize Assignments
To finalize the ASM assignments, select the checkbox for one or more students and choose the appropriate Action:
|
|
|
If you do not see the Match Selected Students choice in the Action drop down in the Assignment Worksheet
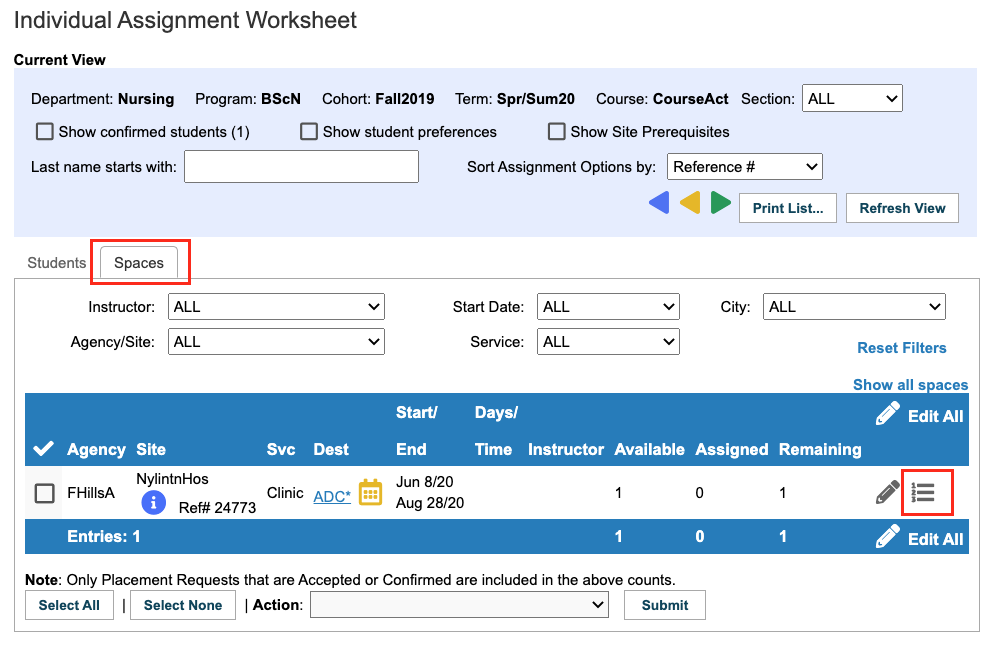
If you have Student Site Selector available for your course (the 123 icon is showing on the cohort/course screen but not active) Click that icon to get to the Student Site Selector screen. If you see a number other than 0, site selector is considered available but not currently active. Click the pencil icon
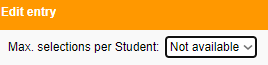
Change the top drop down to Not Available and then hit save Your site selector screen should be set to 0 now. The Match Selected Students choice in the Action drop down will now show up in the Assignment Worksheet. |
|


Things to Remember
- All students in the worksheet should have either a manual or automated assignment. If any students in the worksheet are not to be assigned in the course, they should be removed from the Assignment Worksheet (via the Action dropdown) and waived from the course or removed from the Cohort (via Enrollment) if they are not continuing with their classmates.
Appendix - Random Match Algorithms (NOT based on the Student Site Selector)
- Random matching is used when student preferences are not a factor used in matching, either because students do not have access to the Student Site Selector (so choices are not entered into HSPnet) or when preferences are not a consideration during the assignment process.
- So long as there are sufficient spaces available, all selected students will be matched even if they have no saved choices.
|
Algorithm Name |
Worksheet |
Uses and Results |
|
Random Match |
Individual or Group |
Used to streamline the assignment process when student preferences are not a factor in assigning students. |
|
Random Match – Mix sections |
Group |
Used when group assignments should represent a mix of characteristics such as learning style or experience level. |
|
Random Match – Combine sections |
Group |
Used when group assignments should represent similar characteristics such as geographic preference or experience level. |