Cohorts - Creating Alternating Days for Group Courses
Placing Agency Related Guide (PARG)
Summary:
Create different days of the week within a Group Request so that students (in the same Course) can select Destinations and days of the week (or various shifts) when using Site Selector or if you have alternate days of the week for your groups:
|
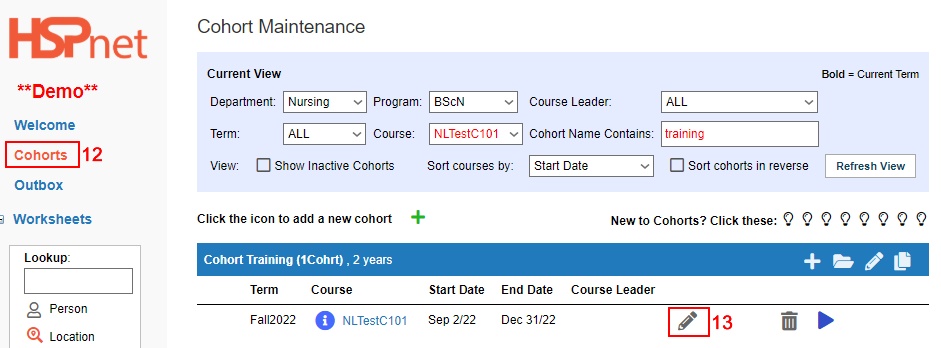
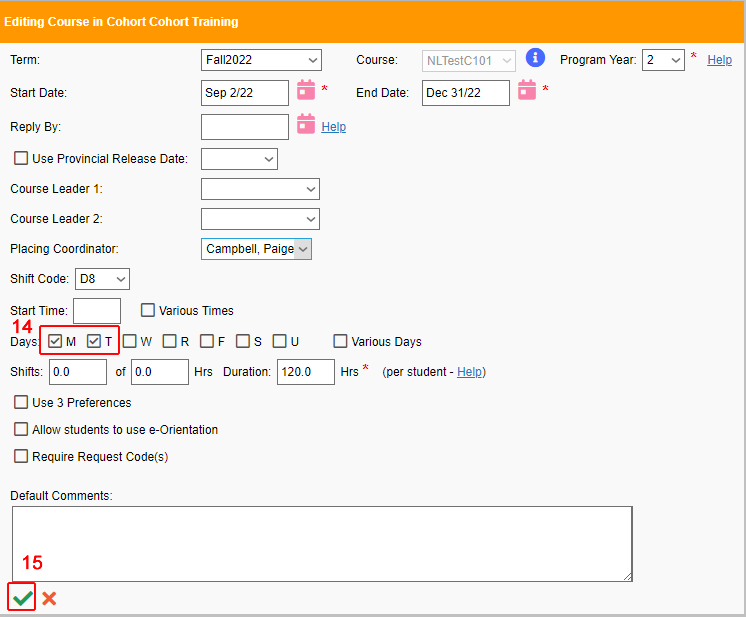
The first thing to think about when doing this is the course edit screen in cohorts is actually a template. When you edit information in that screen and save it, you are creating a template that any placement requests created from that point will have those details.
If you edit it after you have created placements, that edit will not be reflected on the previously made placements, but only new ones that you create. With this in mind, this is how you can create different days of the week in a Group Request in the same course.
|
 |
|
 |
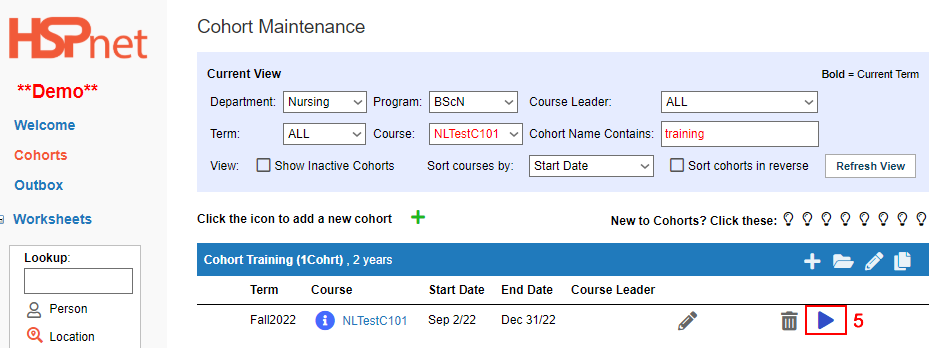
5. Click the enrollment worksheet icon.  |
 |
|
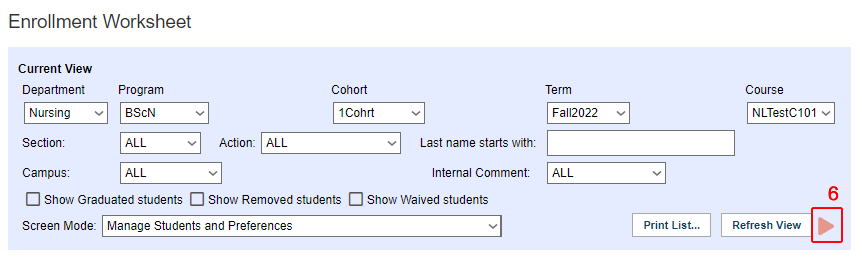
6. Click the Create group worksheet icon |
 |
|
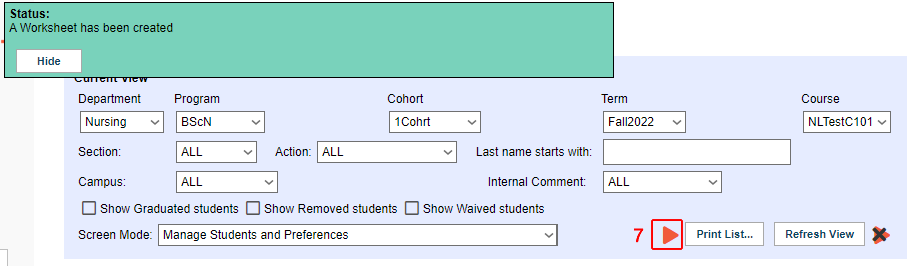
7. Click the new go to button
|
 |
|
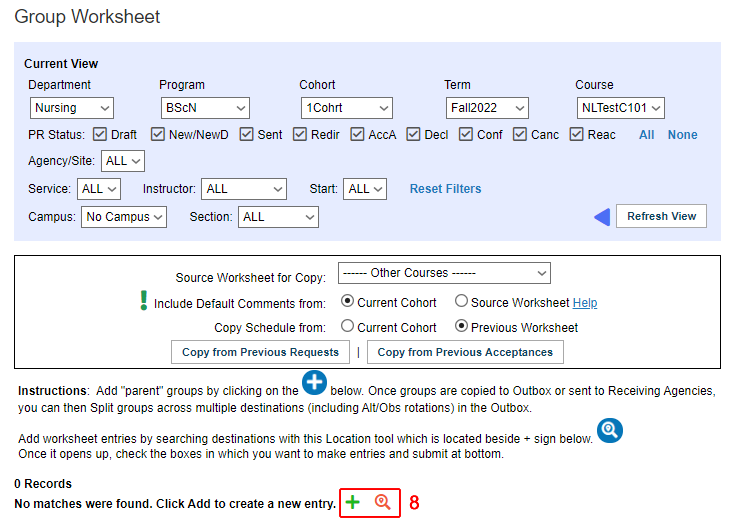
To Add the locations for Wednesday and Thursday
|
 |
|
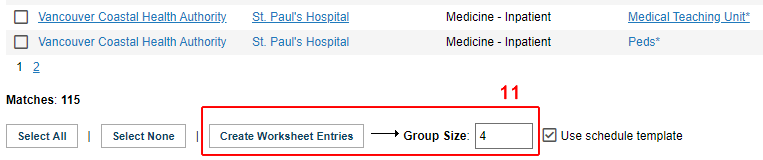
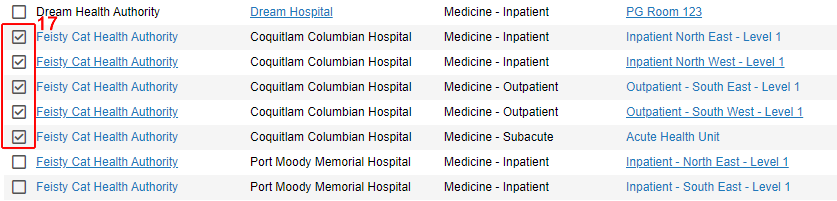
9. In using the the look up Select the destinations by clicking to place a check mark in the box to the left of the desired destinations. Your search results will how below.
10. Pick and choose the destinations that you want to create as placements by clicking the check box(s) beside the listing. |
 |
| 11. Scroll to the bottom of that page and Enter the group size field and click: Create Worksheet entries. Click: Close window and refresh view on the Group Worksheet page to see the entries created.
|
 |
| You now have the destinations in the worksheet for Wednesday and Thursday (WR). | 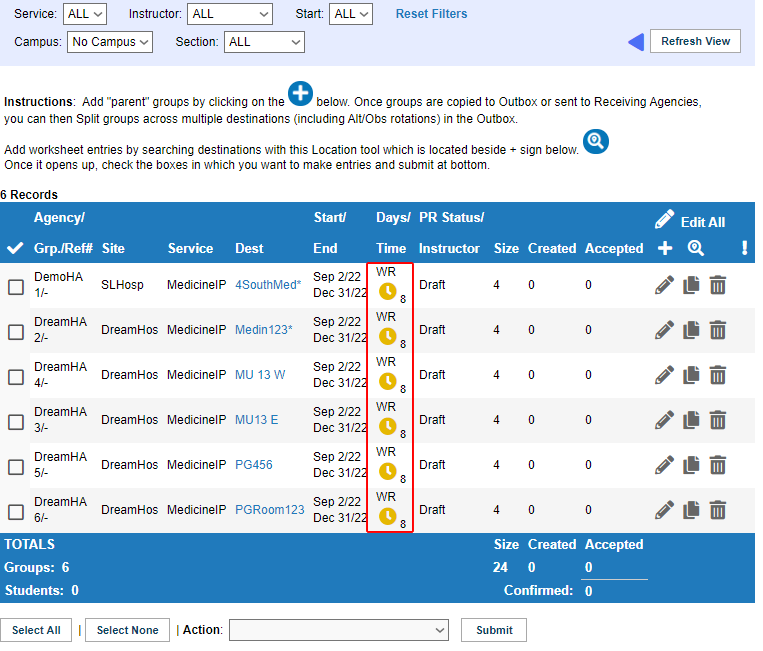 |


 or
or

|
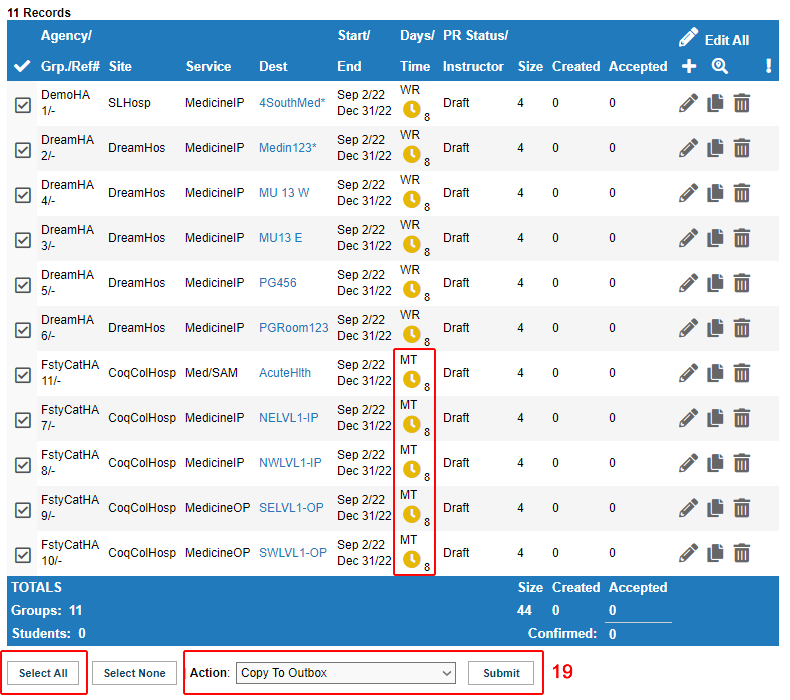
Remember: the Course Edit screen is a template. If you have created placements with Wednesday and Thursday (WR), and you want to create new placements with Monday and Tuesday (MT) for example, this is how you would do that:
|
|
|
|
|
|
|
|
|
|
Click Select All and use the action drop down to copy to outbox and click submit. |
|
|
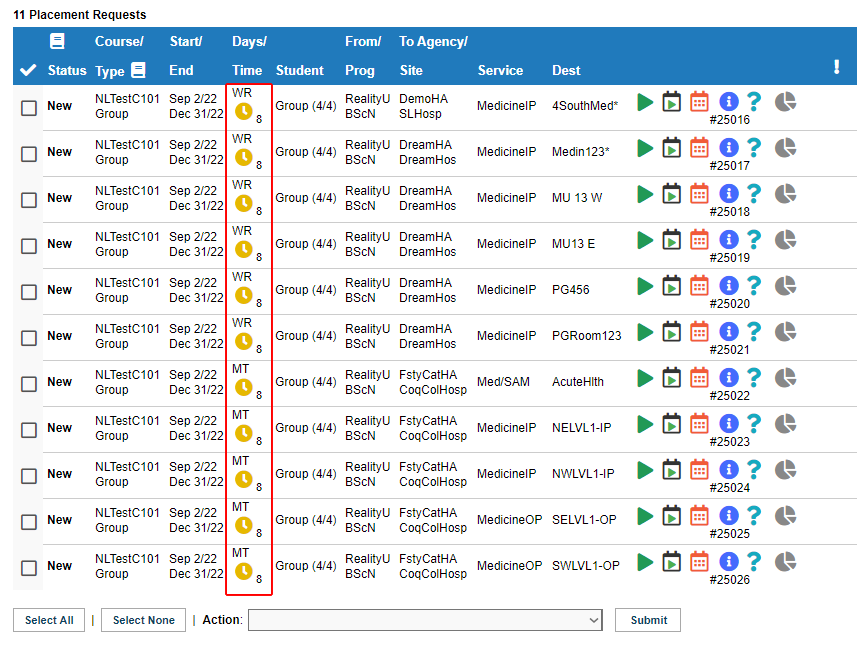
You now have a mix of Wed/Thurs and Mon/Tues mix in your outbox that can be sent to the receiving agency.
If you need to create new placements, remember that they will have the choices that you have in the course template when they are created.
If you do not want those, go back to the course edit screen and change to take away those elements. |
|


 to get the Find locations window up.
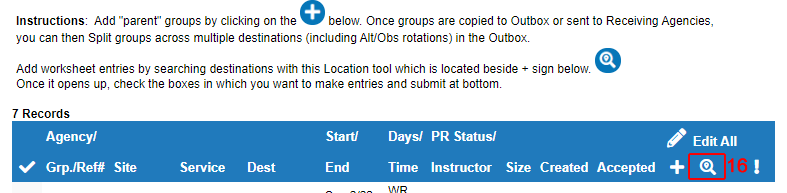


This method uses templates also, but from the Group Worksheet screen only.
|
|
As this is a template, you do not need to add the Agency, site, destination information, but you could if you want to. |
|
|
Any new destinations/requests that you create will follow the days of the week and dates as per the dates and days shown on the entry with the icon: "Use This Schedule as a template." If you do not want that as the template any longer, click the |
|