Email - Stock Message Creation: PC, RC, DC-Advanced
Placing & Receiving Agency Related Guide (PARG RARG)
Summary:
Streamline your communications. Create re-usable stock messages for use within the departments you have access to at your agency.
- Send individually or en-masse
Create the Message:
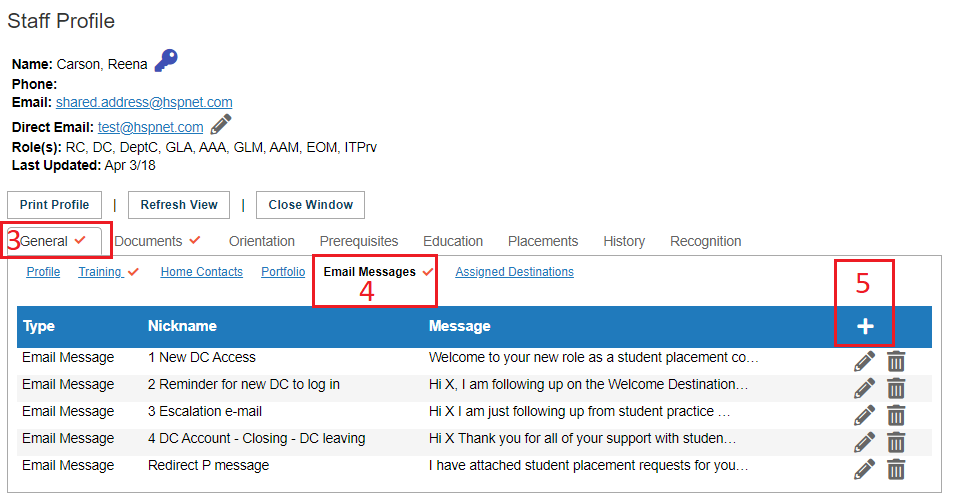
- Look yourself up in Maintenance/Staff/Users.
- Open your profile icon

- Go to the "General Tab"
- Click "Email Messages."
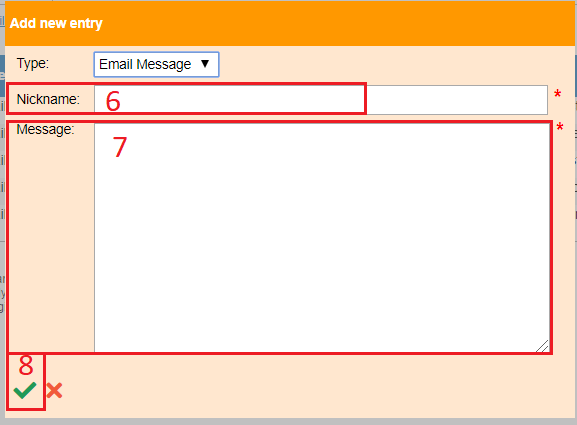
- Use the add icon to add a new message.
-
Give the message a (nick) name.
-
Enter the message.
-
Save the message with the green check mark.
To use/send your e-mail message:
You must be filtered to a SINGLE department that you have access to in your agency; the department drop down cannot be left on "All."
-
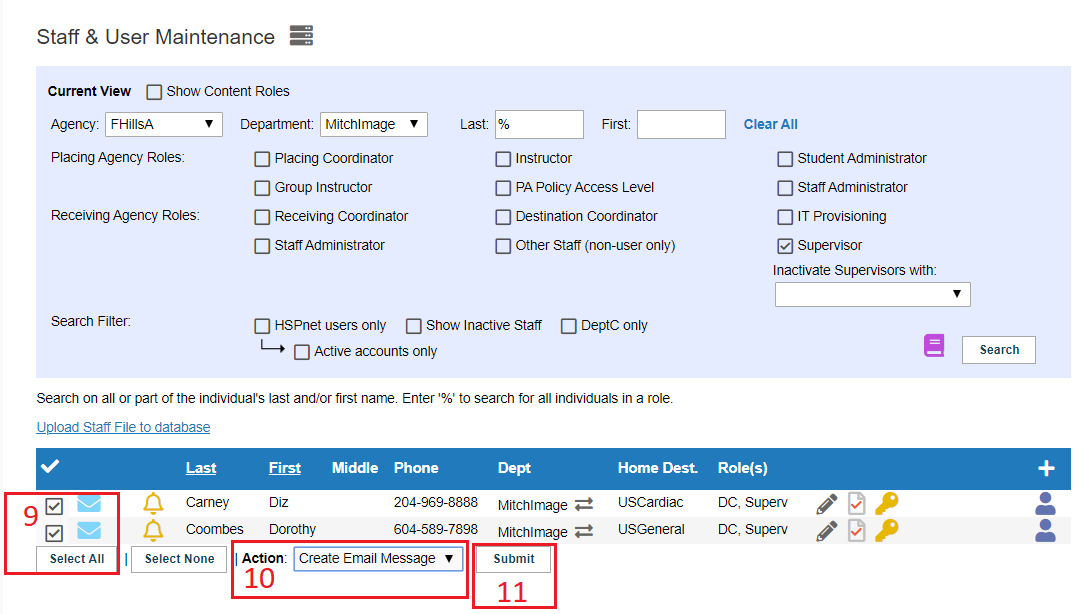
Select names in Staff and User Maintenance (Instructors, Destination Coordinators).
-
At the Action drop down box, select "Create e-mail message."
-
Click "Submit," and the "Send an Email window opens. (If it does not check your browser setting as your Pop up Window blocker may be turned on. Click the link to see how to disable it).

-
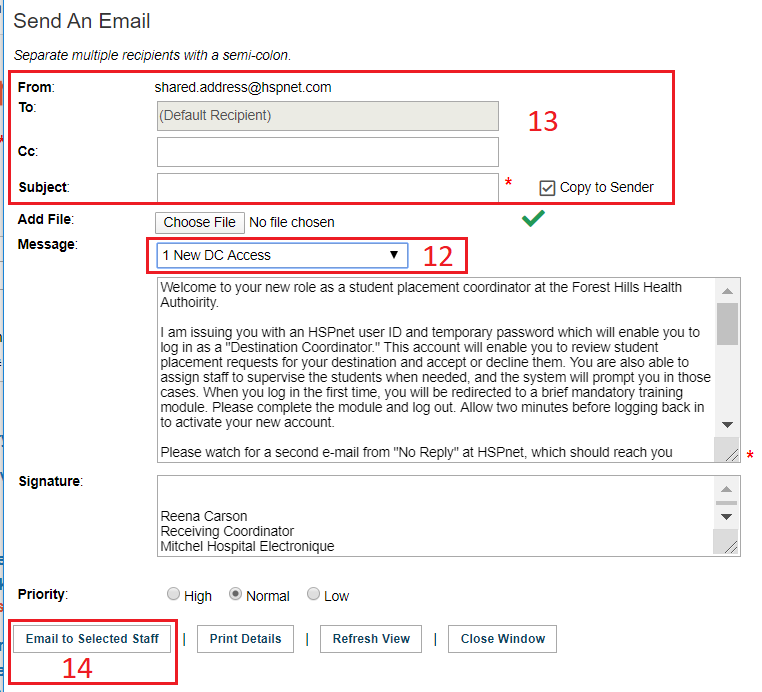
Select your Message from the drop down list on the Messages tab
-
Add or remove any additional e-mail addresses. Click copy to sender (optional). Enter a subject. Upload a file attachment, if desired.
-
Click "Email to selected staff."

You can also use this method to send out mass e-mails to Instructors (PC only) or Destination Coordinators (RC only):
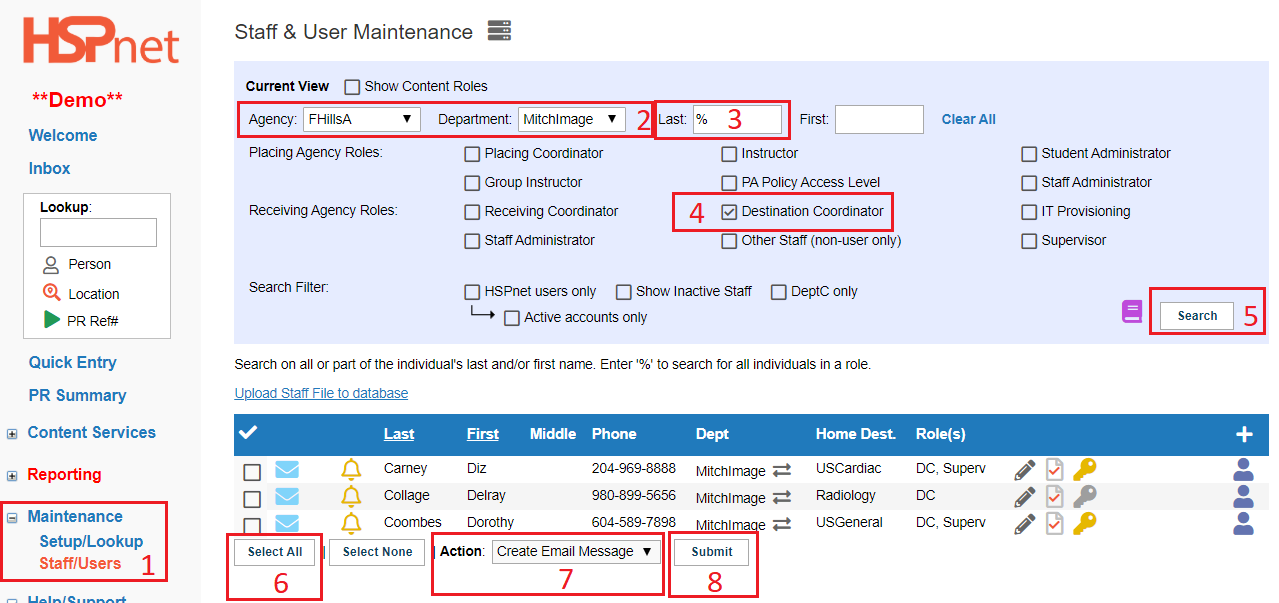
- Click Maintenance/Staff users.
- Ensure your agency filter is on your agency and you must filter to a single department at the department drop down list.
- Insert a % in the last name field
- Click to place a check mark in front of "Instructor" or "destination coordinator."
- Click Search.
- At the bottom, click "Select All" or click to place a check mark beside the individuals you wish to send the message to.
- At the Action Drop down select "Create an e-mail message."
- Click "Submit."
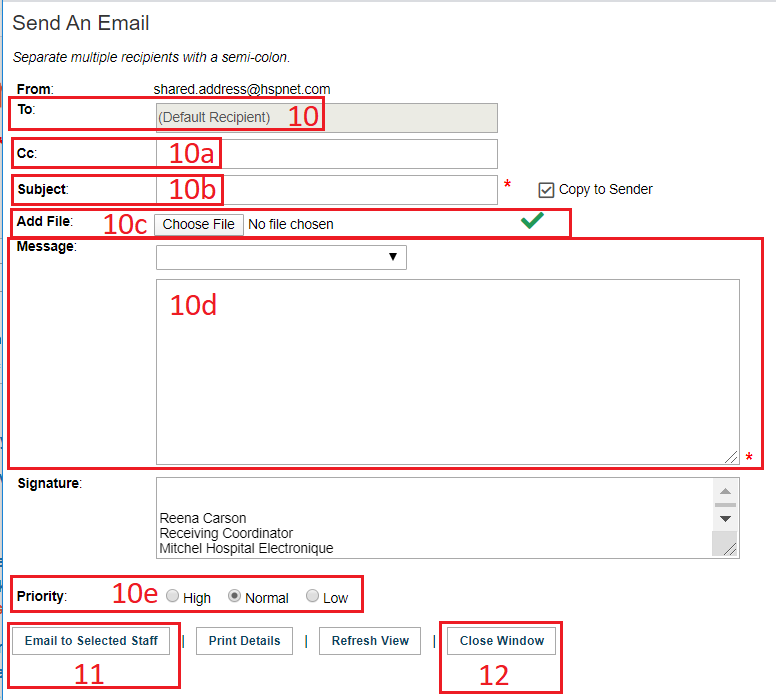
9. The Send an e-mail window should open (if it doesn't your pop up blocker may be on).
10. The "to" field will display (Default Recipient) and is greyed out.
a. add any cc necessary - always a good idea to cc yourself so that is the default setting. To not copy yourself, click to remove the check box in front of "Copy to sender." This default is recommended so you can check the message went as desired and in case you need to resend a copy to anyone else later.
b. Enter a subject line.
c. Optionally, choose a file to attach. Click the green check mark to save the uploaded file to the message.
d. Enter your message in the text field.
e. Enter priority by clicking to place a check mark in front of High or Low - normal is the default
11. Click Email to selected staff. (a red message indicates please wait while the message is generated, then a green background message should say "Status: the email message was sent to x selected staff.")
12. Click "close window."

See more information about staff profiles.
Return to: Placement Cycle Overview for Receiving Coordinators