
Student Guide - Student Site Selector


Placing Agency Related Guide (PARG)    Student Related Guide (SRG)

This is a copy of the Student Guide that is located in the Student's own Knowledge Base Lite which is accessed when a student logs into their own HSPnet account. This page is here for reference for Placing Coordinators for what your student will see.

Summary:
This guide explains how to:

  1. Search  placements or offers that are available for an upcoming course
  2. Select  and rank available placements (e.g. 1st  choice, 2nd  choice)
  3. Update  your saved choices before the Site Selector is closed

Background
Your educational program is using HSPnet to coordinate practicum experiences for students, and has setup access for students to view their upcoming placements and placement history. The program is also setup to allow students to search available placements and to enter their ranked choices for an upcoming placement.

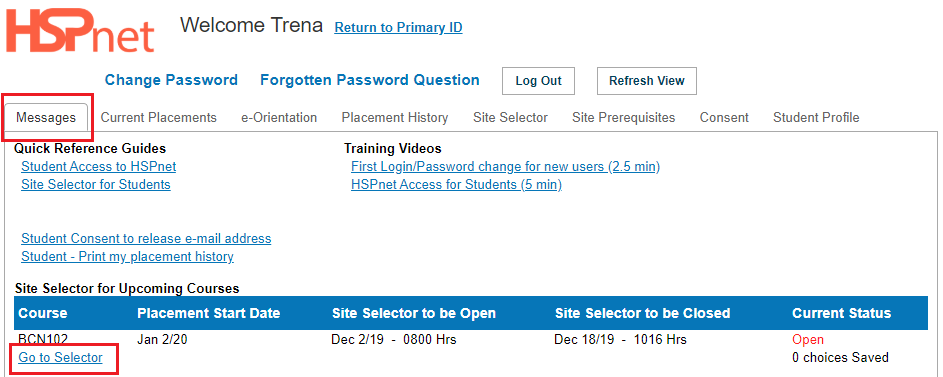
Step 1 – Login to HSPnet

  1. Visit the HSPnet website at at www.hspcanada.net  and click your province on the map of Canada.
  2. Login with your User ID (student number) and password (see the the Student Access to HSPnet  if this is your first login).


Step 2 – View Your Messages


Upon successful login you will be directed to your Welcome Screen, which will default to the the Messages  tab.

Each course in your curriculum that is setup for online selection by students will display dates for when the Site Selector is Open and Closed.

Click
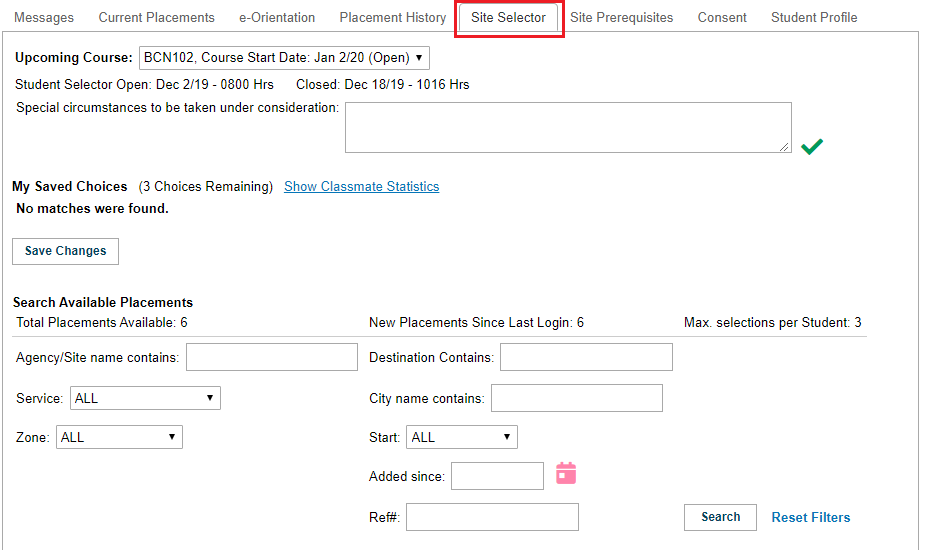
  Go to Selector  for any course that is open for selection.
  

25724122fx.png

Step 3    View the Site Selector


The Site Selector offers a dropdown of courses and is divided into two sections for each course:

  • My Saved Choices  – a list of placements saved and their ranked order

  • Search Available Placements

    • A display of the total number of placements available, and any added since your last login
    • Filters to limit search results by name, region or zone, city, dates, or by service area such as "Mental Health – community"
    • A filter for Experience will display if your educational programs uses codes to categorize placements by type of experience to be offered (e.g. geriatric, musculoskeletal).

Step 4 – Search and Save Available Placements
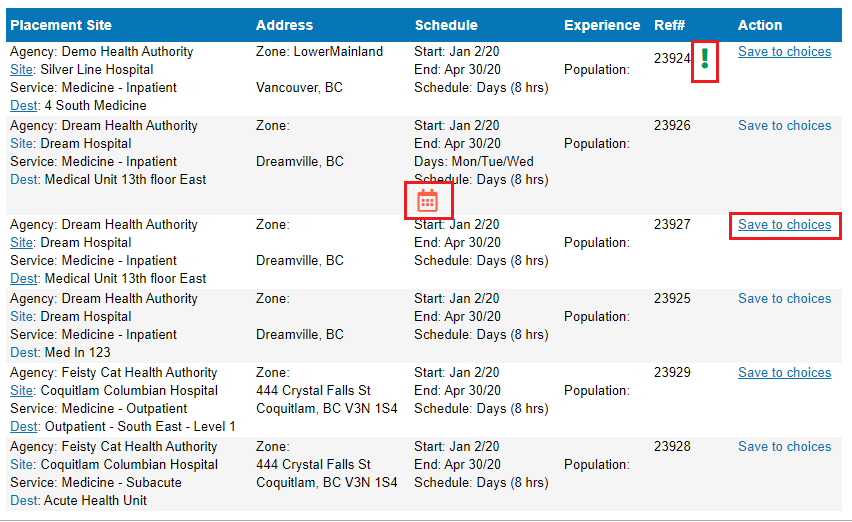
  1. Enter one or more search criteria to narrow your search:

    • Enter text to search for Agency/Site or City name – in the above example "vanc" is entered to each the City field for placements in Vancouver. Leave the field blank to search all cities.
    • Select a Zone to filter to a geographic zone such as "South" or "Lower Mainland".
    • Select a Placement Date to filter only on a single Rotation if the course has multiple rotations.
  2. Click Click to display a list of matching placements:


3. The "comment" icon   indicates that a comment is entered;  comments can contain important information about the placement such as special requirements or scheduling changes.  Hover your cursor on the icon to view the comment.

4. View more information for any placement by clicking  Site or  or Dest  to view the online profile for the Site or Destination including website links, uploaded documents, and program descriptions.


NOTE: Page links will be displayed if more than 10 matches are found;


Click Prev or  or Next  to view additional results, or use filters to narrow your search results.


5. Click Save to Choices Choices to select a placement as Rank #1. Subsequent selections will be added to the list and assigned the next available rank (e.g. Rank #2 for the second selection).

6. To view the schedule of the placement, click
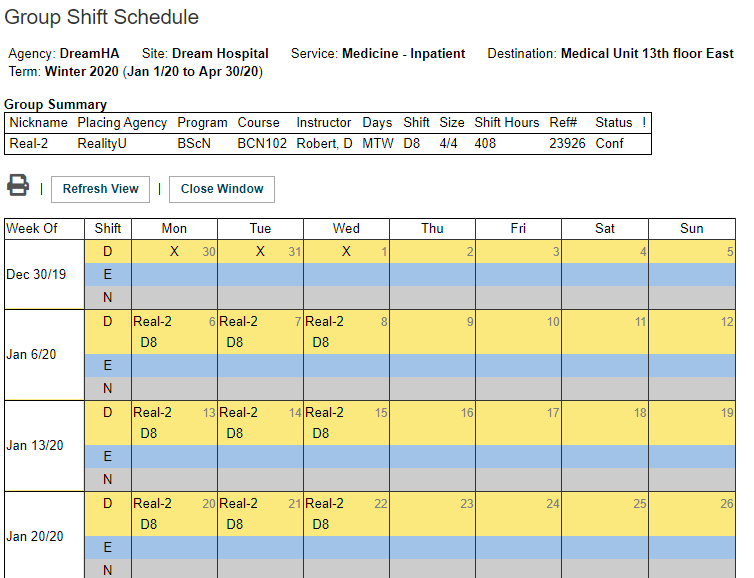
 the the   group shift schedule icon or the the individual individual shift schedule icon.

View or Print a Shift Schedule
Some placement types involve a detailed schedule – the the  Group Shift Schedule   or  or  Individual Shift Schedule Schedule   displays if there is a detailed calendar of shifts for a placement.

Click Click to send the Shift Schedule and Details about the placement site to your local printer.

D8 means an 8 hour shift in the day.

E8 means an 8 hour shift in the evening.

N8 means an 8 hour shift in the night.

Step 5 – Finalize Your Saved Choices

  1. To change the order of your choices, edit the the Rank  dropdown and click click   when done. In the example, the bottom row will move up to be your 1st  choice after saving.


NOTE  – you may need to change two or more Rank dropdowns to ensure there are no choices with the same rank.


Your Saved Choices do not need to be "submitted" before you logout or before the Site Selector closes; every time you add or change your choices, they are automatically submitted and available to your educational program to guide student assignment after the Site Selector is closed.


When you have been assigned to placements, your confirmed placement will be displayed in the tab Current Placements tab.

Optional features

2.   Your school's program may have enabled an option that allows you to view to view statistics on the current selections of your classmates. Before finalizing your selections it may be useful to view these statistics.

If it is turned on, Click Click Show Classmate Statistics  to display the number of students who have selected that placement in the same rank, or in any rank per placement.


This will show the aggregate data of choices at that point:


#Classmates with same rank: 1 - This shows how many classmates have the same rank of that particular choice.


#Classmates in top 3 choices: 2 - This shows how many classmates have chosen this placement within their within their top 3 choices.


3. Your school's program may have enabled an option that allows you to enter special circumstances to assist with assignment of students to available placements.

If this feature is enabled for your program, remember to Save this comment by clicking clicking