Student Admin - Assigning/Unassign or Reassigning via Cohorts
Placing Agency Related Guide (PARG)
Summary:
This guide below is the last step (Step 8) in the Placement Cycle Overview.
This guide assumes students are already in the database. If you need to add them to HSPnet first, please review the applicable documents linked below:
- Student Maintenance: Add students to the database one at a time.
- To upload multiple students from a spreadsheet: Automated Student uploads.
|
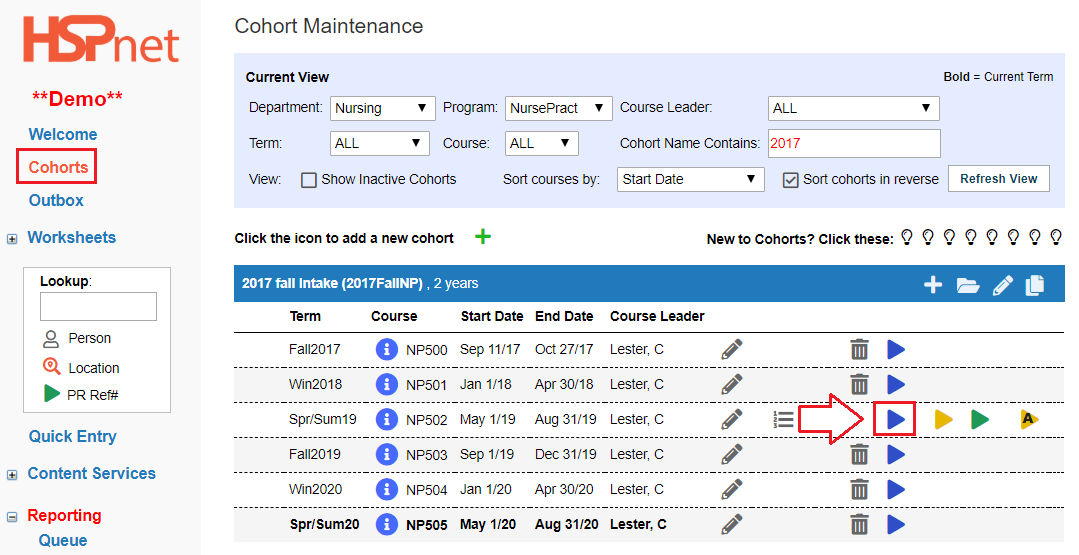
Students must be copied to the group or individual worksheet before they will appear on a group or individual assignment worksheet. To check this:
On the Cohorts screen, click the enrollment worksheet icon 

|
|
|
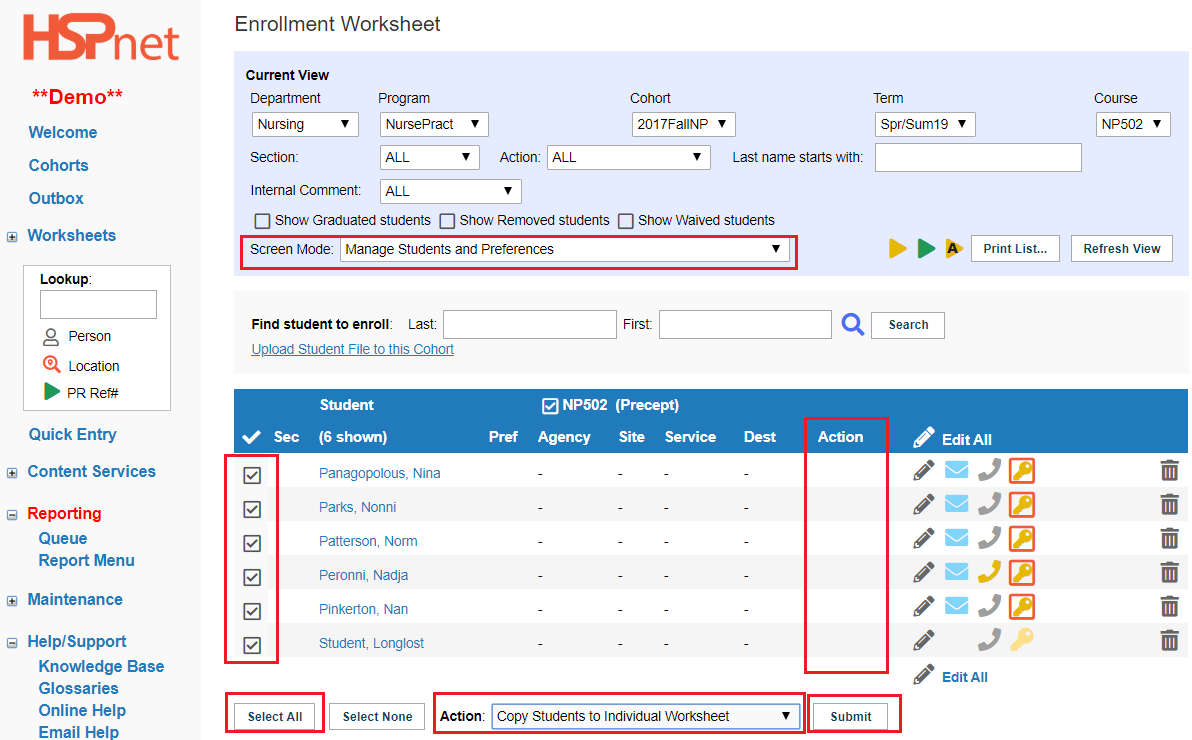
On the Enrollment Worksheet look under the Action Column:
-
At screen mode select the drop down: Manage Student Preferences.
-
Look under the Action column:
- Group courses should say group under the action column.
- Individual courses should say Indiv under the action column.
-
If there is nothing under the action column:
- Click: Select All, or click to place a check mark in the adjacent box (es) to select individual students.
- At the Action drop down, select copy student to group or individual Worksheet (group for group placements, and individual for individual placements).
- Click: submit.
- You may need to click refresh view.
|
|
|
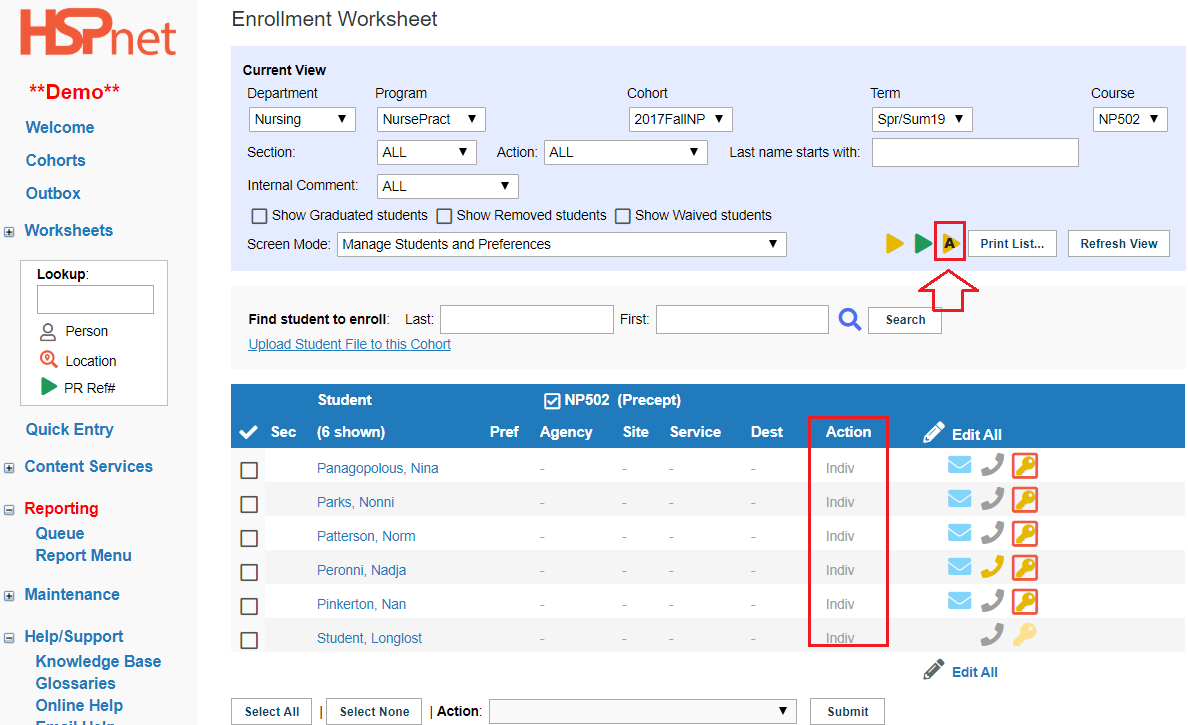
The action column should now be populated, which means the students will now also be on the assignment worksheet.
You can click the go to  button on the Enrollment Worksheet to navigate the Assignment Worksheet. button on the Enrollment Worksheet to navigate the Assignment Worksheet.
|
|
|
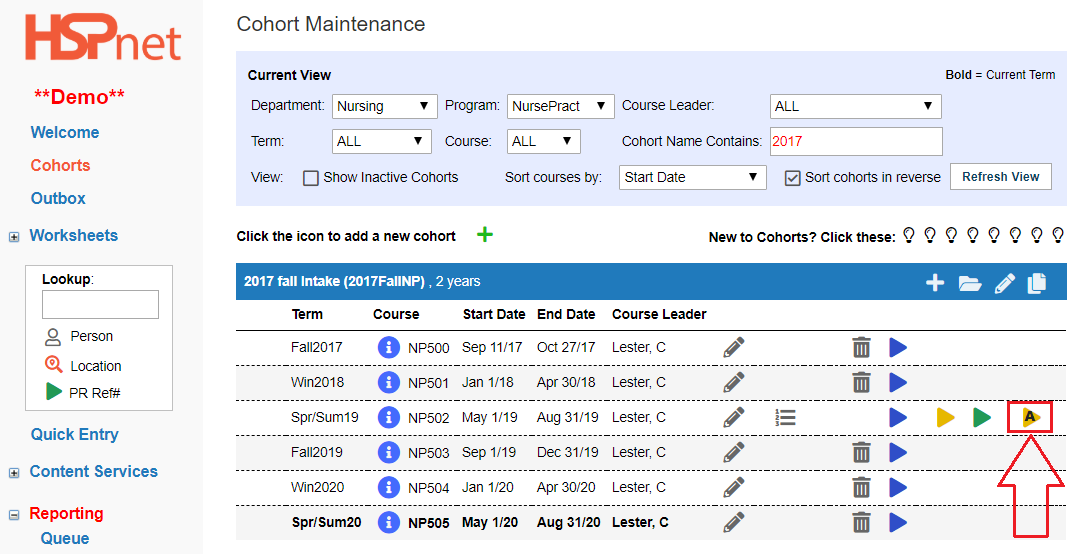
If starting from the Cohorts screen: Click the Assignment worksheet using one of the two icons below or the same icons if proceeding from the enrollment worksheet.
- yellow icon with an A in it for individual assignment.
 red icon with an A in it for group assignment. red icon with an A in it for group assignment.- If there are no students on the assignment worksheet, please see the three sections above.
|
|
|
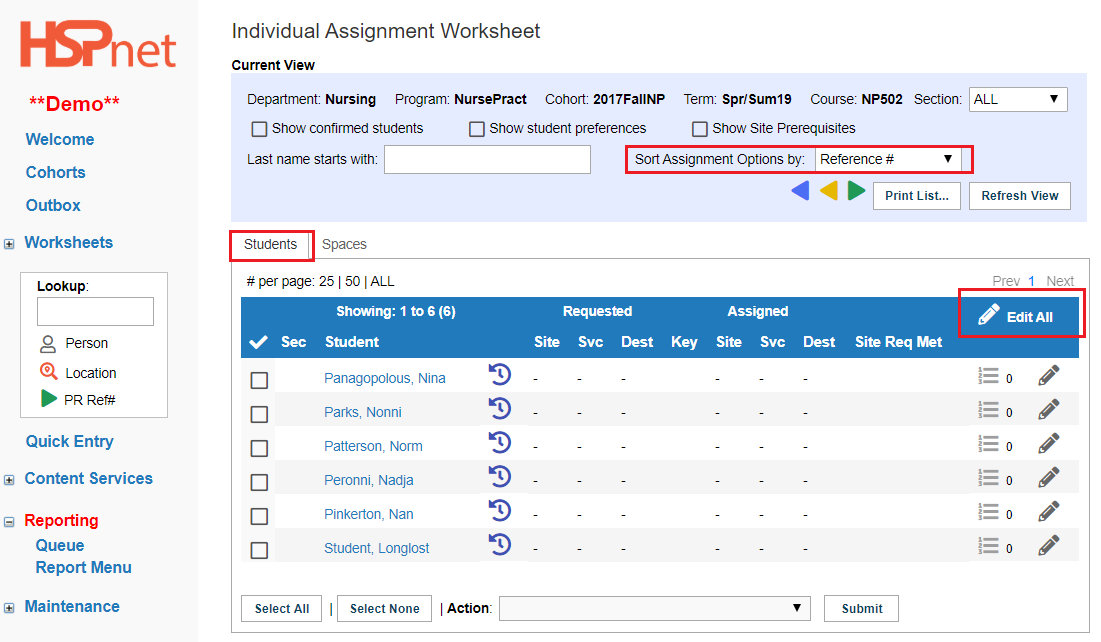
On the Individual or Group Assignment Worksheet:
- Choose the Students tab and choose a sort order.
- Click "Edit All"
|
|
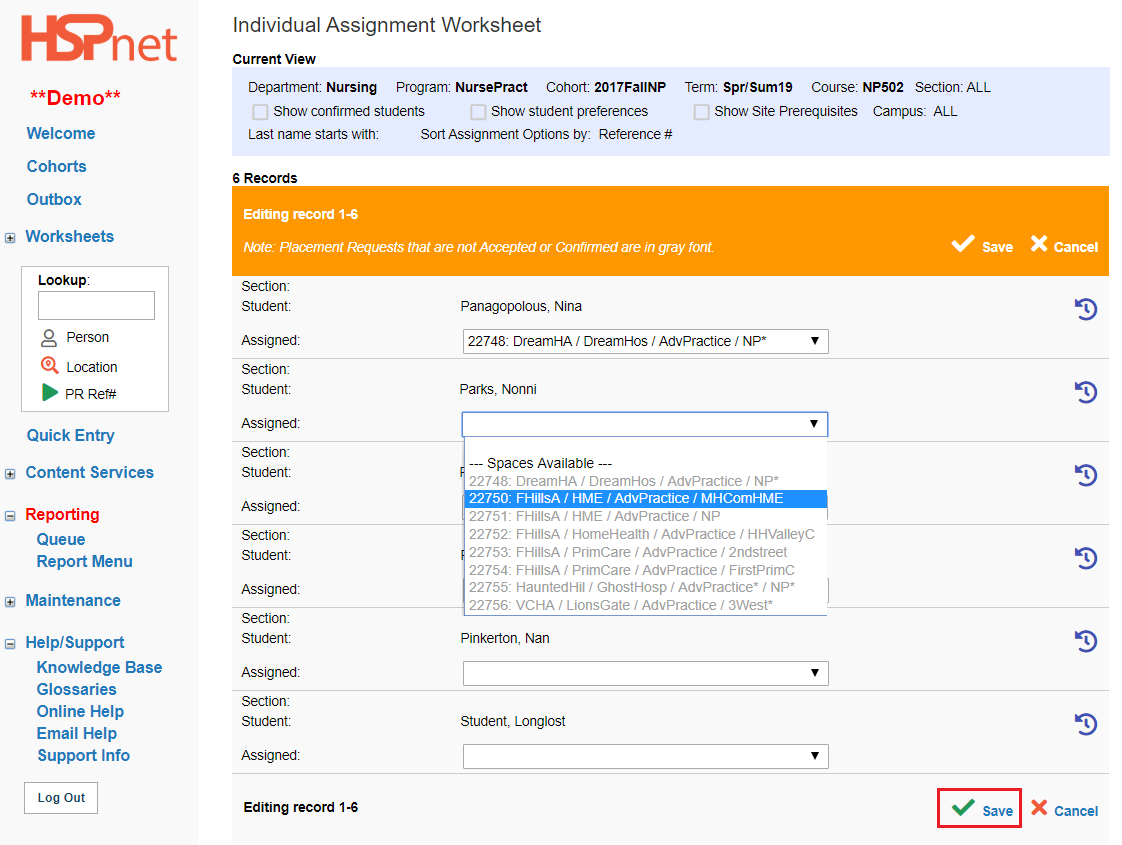
- Select placement requests from the drop down list for each student (individual) or group.
- Save the changes when done, or save and resume as you do a series of them. The spaces available will start to decrease after each save, as they are used up, showing only those that are still available.
- Any split request, created from a parent or primary request, will not be available for assignment; any students assigned to the primary request are automatically assigned to all of the splits created from the original request.
|
|
|
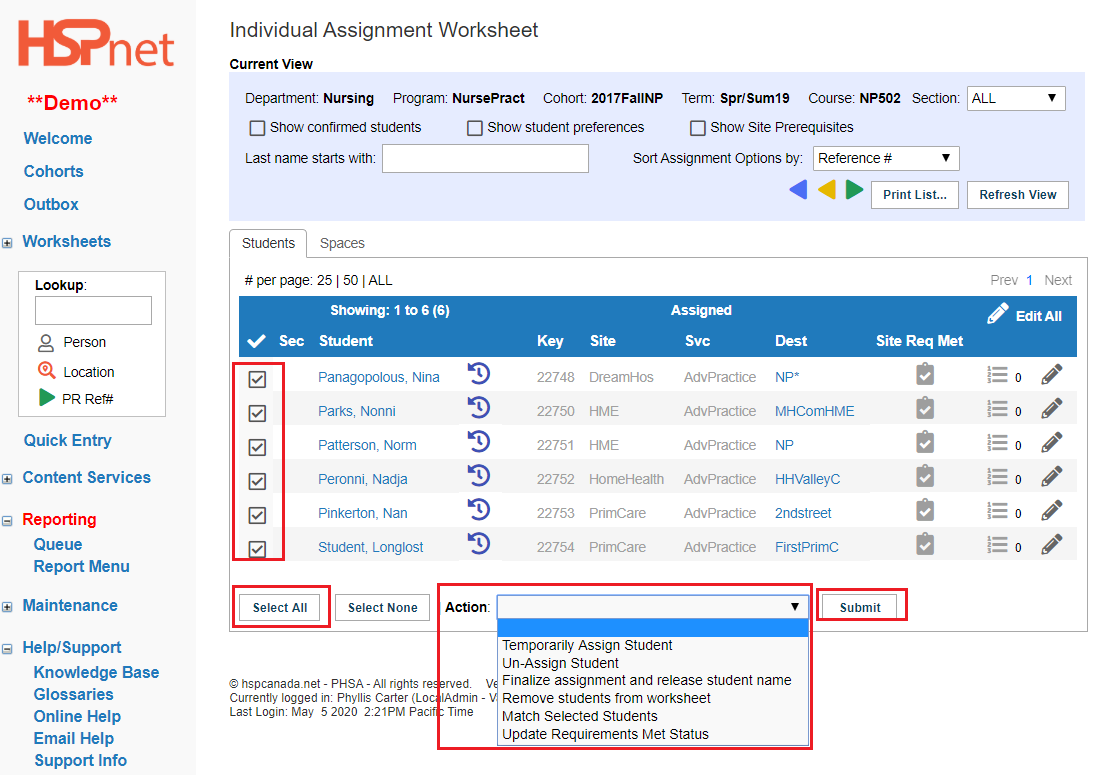
To finalize and release student names:
- Click: Select all or click to place a check mark in the box to select specific students.
- From the Action drop down at the bottom of the page select: "Finalize assignment and release student name."
- Click Submit.
Other options on the drop down list:
|
|
|
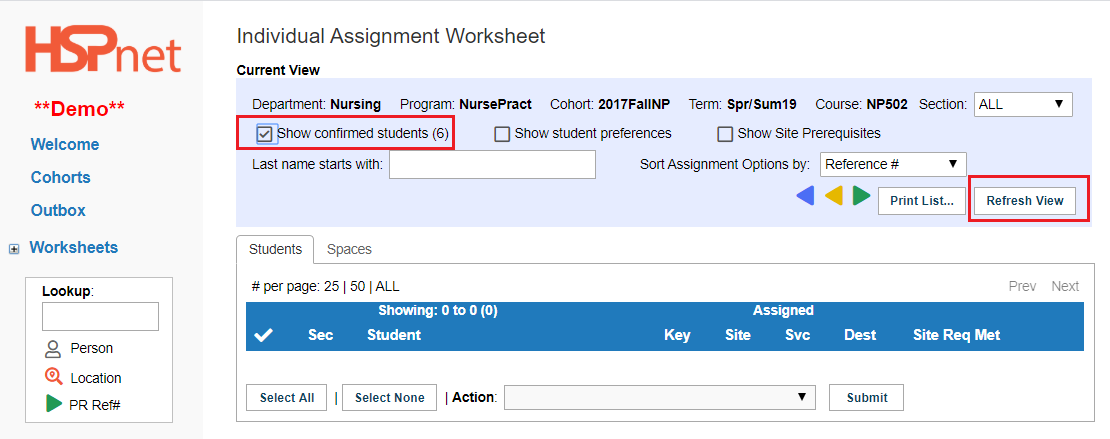
Once confirmed, the students will no longer show up on the Assignment worksheet. To see them again:
- Click to place a check mark in front of Show Confirmed Students.
- Click: refresh view.
|
|
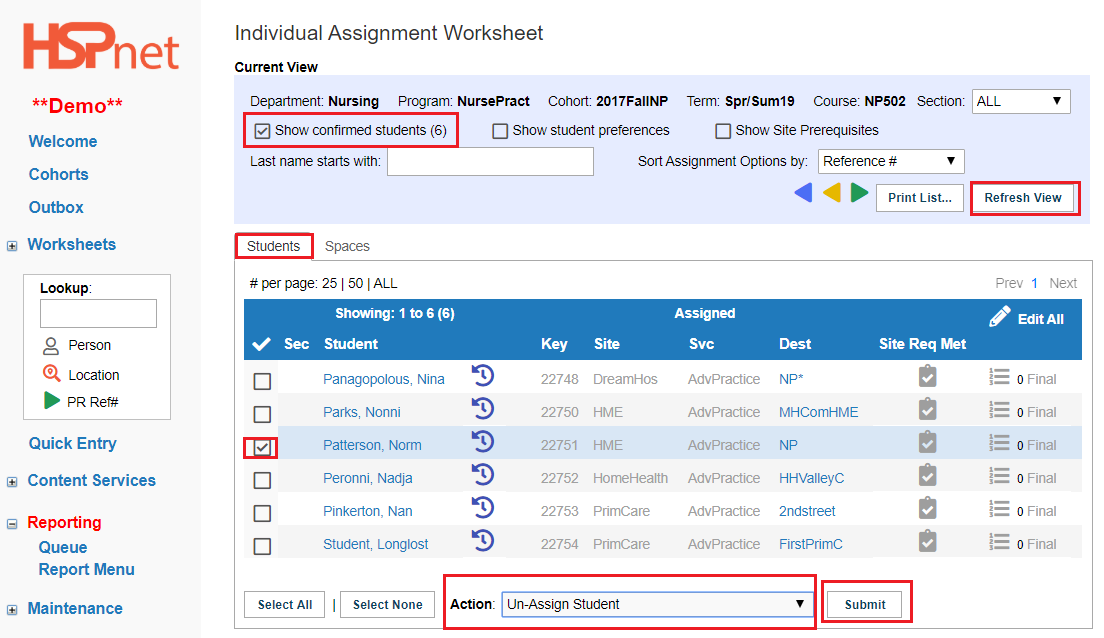
The rest of this document shows how to un-assign a confirmed student and re-assign them to a different placement request
|
Go to the Cohorts screen and use the go to button to reach the assignment worksheet (individual) or group and select the Students tab.
- Click to place a check mark in the box in front of Show confirmed students.
- Click: refresh view.
- Click to place a check mark in the box adjacent to the student you need to un-assign.
- At the Action drop down list select: Un-assign Student.
- Click: Submit.
|
|
|
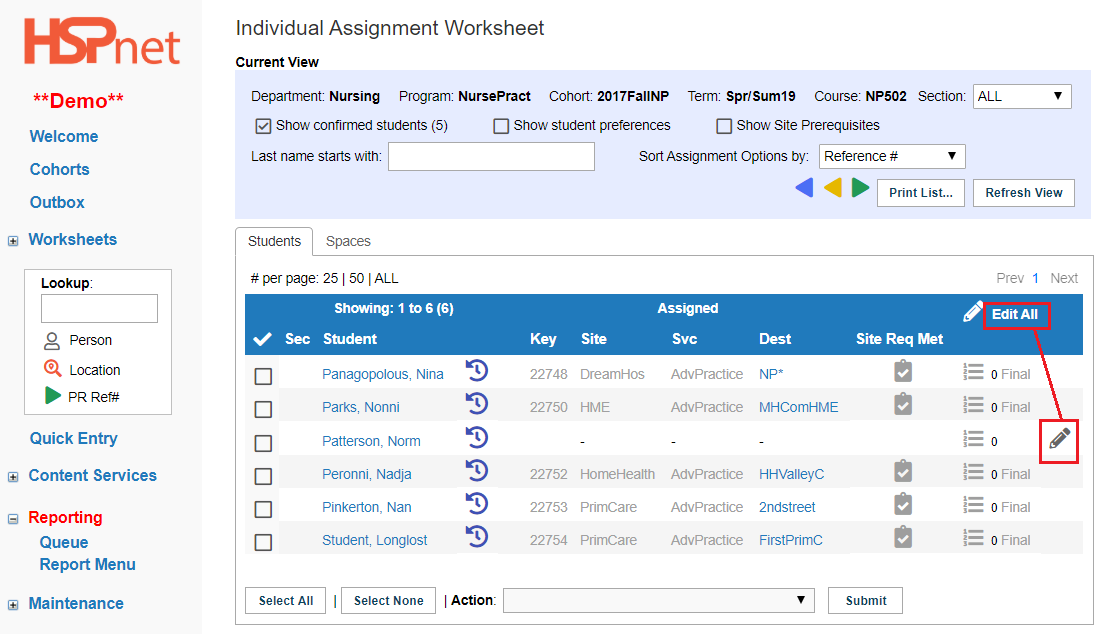
To re-assign a student:
- Click the edit icon
 or edit all. or edit all.
|
|
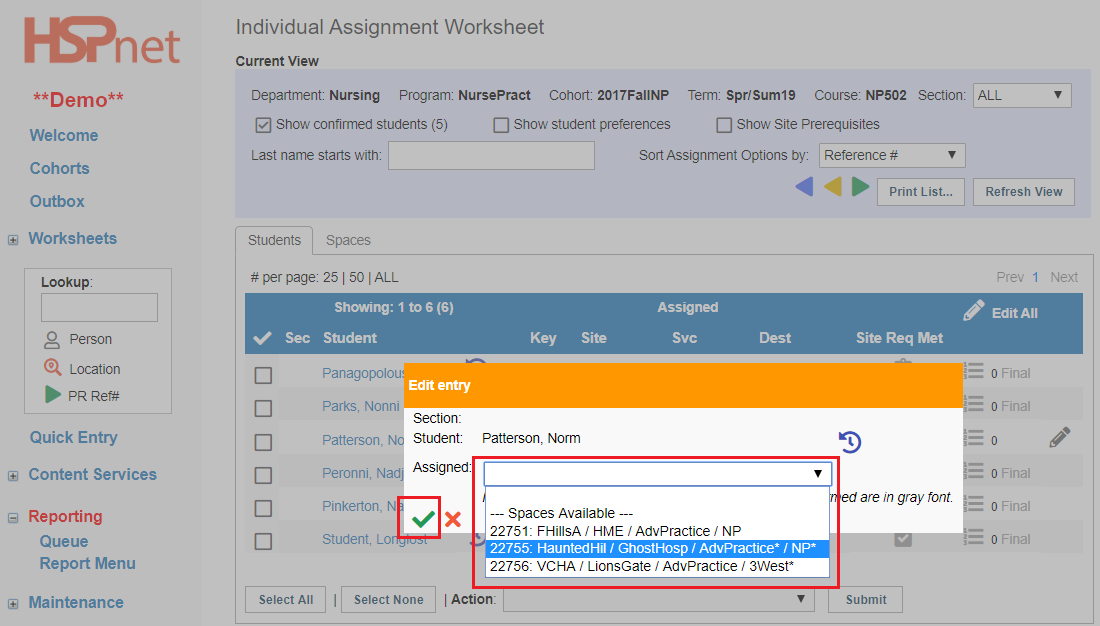
- 2. When the edit entry screen opens, select an available space from the drop down list.
- 3. Click the green check mark to save the change.
|
|
|
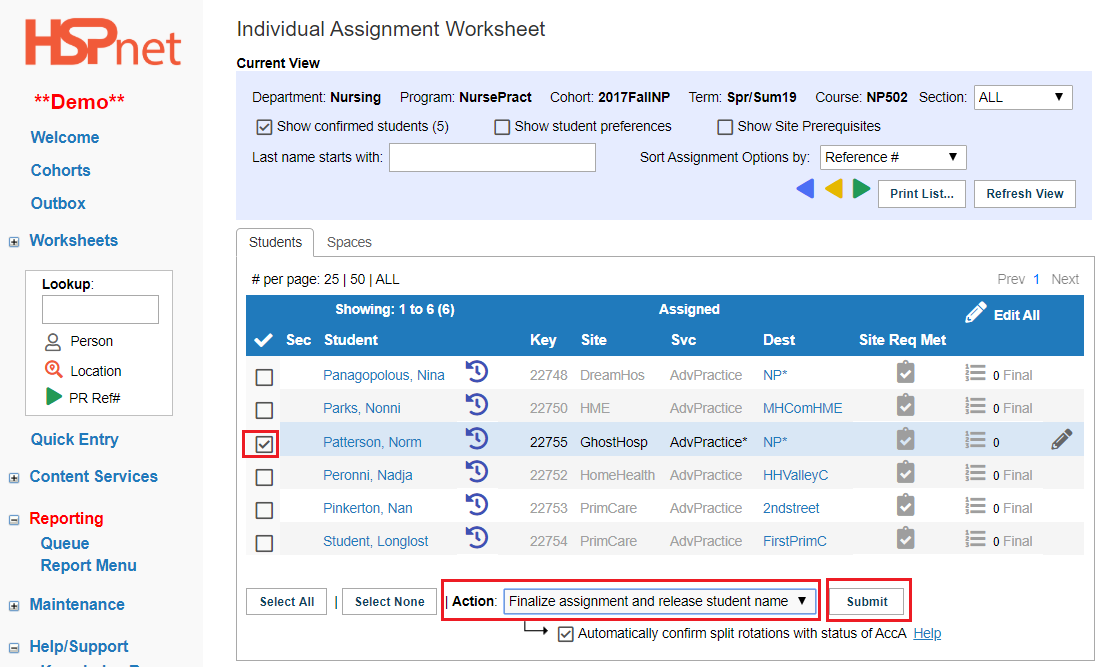
To Re-assign the now unassigned student:
- Click to place a check mark in the box to select the student name.
- From the Action drop down select: Finalize assignment and release student name.
- Click: submit.
|
|


