|
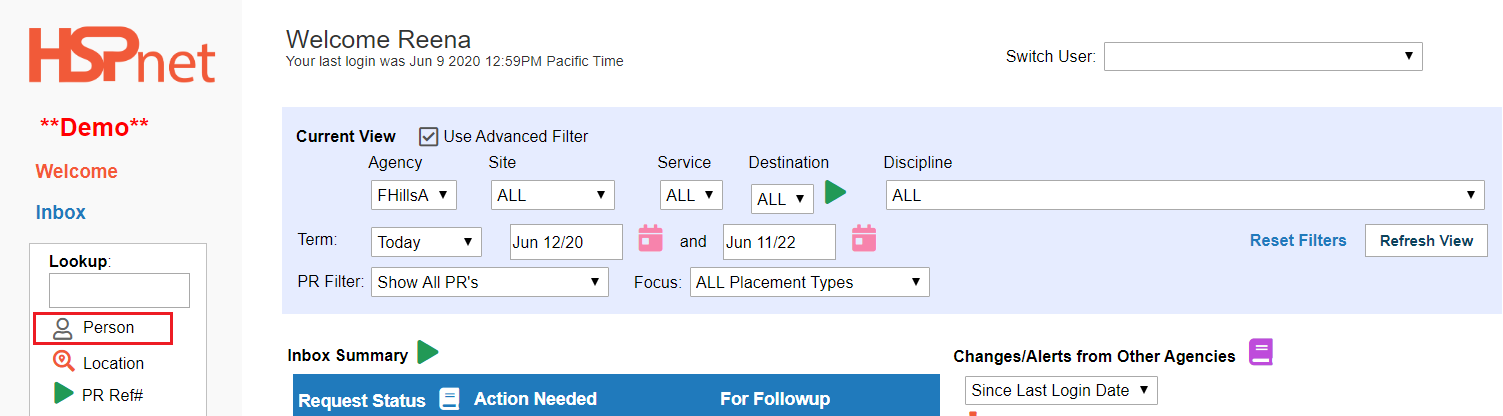
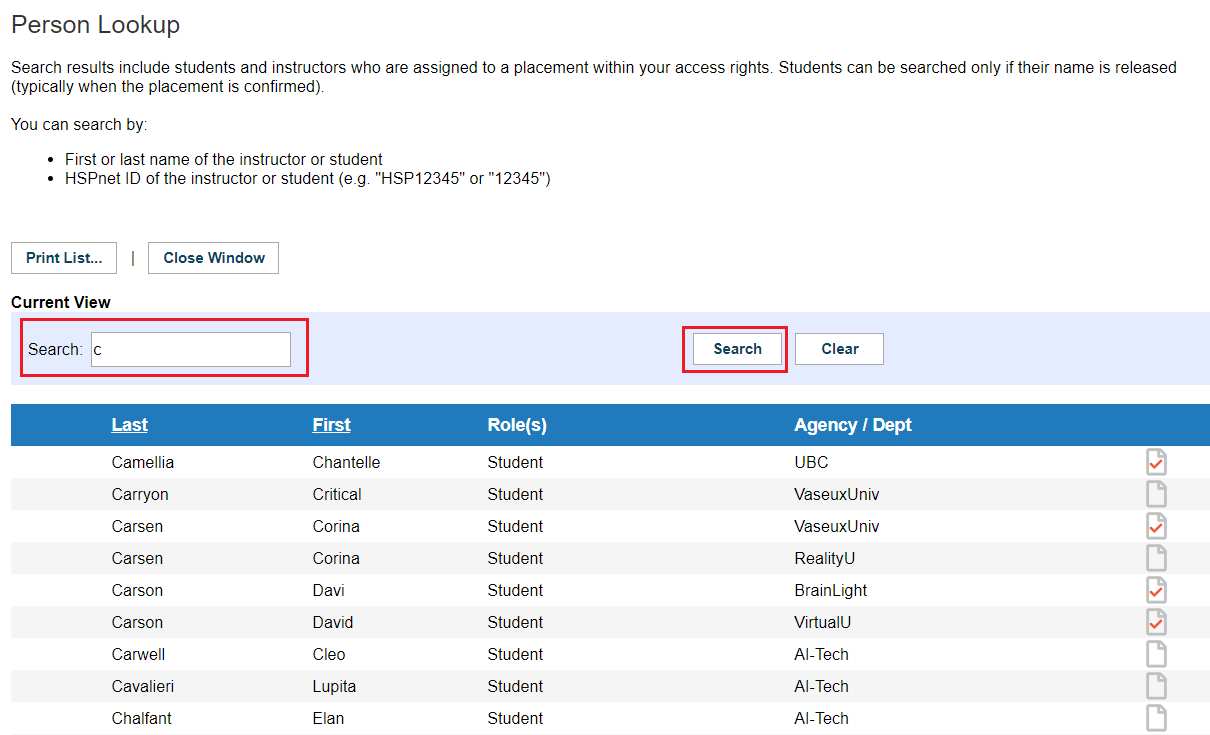
Person Look Up:
-
Placing Coordinators can use this field to look up two types of staff assigned to confirmed current placement requests with the the Receiving Agencies: Destination Coordinators and and Supervisors. (PC's may also search for them in Maintenance/Staff and user maintenance).
-
Receiving Coordinators can use this field to look up up Placing Agency Course Leaders and and Instructors who are currently assigned to a confirmed placement request at their site(s). (RC's may also search staff and user maintenance for both both Course Leaders and and Instructors; however however Receiving Coordinators can only search for for students using this lookup). RC and and DC Advanced can search student names with the the Person look up, provided those students are assigned at their site in the destinations and disciplines they have access to.
-
To search in this field:
- Click Person.
- Enter a search (a letter, part of a name or a whole name).
- Click the Search button.
- If too many responses are received, enter a few more letters of the person's name in correct order. EG: if "C" returns 100 people and you are looking
for for Chambers, enter enter Cham and search again. You could put in a whole name, but if you do not spell the name correctly, it will not appear.
|

|
|
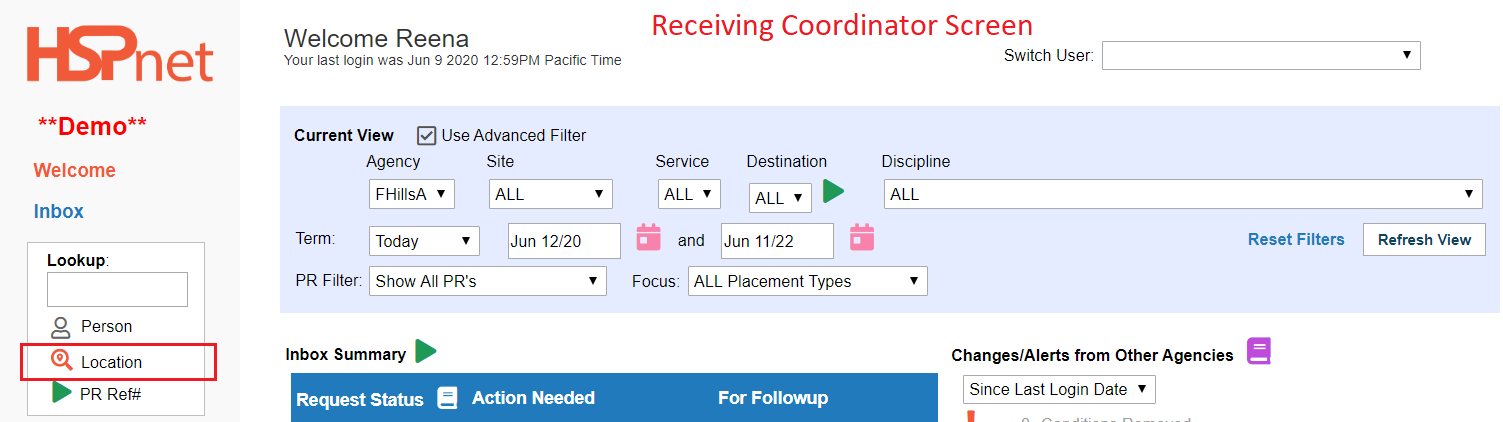
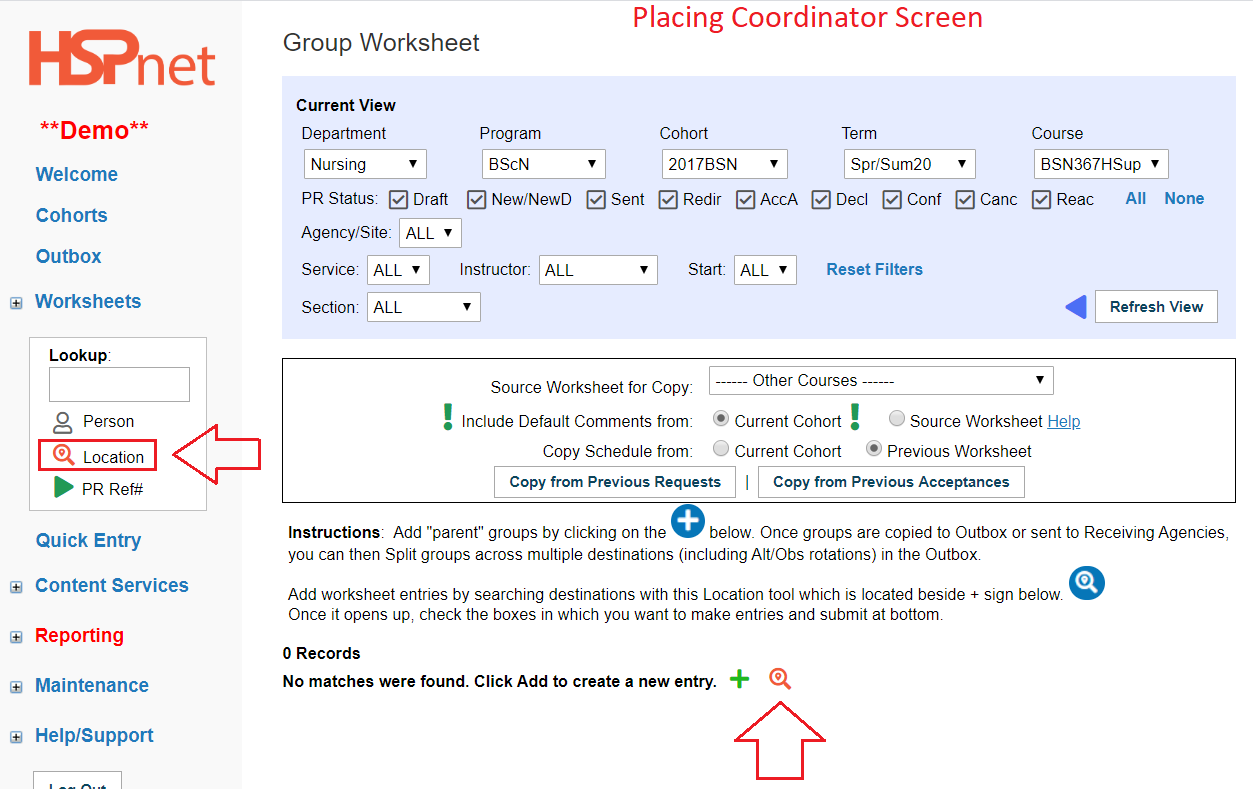
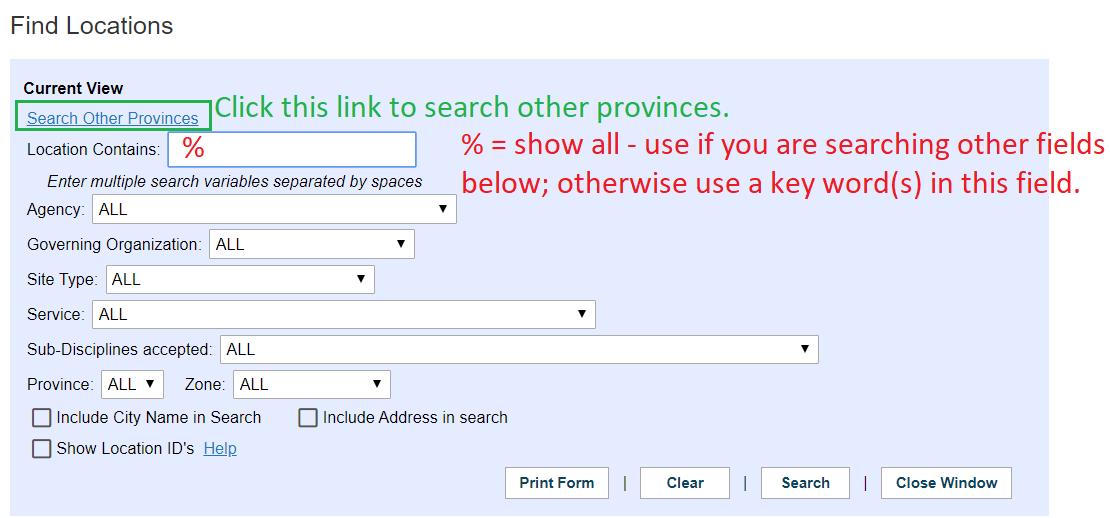
Location Look up:
The Location Look Up feature is available on the the Welcome Screen for for all RC and PC users. PC Cohort users can also use this feature in the the Worksheet Tools available for PC's in in cohorts.
In the Cohorts screen (Placing Agency only) you can add Destinations directly to the Worksheet by selecting them on the left and clicking the button "Create Worksheet entries (group size must also be entered if a group placement).
- The Look up on the Welcome Screen allows you to
search search your own province and and other provinces.
- The Look up on the Cohorts Screen allows Placing Coordinators to search and add destinations within their own province only (except Atlantic Canada where four provinces are in the same data base together). All other provinces are separate databases from one another, but using the search on the welcome screen enables you to view information in the databases of other provinces.
The The Location Look Up icon looks like a magnifying glass glass  . On the RC screen this feature is only available on the Welcome screen in the Lookup box. PC's have a checkbox version on the Worksheet.
|
|
|
To use the the Location look up feature: (all users)
Depending on how much information the receiving agencies have entered, and depending how closely they have followed the prescribed services will determine how effective this feature is in producing information.
Location Contains field:
You can enter too much information so we normally suggest you start only with a key word search in the "location contains" field. If you get too much information, you may want to add some more key words (e.g.if you entered "Hospital" you may want to try again with "Children's Hospital.")
If you are aware of the specific agency you want to use, limit the search further by selecting the agency from the drop down list. If you are simply looking for locations anywhere at the start, leave the setting on "All."
|
|
|
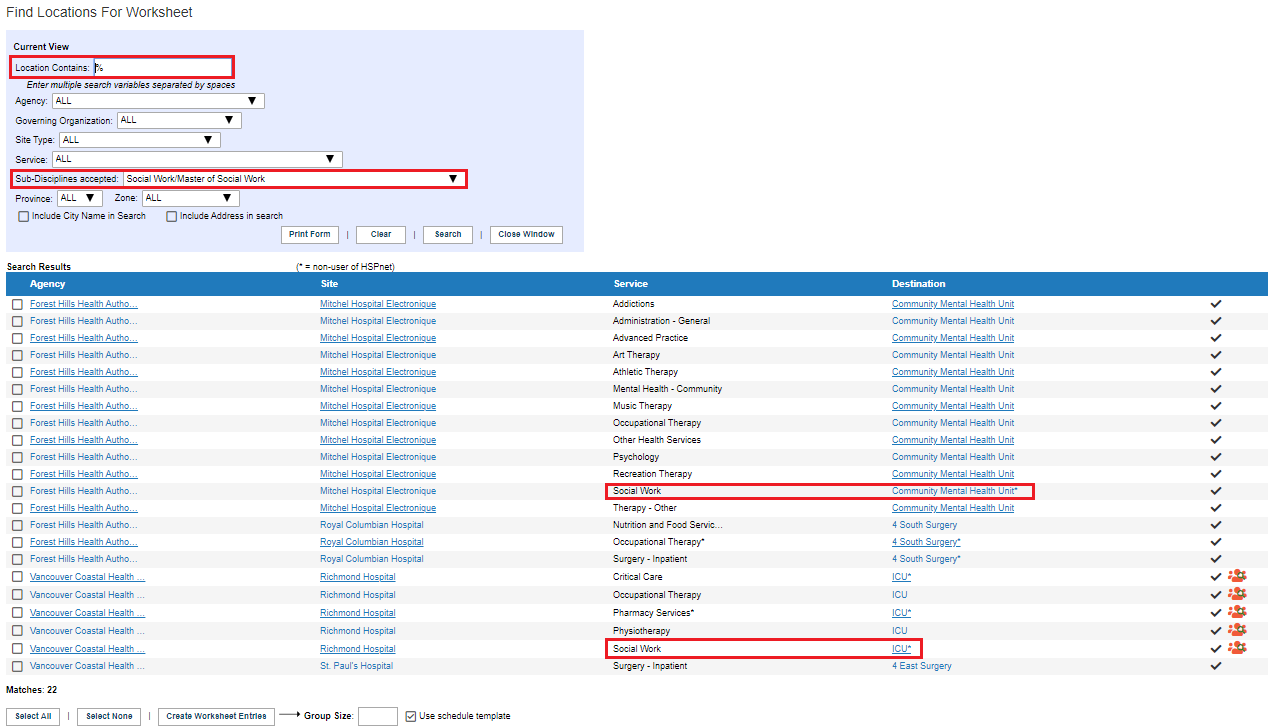
To Search a Service using the Location Look Up Feature:
- Place a %
in in the location contains field (which means show me all opportunities).
- Select
the the service from the drop down list.
- In addition, you may wish to add the
specific specific sub-discipline you are looking to place: eg: Bachelor of Social Work, or a separate search for Master of Social Work. Filling in those 3 fields can yield exact information in some jurisdictions, and provide a guide to where to start looking in others. If no hits from entering all 3 fields, enter only the first two fields (Location Contains and Services) and try the search again.
- Click the Search button.
PC Users Only: (Information for other users follows).
-
On the worksheet, click to place a check mark beside each destination you wish to add to your worksheet.
-
Enter a group size if a group worksheet.
-
Click "Create worksheet entries."
- You can click on the destination links if there is a hyperlink and review the destination profile for further information.
- The little black check mark means accepts students in the selected sub-discipline.
- Destinations displaying this icon
 are "actively seeking students in this sub-discipline. are "actively seeking students in this sub-discipline.
- You can use
the the Print Form button to print a PDF of the results. When you click "Print Form," the PDF will appear as a link above the "Print Form" button seconds later. You can click the link and use use File Save as to save the results to your computer.
|

|
|
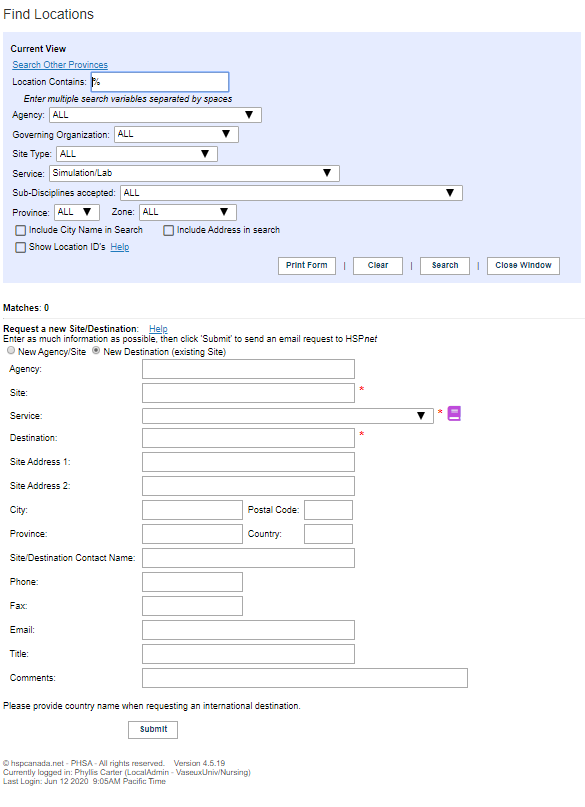
Request a new Site/Destination:
If you refine your search and still cannot find the Destination you are looking for, under the "Search Results," the "Request a new Site/Destination" screen opens.
Please complete the mandatory fields fields Site, Service, Destination, and as many other fields as you can. When ready, click "Submit."
This will turn the request into an email format that you can add additional information or just hit send to email it support.
Your default email program, eg: Outlook, will open up for this email. HSPnet support will add non HSPnet user Receiving agency destinations.
If the Agency or site uses HSPnet you can contact the Receiving Coordinator/Service Contact directly to ask them to add a destination; otherwise HSPnet support will forward requests that are under the responsibility of HSPnet user agencies/sites to the the Service Contact/Receiving Coordinator to respond.
|
|
|
Items to be aware of with this feature: (PC and RC)
In this search, the service of "Social Work" was not entered, but the sub-discipline "Master of Social Work" was entered; the feature has pulled up the same destination: Community Mental Health Unit with all 13 of its services. Social work is the service that should be selected to place social work students, while psychology would be used for psychology students, Music Therapy for Music Therapy students, etc.
|
|
|
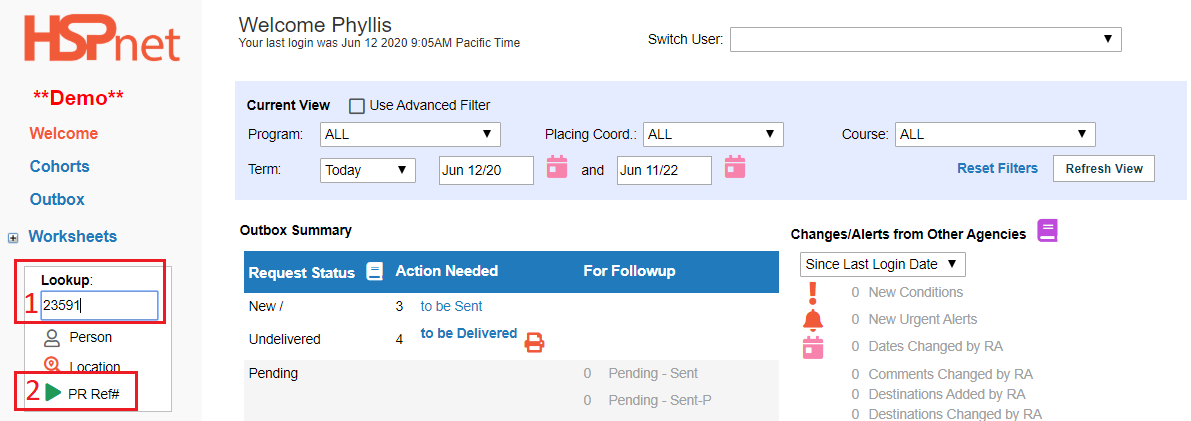
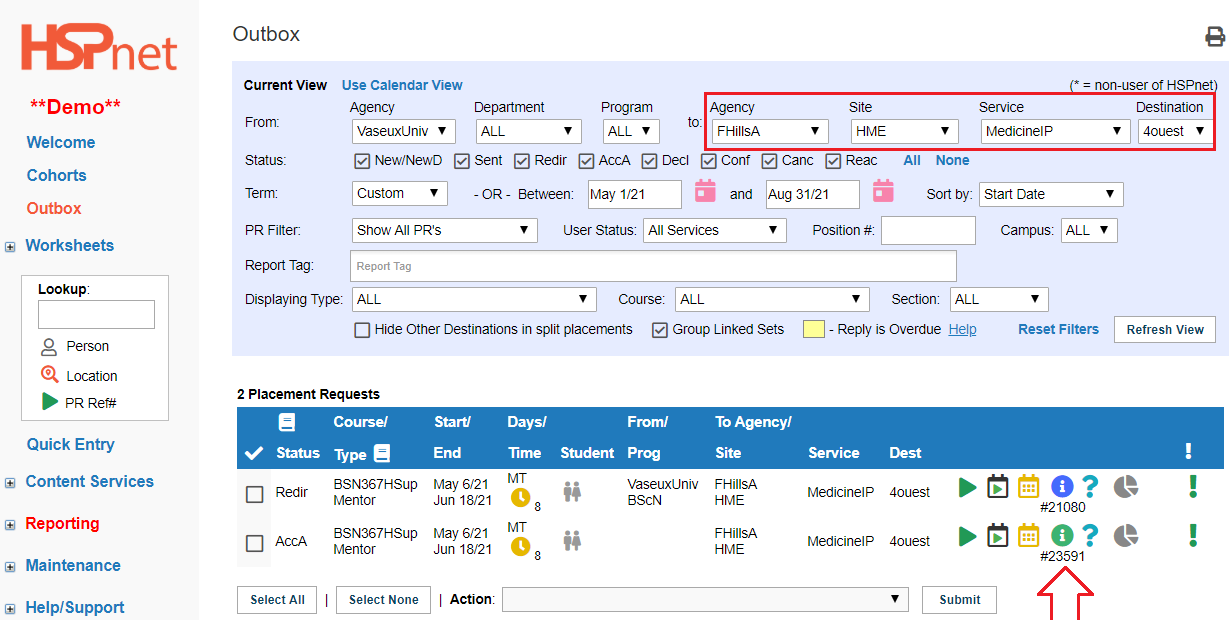
Placement Request (PR) Look up:
This feature enables you to find a request by the placement request reference number using the look up feature:
PC, Course leader, RC and DC DC Advanced screens have a look up feature to quickly locate a request. "DC View" RC and users: please see the bottom of the page.
- Enter the Placement request number in the look up field
- Click the green go to button

This feature sets your outbox or inbox filters to the correct period of time, the correct agency, site, service and destination. You may need to scroll down. The details icon for the request you looked up will be highlighted in green green  . .
Note to RC's: DC Light users do not have the look up feature: however if the DC holds down the control key and "F" key at the same time, a small search window will open. When they enter a Placement request number, the number will be highlighted in their in box. If they use Firefox, they may need to enable the highlight feature.
|
|
|
Return to: Assigning Student in a Quick Entry Guide (Placing Agencies) Instructions
Return to: Placement Cycle Overview for Receiving Coordinators
|
|


