Student Admin - Student Site Selector (SSS)
Placing Agency Related Guide (PARG)
Summary:
Educational programs may use the site selector tool to enable students to search HSPnet for:
- available placements or offers.
- a list of available sites (even before requests are sent).
- save 1 to 20 choices in ranked order.
Student's choices can be used to guide the assignment process:
- The Placing Coordinator (PC) can refer to the students' choices during manual assignment of students,
- or the PC can setup HSPnet to perform automated student matching based on students' choices and other variables.
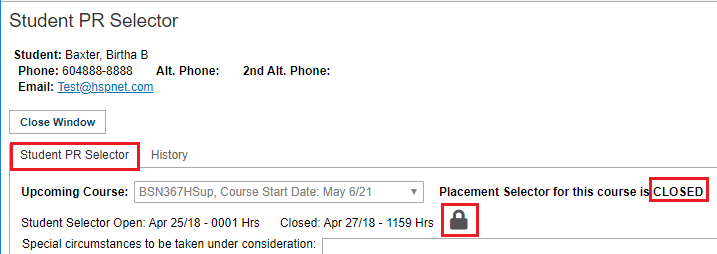
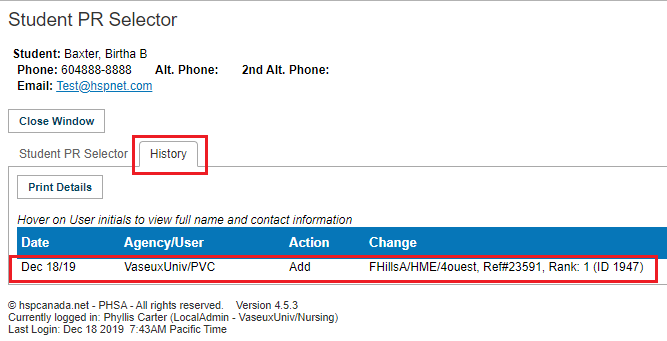
- Once the site selector is closed, a PC may review the student selections and unlock them to make changes if needed (perhaps the student does not meet the requirements for their selection).
Any changes made by the PC are tracked in the site selector history for that student.
Contents:
- Site Selector Activation.
- Course Default set up in Course Maintenance.
- Set specific final settings in Cohort Maintenance, including opening dates/times and closing dates/times.
- Review available placements available for selection before opening site selector (including how to withhold placements).
- Monitor Student selections/assign.
- Creating a Student PR Selection Report.
- Advanced/Complex usage of the Site Selector.
|
Student Site Selector Activation:
|
|
|
|
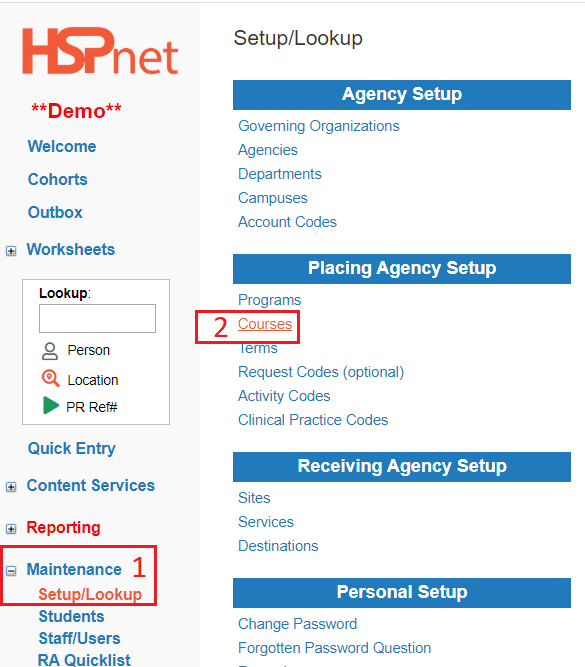
Setup Course Defaults in Course Maintenance:
Each course that allows students to make selections needs "default" settings for the Site Selector, including maximum number of choices (from 1 to 20) and options such as allowing students to view classmate statistics. The default settings in course maintenance must be modified on the Cohorts before each scheduled course to indicate opening and closing dates and times, as well as any other changes specific to that course in that cohort.
|
|
|
|
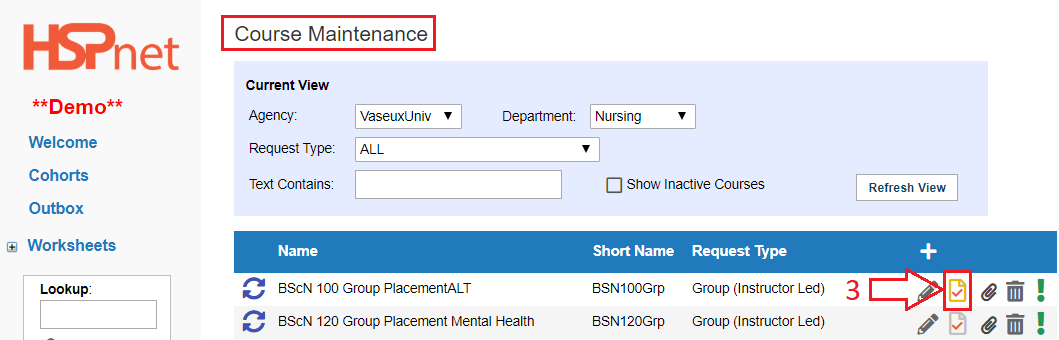
Setup Course Defaults in Course Maintenance, continued: 3. Click to open the Course Profile |
|
|
|
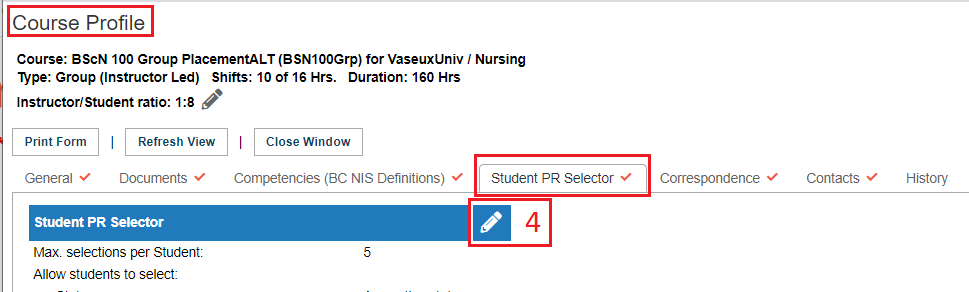
Setup Course Defaults in Course Maintenance, continued:
4. Select the course profile tab: Student PR Selector and click Edit |
|
|
|
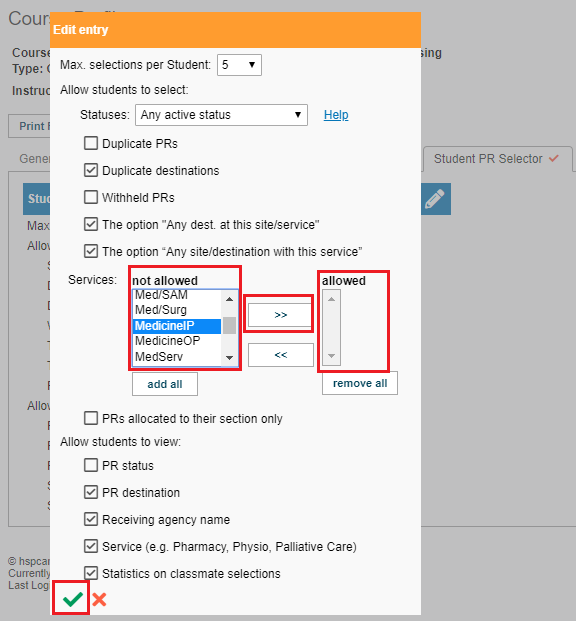
Setup Course Defaults in Course Maintenance. Example:
Click to add or remove a check from a box to allow students to make selections.
Allow Students to View:
For a complete guide to creating a new course, please click the link. |
|
|
|
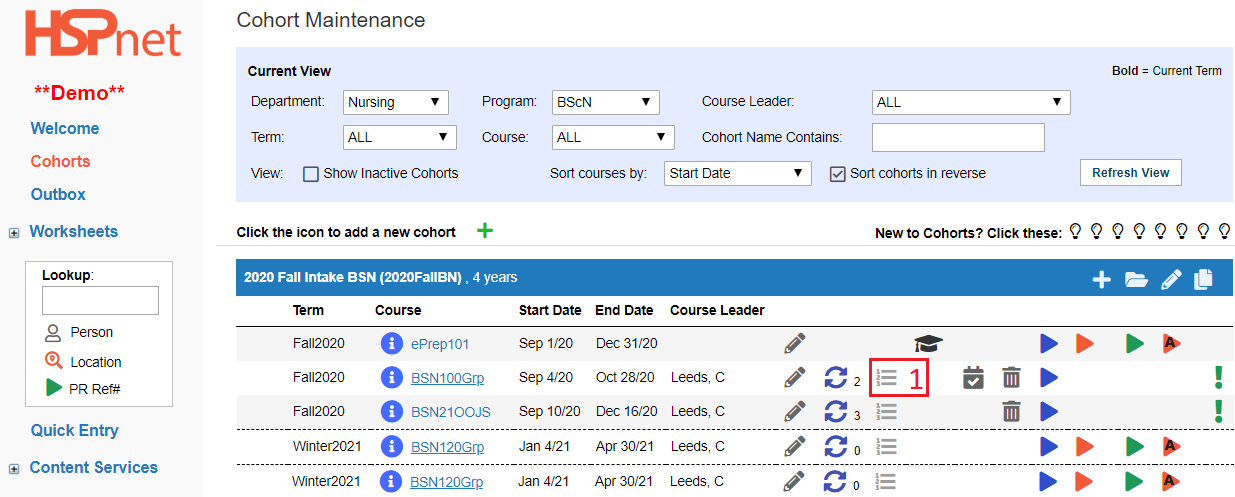
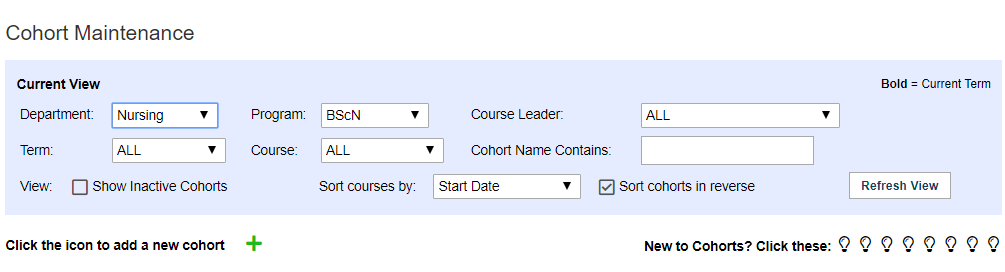
When a course is added to a Cohort, it inherits the default Site Selector settings for the course (e.g. a maximum of 5 saved choices). These settings must be finalized in Cohorts, each time a course is offered, including the Open/Close dates for the student selection process. In the example the course profile has a default site selector set up (in course maintenance), and this information is displayed in the Cohorts screen next to the course with the icon:
|
|
|
|
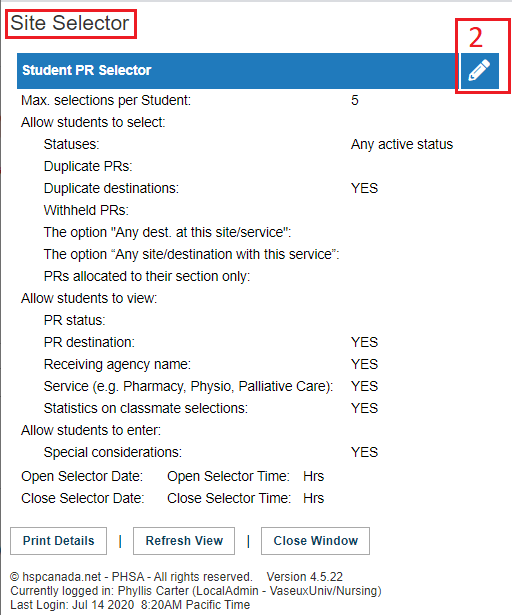
Set Specific "Final" Site Selector settings in Cohort Maintenance, continued. 2. Click the pencil/edit icon
The Site Selector should be open to students on weekdays only so they can seek assistance from Help Desk or faculty if needed. |
|
|
|
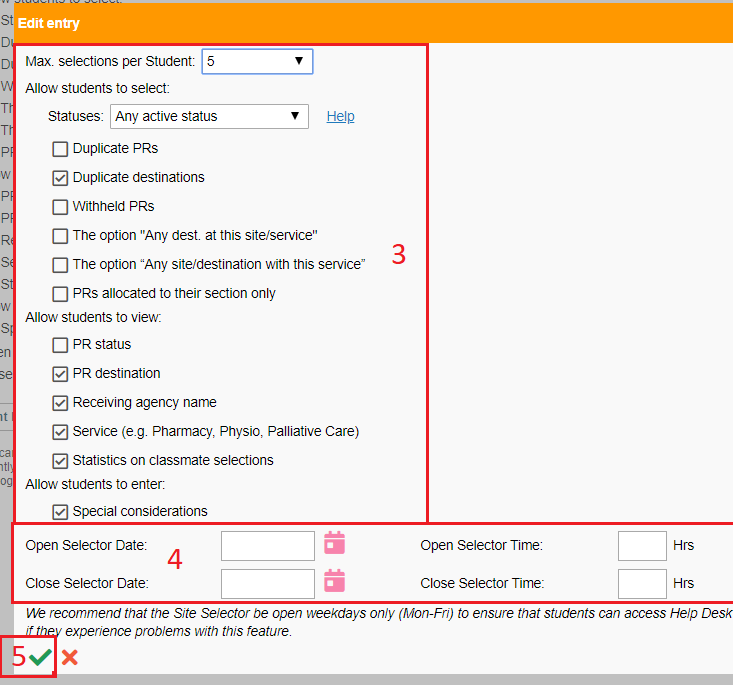
Set Specific "Final" Site Selector settings in Cohort Maintenance, continued. 3. Modify the default settings if needed (e.g. increase to allow a maximum of 6 saved choices for this term only), and 4. Set the dates and times for the Selector to be Open and Closed. 5. Click the green check mark |
|
|
|
The site selector icon in Cohort Maintenance is colour coded to indicate the stage the site selection process is at: Selector is available for a course (set up in cohorts needed)
|
|
|
|
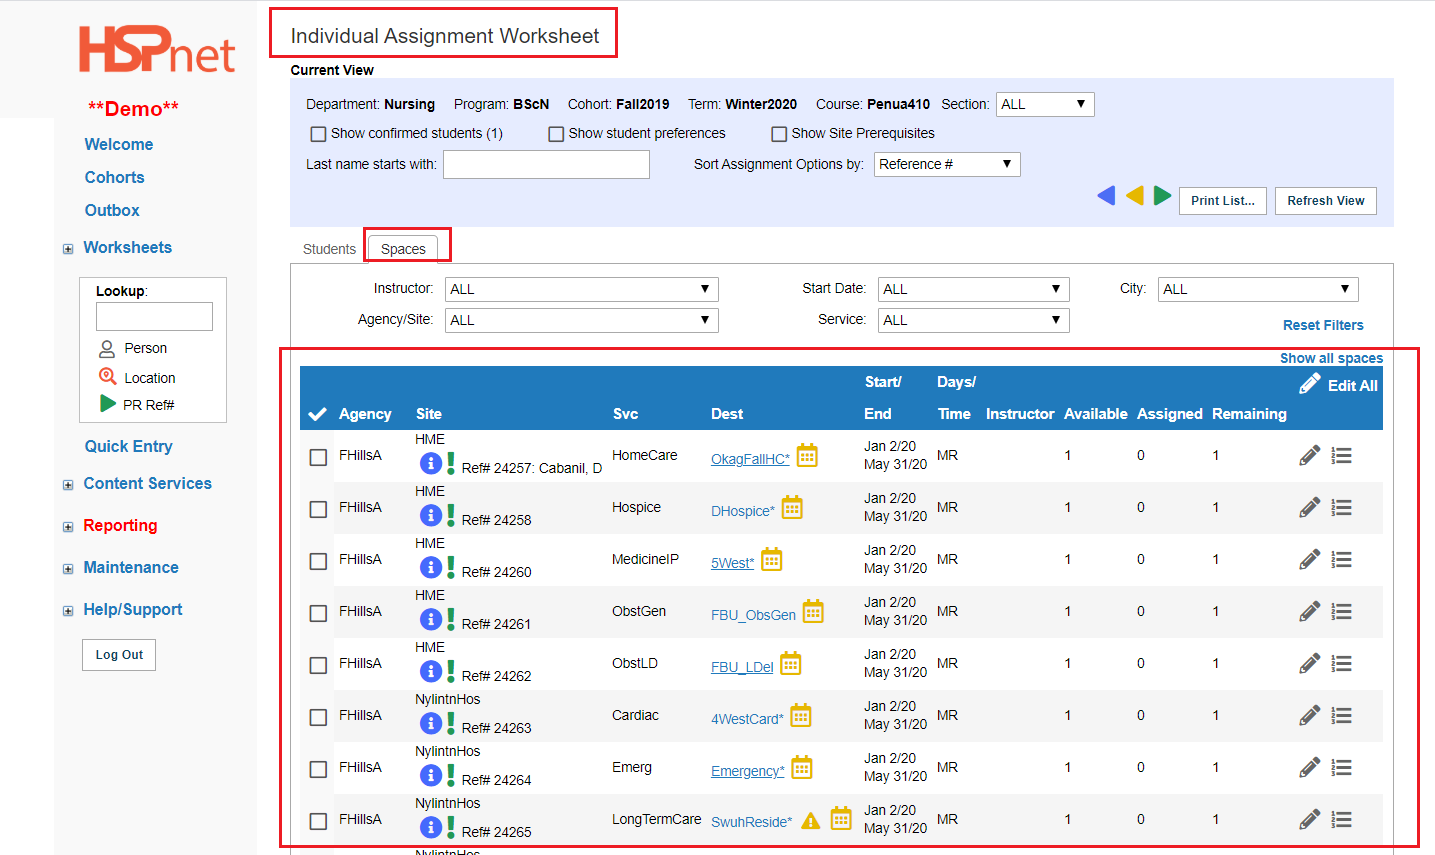
Review Available Placements before opening the Site Selector.
Whether you use option 1 or option 2:
Option #1 – Students may select only Accepted or Confirmed placements On the Individual or Group Assignment Worksheet |
|
|
|
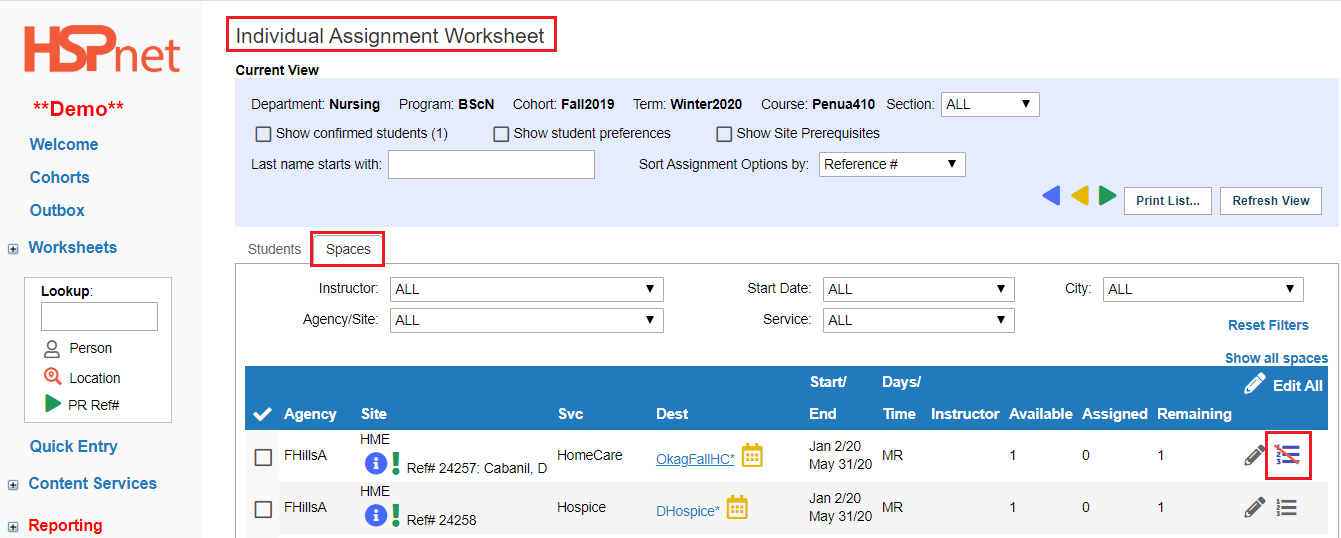
Exclude placement from student selection on the spaces tab of the assignment worksheet.
It is possible to exclude or hold back any placement from student selection to reserve it if needed later, for example for a student with special circumstances.
To exclude a student from the site selection process: the student needs to be removed from the individual or group worksheet when the site selector is open.
|
|
|
|
Exclude placement from student selection on the spaces tab of the assignment worksheet, continued. 3. Click OK to mark it "Excluded from student selection." 4. Click |
|
|
|
If you assigned a student to a Placement Request, and now need to move that request out of the site selector which is already in progress: On the Spaces tab of the Assignment Worksheet:
|
|
|
|
Review Available Placements before opening the Site Selector, continued.
Option #2 – Students may select Placements with any active status (excluding Declined or Cancelled)
Some programs may want to use the Site Selector to allow students to "vote" on potential sites, rather than allowing them to select "real" placements only. The PC can therefore create spaces in the Worksheet and copy to Outbox, and open the Site Selector for students to choose from requests with status of:
To withhold active Placement Requests from student selection in the Worksheet: Manually assign and confirm students to the placement request to be excluded, and click:
The Placing Coordinator can use the students' selections or "votes" to guide which placements to send (if any are un-sent), or to identify which pending placements should be followed up based on student interests, and can delete any un-sent requests that are not needed. |
|
|
|
Notify Eligible Students to use the Selector
If student access is already enabled (see Activating Student Access) then you can broadcast an email notification from Cohorts Enrollment
3. Select the checkbox for students to be notified and choose the action "Create Email Message" to initiate an email broadcast. You may wish to upload a copy of the Quick Reference Guide entitled Site Selector for Students or remind them that the guide is available on their Messages screen after login. |
||
|
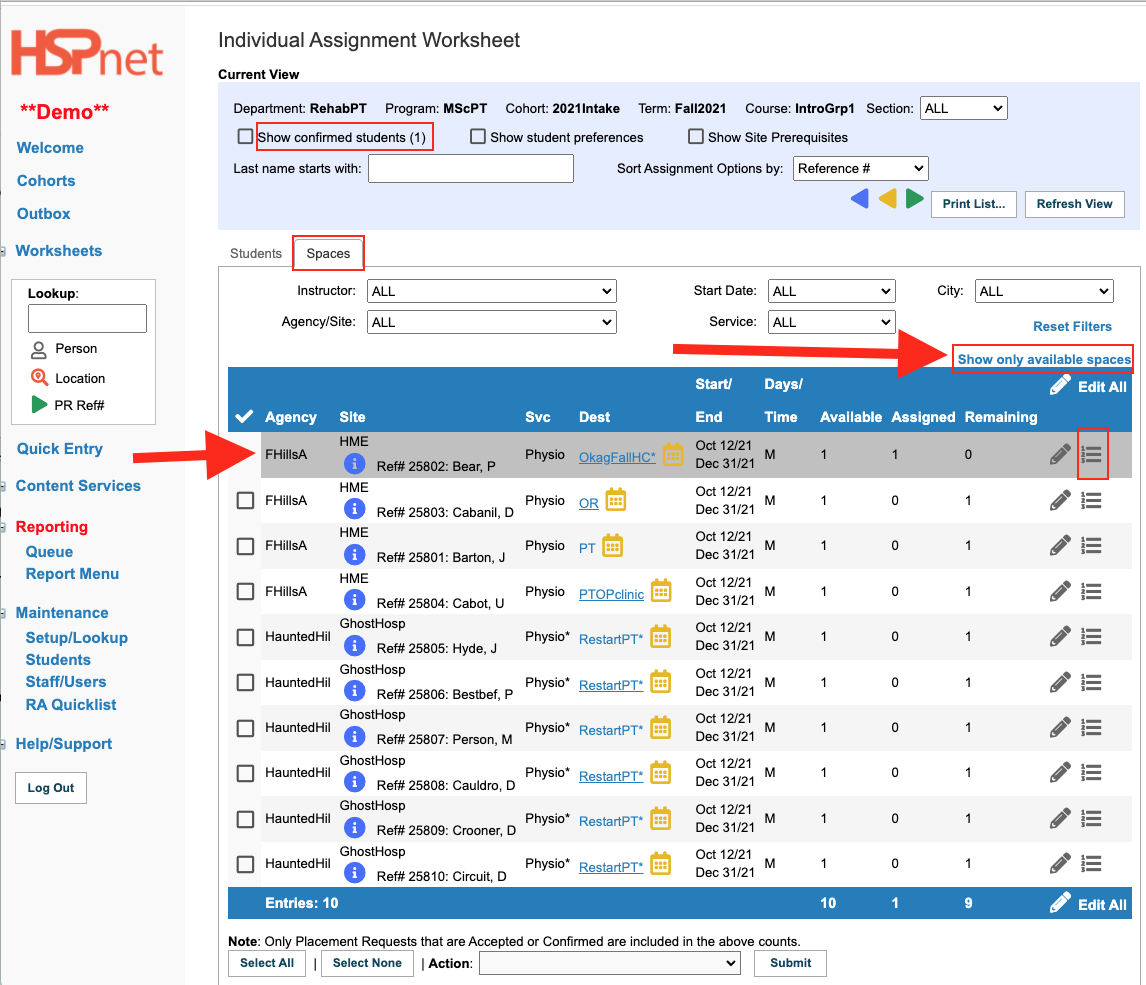
Monitor Student Selections and Prepare for Assignment
You can monitor student selections as below, or if you prefer, you can run a report (covered below this section). The Assignment Worksheet
Site Selector can be run as many times as you like. Keep specific matches for each round, then finalize the assignments each time you run the match., otherwise you cannot reopen the site selector for new matches. When you are satisfied with your review of students' selections, you can proceed with:
If you use automated matching, and allow students to select any active status, you may experience a lower number of successful matches, if the students' selected sites are not available (they may be declined).
If you use the Site Selector to collect student "votes" on potential placements, then you could repeat the selection process later so students can select from actual placements (Accepted or Confirmed). |
|
|
|
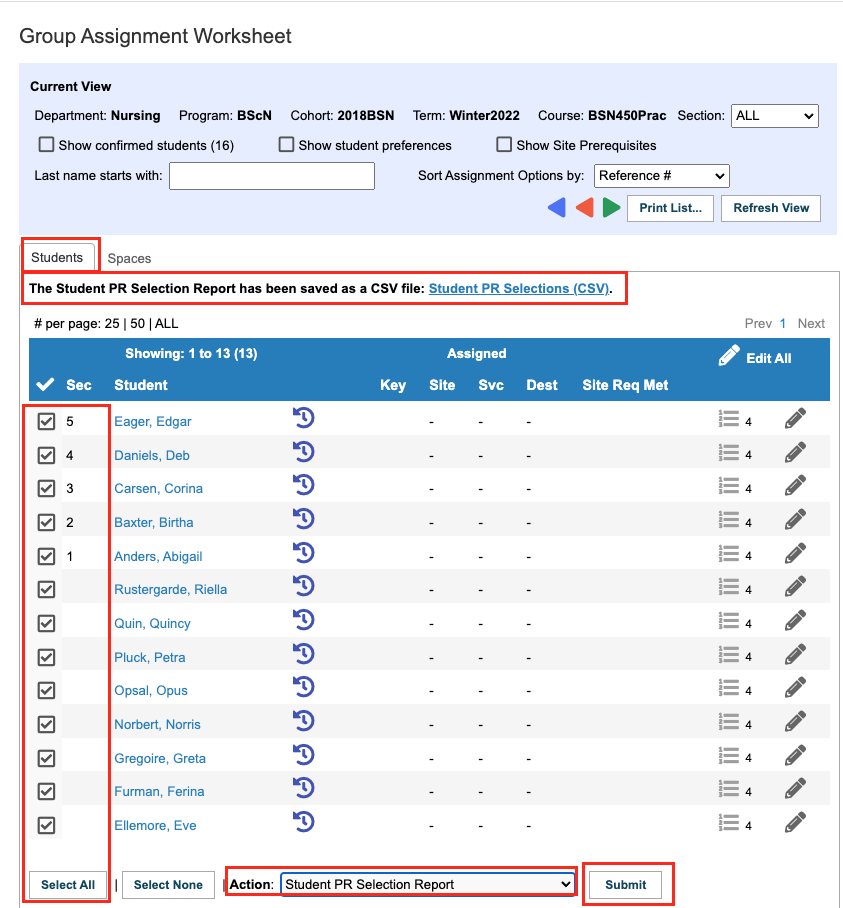
Run A report on Student Selections:
To see how the students responded:
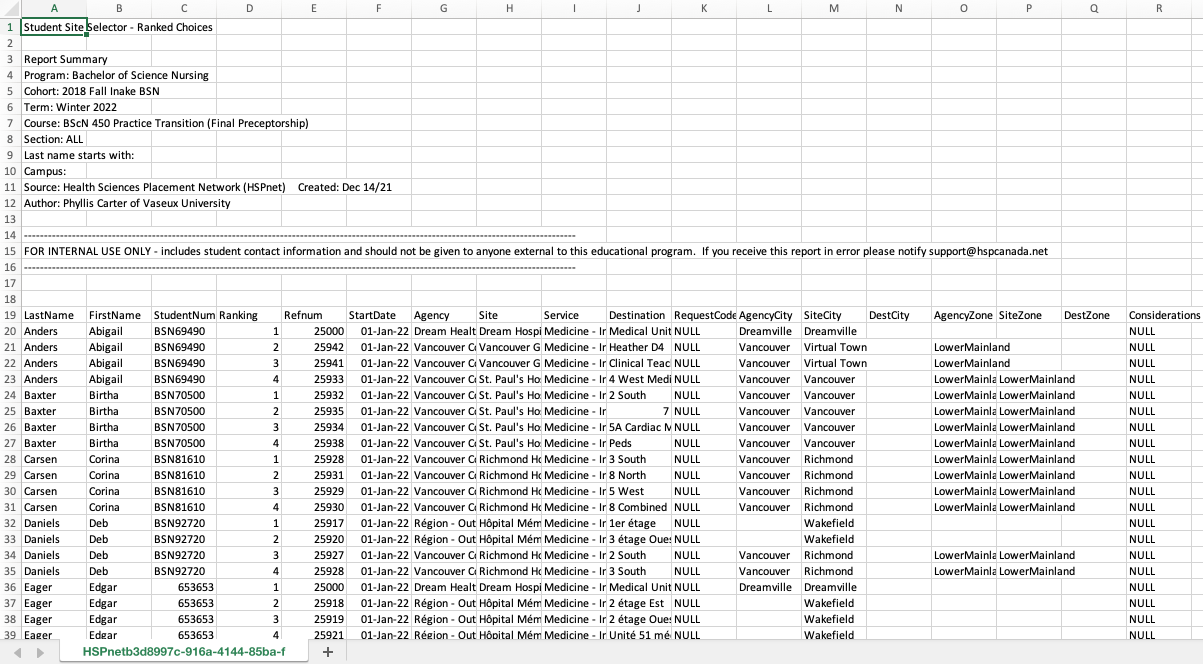
The Excel file will list the students, the reference numbers and the ranking each student gave each Placement Request Reference Number.
You can use Excel Pivot tables to improve the organization of this raw data to determine the highest ranked placement requests by the most students.
|
|
|
|
Advanced/Complex Usage:
For one course you may want to run a site selector multiple times on an ongoing basis.
Let's assume there are 60 students in that course and there are 15 placements confirmed this year. You now want to run the site selector for 20 students at a time and offer them 5 choices to select from, then the 2nd lot (20 students/5 choices) and then the 3rd lot (20 students/5 choices each). After each set of 20 students complete the site selector, you want to run auto-match, assign the students, finalize and release the names, and then start the 2nd lot.
The issue is when the first batch of students are finalized, they will be on the worksheet which means they can potentially view the next set of choices when the site selector is opened for the second set of 20 students.
There is the option to NOT finalize the first 20 students, so you can remove them from the worksheet before the second site selector opens, in order to keep the first set of students matched from seeing the choices available to the second of students.
Finalizing the students for the first pass on their match placements does not restrict or impact the set of choices for the second set of 20 students, but there is no way to restrict the first (already matched students) from viewing the next set of choices when the site selector is opened the second time for the next set of 20 students.
Instead of the above scenario you could create for HSPnet purposes, three separate courses: Fun 101 Match A, Fun 101 Match B, Fun 101 Match C. In the real world there is only one course: Fun 101. To make this work, each set of placements must be allocated in advance among the three courses you have set up. This allows you to run the site selector separately for each course, finalize the students and ensure each set of students only see the placements allocated to their batch of 20 students, even if the selector is run at different times for each course. |