- Click the icon:
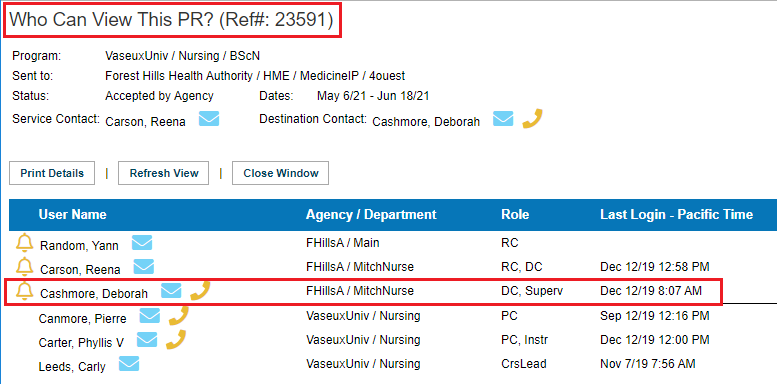
  who can view this PR who can view this PR
- Is the destination coordinator/destination contact listed as being able to see this request?
- If Yes: this means it is not an access issue but is a setup issue - please see Setup issues below.
- If no: (the DC is not listed as being able to view the request) please proceed further down to #2 Access Issues.
|
|
|
Set up Issues
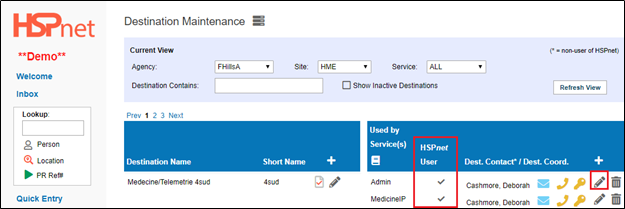
- Click: Maintenance/setup/lookup/destinations. On the Destination Maintenance screen, check to see whether there is a check mark in the column: HSPnet user.
- If there is no check mark:
- Hover your cursor over the DC user key
  to see whether the DC has logged in within the past 180 days. If Yes: to see whether the DC has logged in within the past 180 days. If Yes:
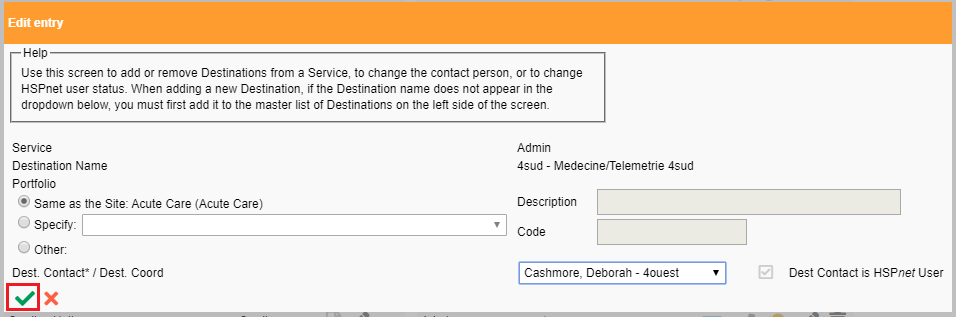
- Click the Pencil icon to the right of the destination contact/coordinator and see the next step in the next section/frame below, adjacent to the "Edit Entry" screen capture.
- If no: (The destination coordinator has not logged in for more than the past 180 days) please see below Access Issues.
- If the Destination Coordinator's user key is disabled
  please see below: Access Issues. please see below: Access Issues.
|
|
|
Set up Issues
- (Continued from Yes in the frame above) Click the green check mark to re-save this individual as the destination contact. If the account is active, a check mark should now appear under HSPnet user on the Destination Maintenance screen, even without editing anything, because clicking the check mark forces the system to save the contact again, and it should now update to show the contact is a user. (This should happen automatically when an account is activated, but sometimes it may not – if the DC was assigned while still not a user; if the DC access timed out at some point, etc).
- If the above procedure of simply clicking the check mark to re-save the DC as the destination contact does not result in the check mark appearing under HSPnet user:
- Click the pencil icon beside the destination contact on the right again.
- Select the blank space at the top of the destination coordinator drop down list and save the changes.
- Reselect the correct destination coordinator again and save the changes again. If this still doesn't result in a check mark appearing under HSPnet user on the Destination Maintenance screen (and the DC can see the PR) please contact HSPnet support via email help.
|
|
|
Set up Issues
- If there already was a check mark under HSPnet User on Destination Maintenance:
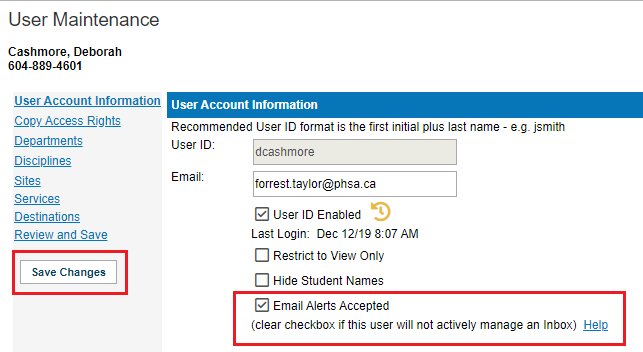
- Click to open the Destination Coordinator’s user key
- Check to ensure there is a check mark in the box in front of Email Alerts Accepted. This box must be checked for anyone assigned as a destination contact on the destination maintenance screen, otherwise the system treats them as a non-user. Click to add a check mark if needed and save the changes. [Other Contacts on the destination profile do not need to have email alerts accepted checked: only the destination contact assigned on destination maintenance must have this checked].
- After editing the DC user account, go to the redirect-P placement:
- open the details icon
 
- Select the history tab
- Click redirect again to clear the redirect-P status.
|
|
|
Hybrid: Set up and Access Issues!
If there already was a check mark in destination maintenance showing the DC as an HSPnet user, and Email alerts accepted was already checked in their user maintenance screen and the who can view this PR
- Open the user's profile icon
  . .
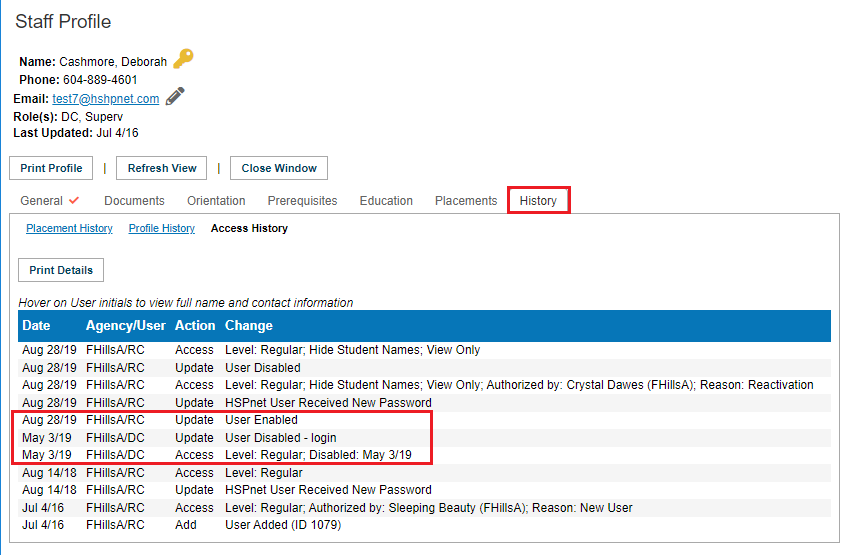
- Select the history tab.
- Click the Access history link.
- Check to see if the destination coordinator had access on the date the placement request was sent:
- Also open the Placement Request details icon
- Go to the history tab and check the date the placement request was redirected.
- If the Destination Contact did not have access to HSPnet at the precise moment on the date the placement was redirected that would cause the Redirect-P status, and also explain why they can now see the request, if they currently have access again now.
- In the example pictured on the right, Deb Cashmore's account was disabled on the date the placement request was redirected. Deb's account was re-enabled 2 weeks after the request was sent, therefore, she can see it now, but the status is redirect - P (printed) because her account was not active at the instant the RC redirected the request to her.
|
 
 
|
|
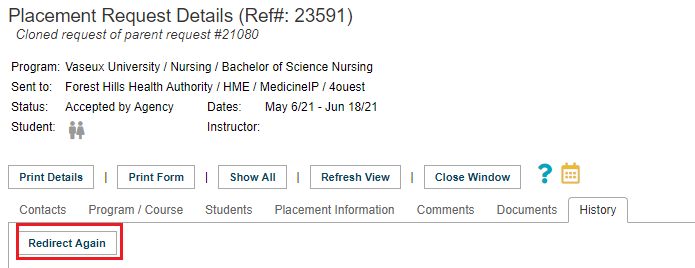
To update the request so it is redirect instead of redirect-P.
- On the history tab of the placement request, click redirect again to clear the redirect–P status.
|
 
|
|
Access Issues-basic
2. If the user cannot see the request: when you click the icon
- Hover your cursor over the DC user key
- If the DC has not logged in for more than 180 days, then the account is disabled but the user key may look normal.
- The Destination Coordinator's user key could also show up as disabled
- Accounts may also be disabled by too many login attempts.
Resolution:
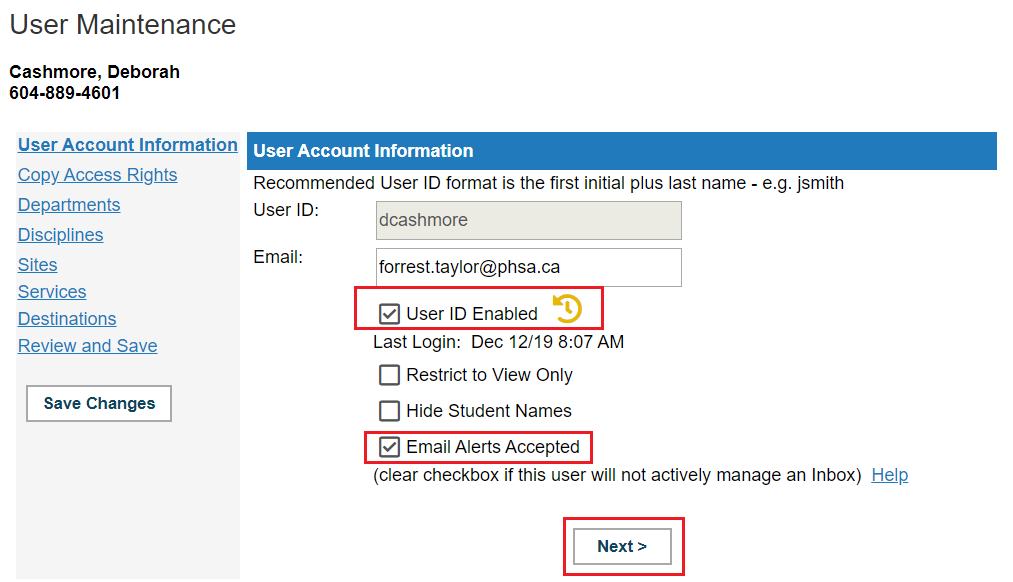
- open the user key and click to place check marks if needed, in front of:
- User ID Enabled
- Email Alerts accepted
- Click next and from the drop down lists select who authorized the reactivation and the reason for the reactivation.
- Save the changes.
- On the history tab of the placement request, click the box: Redirect Again to change the status from redirect-p to redirect.
|
 
|
|
Access Issues-specific missing elements
In this scenario, the user account is active, the DC may have logged in a moment ago, the HSPnet user check mark appears in Destination Maintenance, etc.
- Click to open the Destination Coordinator’s user key
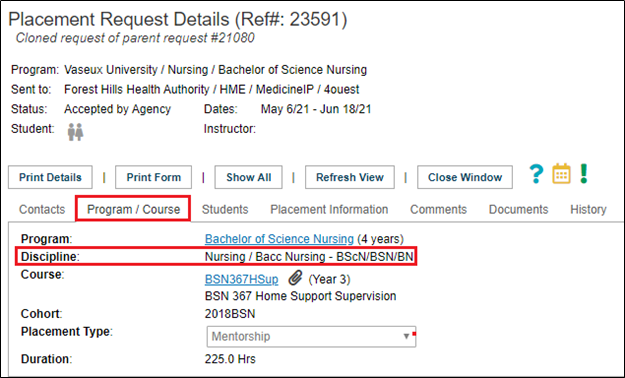
- Open the details icon
- Select the program/course tab
- Check to see what the discipline/sub-discipline in the placement request is.
|
|
|
Access Issues (continued from above frame)
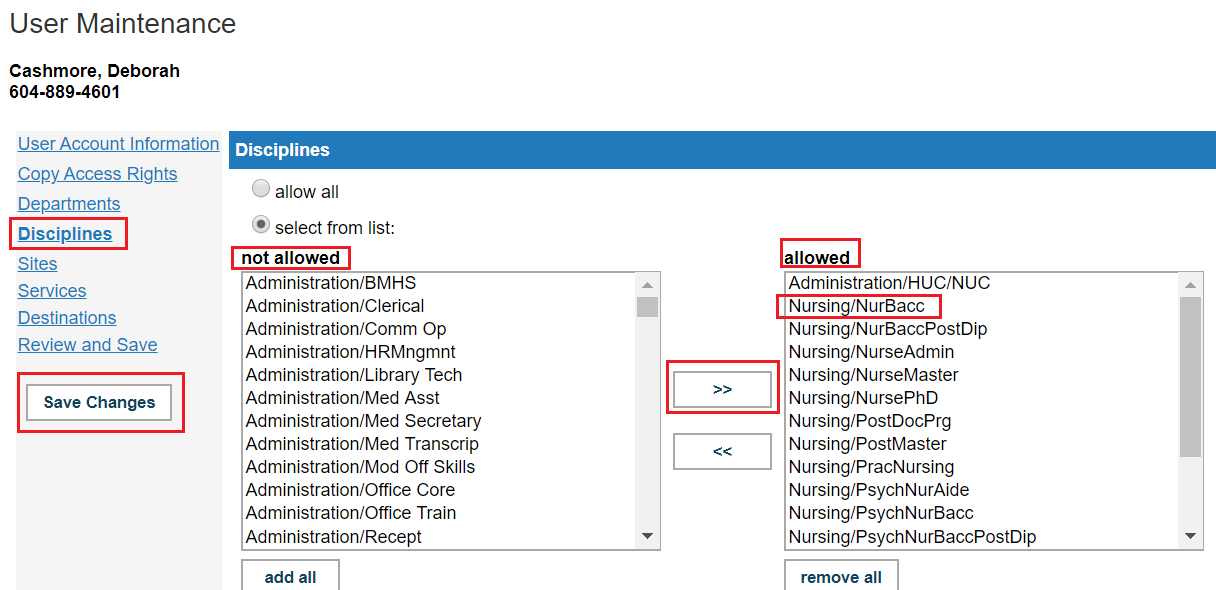
- Go back to the User Maintenance and click the disciplines link screen and make sure that discipline on that request is in the user’s “allowed” box. If it is not in the allowed box, and if you still want to send the request to the destination:
- Click the discipline to highlight it in the not allowed
- Click the arrow that points to the allowed box in order to move the discipline into the user’s access.
- Click Save Changes.
|
 
|
|
To update the request so it is redirect instead of redirect-P.
- On the history tab of the placement request, click redirect again to clear the redirect – p status.
|
 
|