IT Provisioning - Training Scenario - Individual placement
Summary:
This guide is applicable only to Alberta at the moment.
Summary:
This guide covers the steps required to enter IT Provisioning information used for Receiving Agency automation of access to systems and networks.
This scenario describes an individual placement, where a single student is assigned to a placements Student-specific IT Details are entered on the profile of student, while placement-specific information is entered on the placement details.
|
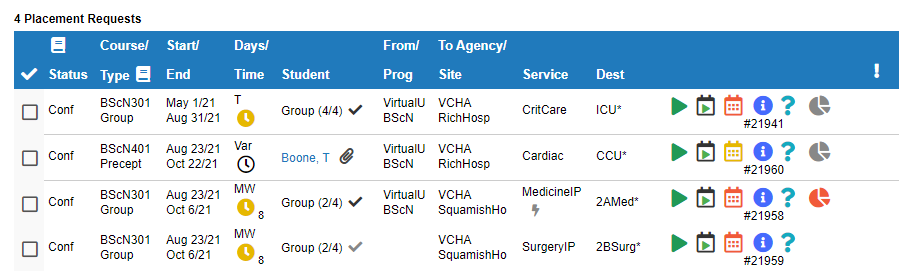
Ensure placement information is entered in HSPnet and Confirmed
Ensure the student has been assigned and Finalized (name released) |
|
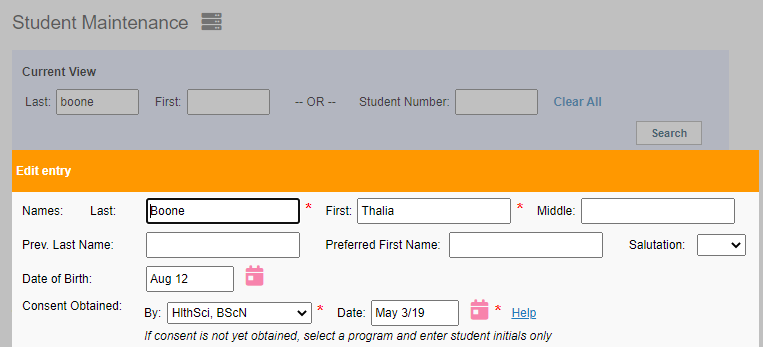
| Ensure student day and month of birth have been entered on the student record |
|
|
Open the student profile by clicking the link with the student name in the Students tab of the Details screen, in Enrollment, or in the Outbox
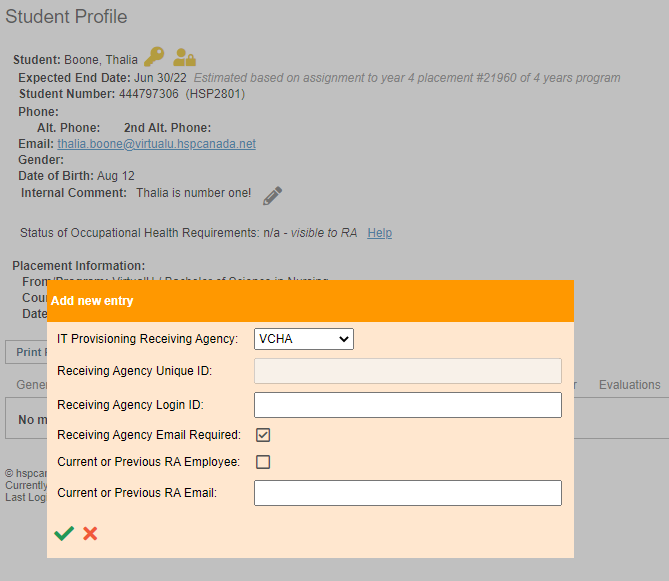
Access the RA IT Provisioning tab |
|
|
If an entry does not exist for the agency where the student is assigned to be place, add an RA IT Provisioning entry by clicking the add icon
Save with the green check-mark
|
|
|
If an entry already exists for the agency where is student is assigned to be placed, review the information and update it if necessary by clicking the edit icon
NOTE: The RA IT Provisioning entry on the student profile provides the network account for the student. If the student is placed on a site with a legacy system (e.g. non-Connect Care), IT provisioning is complete at this point. If not, proceed to the next step |
|
|
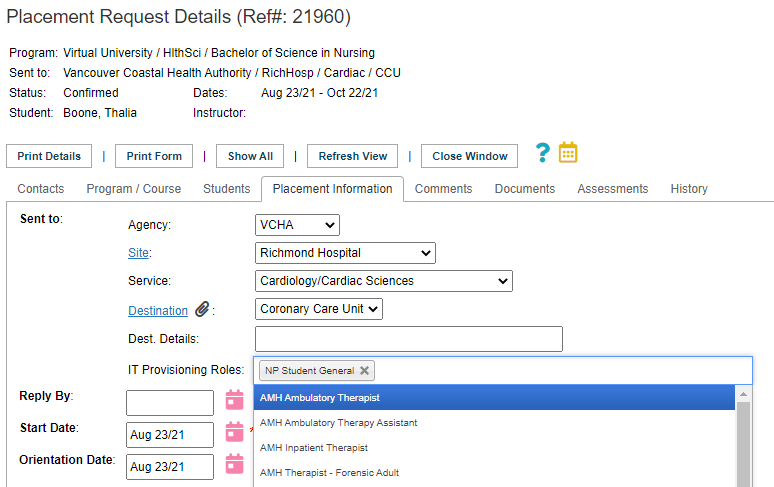
In the Details screen for the placement, access the Placement Information tab
NOTE: This step and the following are only required for students going to sites requiring specific IT roles (e.g. Connect Care)
In the IT Provisioning drop-down menu, select the role(s) required for the students in the group |
|
|
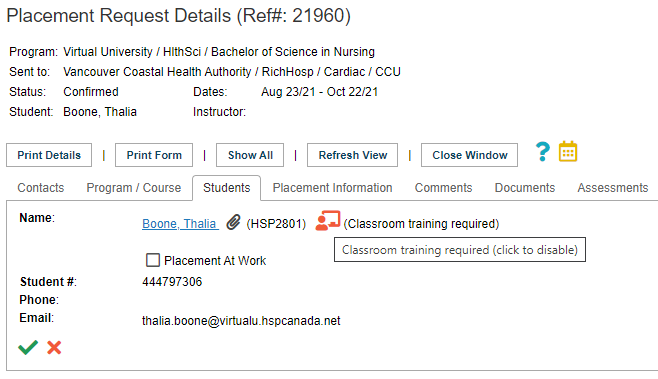
Access the Students tab
Click the Classroom training required icon to enable or disable it and indicate whether classroom training is required for the select IT roles for the student |
|