
IT Provisioning - Information for Receiving Agency Automation - Setup of IT Roles (for Receiving Coordinators)
Receiving Agency Related Guide (RARG)
Summary:
This guide is applicable only to Alberta at the moment.
Summary:
The Receiving Agency IT Provisioning features in HSPnet allow entry of information used by RA IT systems to automate student and instructor access to networks and applications. This guide explains how Receiving Agencies set up and update the Receiving Agency IT Provisioning Roles, which can be assigned to placements and will be included in the Security/Access Listing web service API which IT teams on the receiving agency can access HSPnet placement and student data.
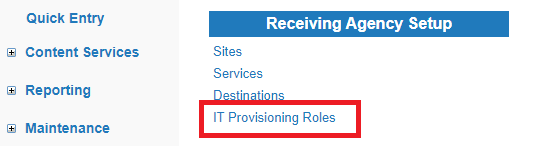
Setting up and updating the list of Receiving Agency IT Provisioning Roles
|
Go to Maintenance > Setup/Lookup > IT Provisioning Roles (under Receiving Agency Setup) |
|
|
Add a new role
|
|
|
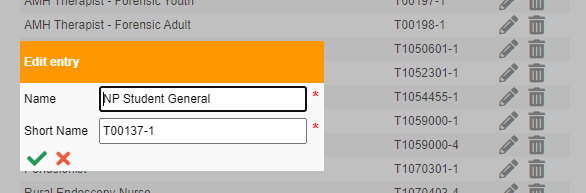
Update an existing role
|
|


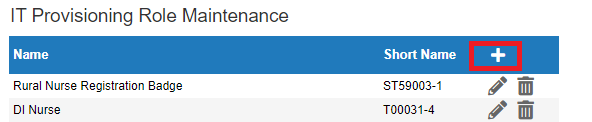

- The list of RA IT Provisioning roles is specified and maintained by the receiving coordinators. Specific roles for each placement may be entered and updated by the placing coordinator or the receiving coordinator
- Placing coordinators will select RA IT provisioning roles for each placement based on the list
- Updating entries in the list will automatically update all placements to which the role is assigned. For changes in the definition of roles, it is recommended to add a new roles and retire the previous one rather than changing the name.