
Destination Coordinator - Workflow Guide (DC Advanced)
Receiving Agency Related Guide (RARG)
Summary:
The default screen for Destination Coordinators is called DC View (or sometimes DC Lite). Advanced DC is more appropriate for coordinators who have multi-site, multi-department, a lot of destinations and a ton of placement requests - otherwise the DC View screens outlined in the linked DC View document, are much easier to navigate. While this summary provides a broad overview – we recommend you learn all about the process from the DC View guide linked here, which also links you to video learning modules, before attempting to use this Advanced screen.
Background
Destination Coordinators (DC) are responsible for accepting or declining placement requests for areas under their responsibility, and for assigning a supervisor or preceptor as needed. Destination Coordinators can also update their online Destination Profile to provide educational programs and students with up-to-date information about their unit or program. Destination Coordinators need not login to HSPnet on a daily basis – an email will be sent when there are Pending requests in your HSPnet inbox and your last login was more than 3 days ago.
Step 1 – Login to HSPnet
- Click the link provided in the body of the email sent from HSPnet (be sure to note the Term (e.g. Fall) noted for the pending requests), or visit www.hspcanada.net from your internet browser (Google Chrome; Firefox, Safari, Edge).
- Click your province (from Quebec westward every province is a different database and your log in information is only recognized when you click on your province) on the clickable map to view the login page and local HSPnet News.
- Enter your User ID (usually first initial + last name) and your password.If you forget your password, use the Help with Forgotten Password link to reset your password to be sent via email; if you are locked out: please contact your Receiving Coordinator/service contact who is also your local HSPnet administrator.
|
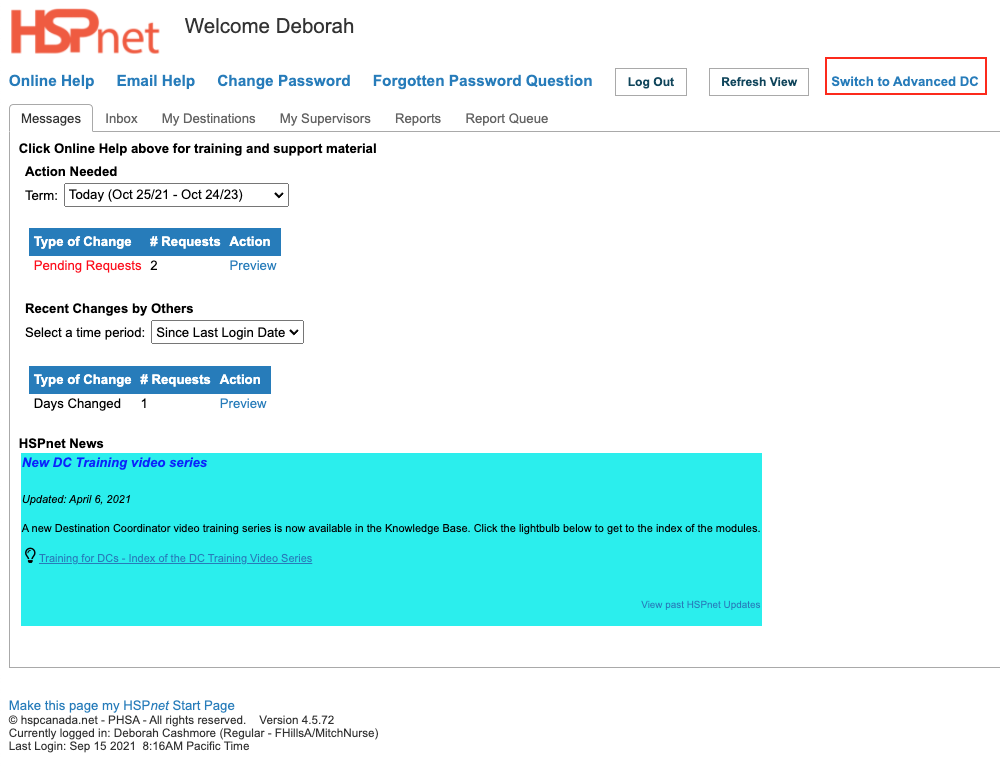
To access the DC Advanced screen, click the link in the upper right hand corner of the DC View screen. You can switch back from the Advanced View to DC View at this same link location. |
|
|
DC Advanced Welcome Screen- overview
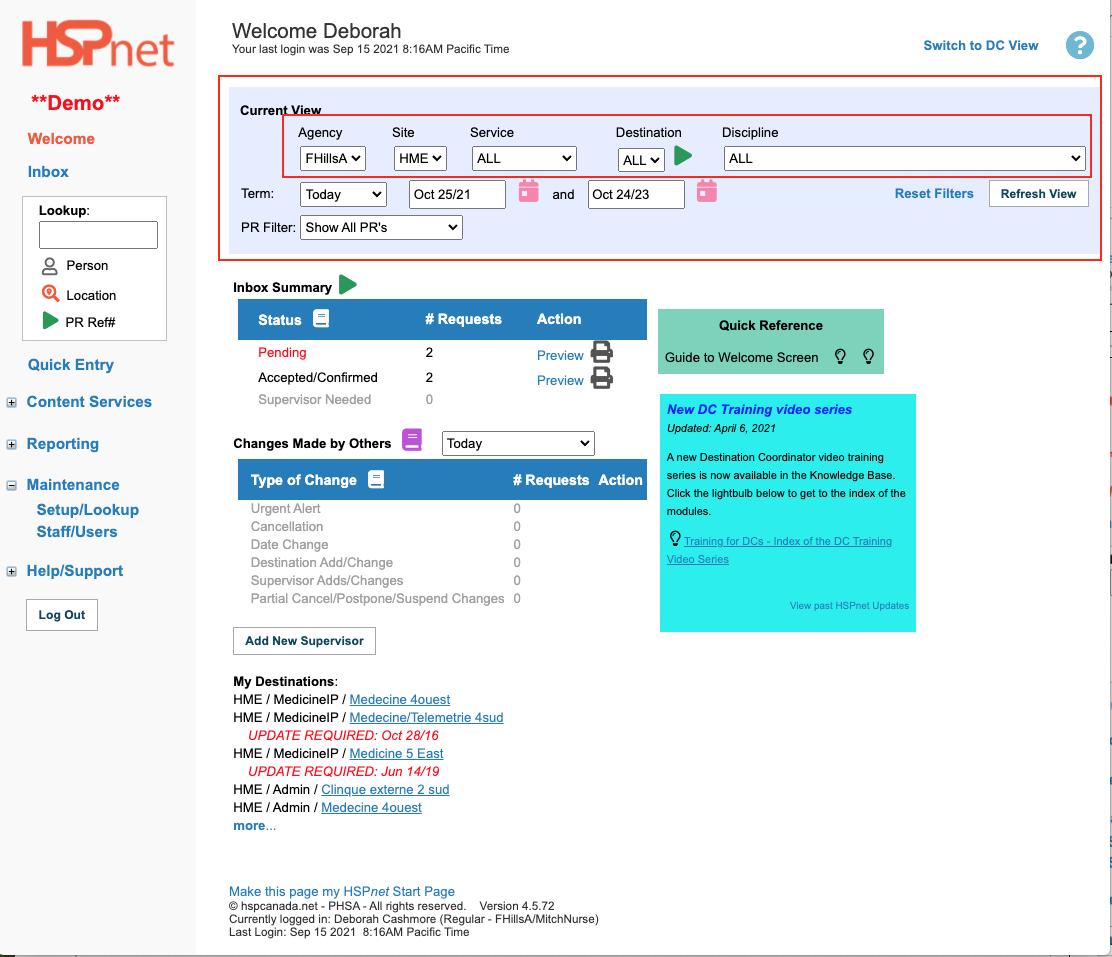
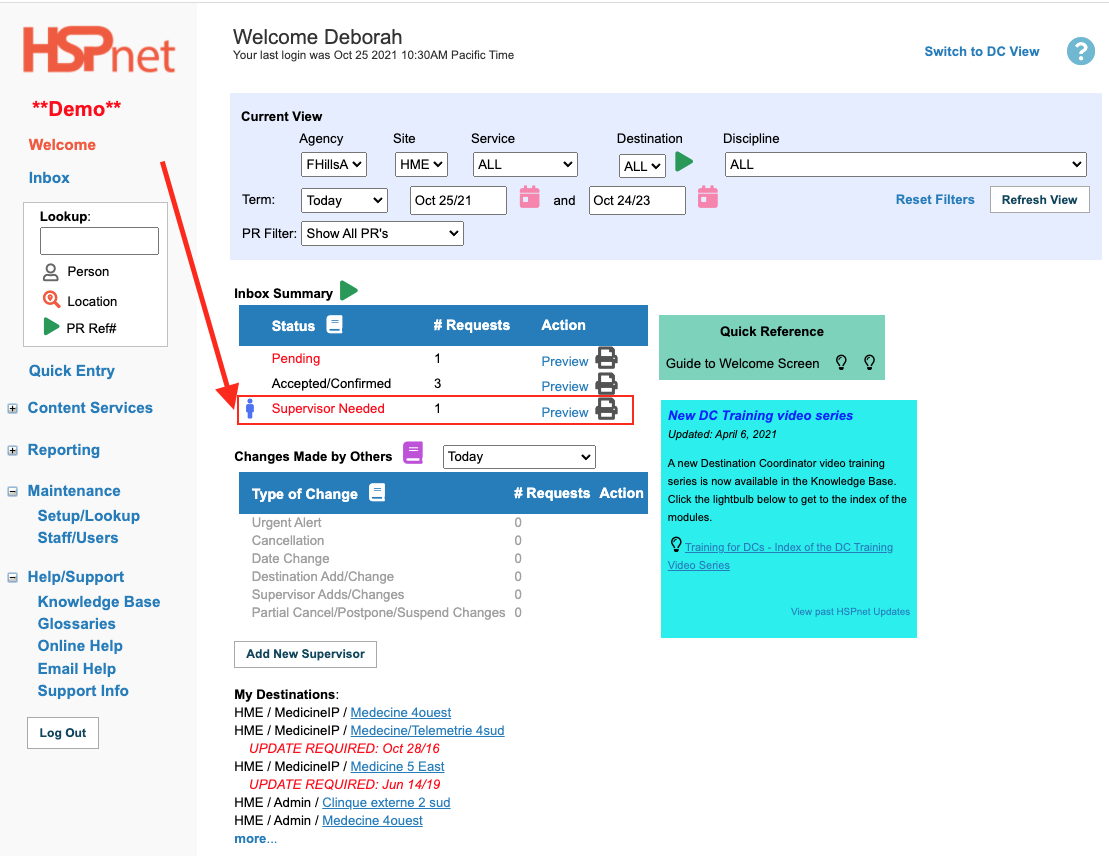
The Welcome screen is like a dashboard. You should see your name at the top of the screen along with the link to switch back to DC View. The left hand side is a navigation bar. Click on the world Welcome to return to this screen at any time.
The light blue area near the top of the screen is called the Current View. Starting in the left of that area is a drop down list for Agency (only your agency will be available on that list), next is the Site drop down list and this will enable you to select specific sites within your access. Once you have selected a site, you can continue to select a specific Service and a specific Destination. The green button beside destination is a go to button that would take you to the specific inbox for the Agency, Site, Service, and Destination selected; if you also select a discipline before clicking it, that button will take you to the desired inboxes. This same icon also appears in the look up area; you can enter a Placement Request reference number, click that green triangle in beneath, and locate a specific Placement Request in its inbox.
The next line of Current View enables you to change the period of time (dates) that you are viewing.
|
|
|
DC Advanced Welcome Screen- overview continued:
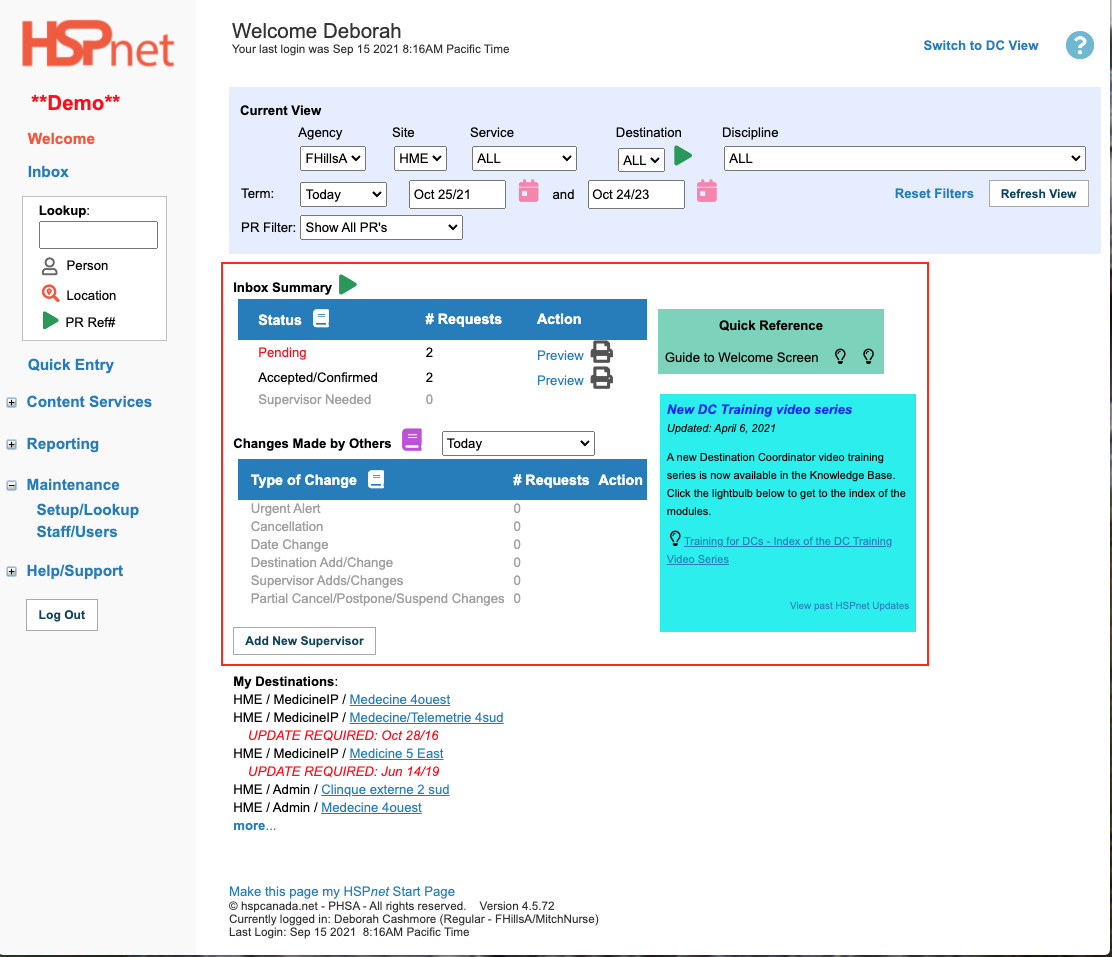
The Inbox Summary is located in the central part of the welcome screen and features a third green triangle go to the inbox button.
If your department is set up with one of the above terms, it only affects the term your screen displays at your agency: All of the requests you receive will use the terms set up by their agency. For example: your display may say 1 Supervisor needed, but when you look at the contacts tab of the placement request, each one may use different terms, such as preceptor on one request, while another may ask for a clinical instructor.
The next section here is Changes Made by Others. There is a drop down list so you can select different time periods when others (Receiving Coordinators, Placing Coordinators, other Destination Coordinators if more than one of you have access to the same destination), may have made updates to the requests such as:
|
|
|
DC Advanced Welcome Screen- overview continued:
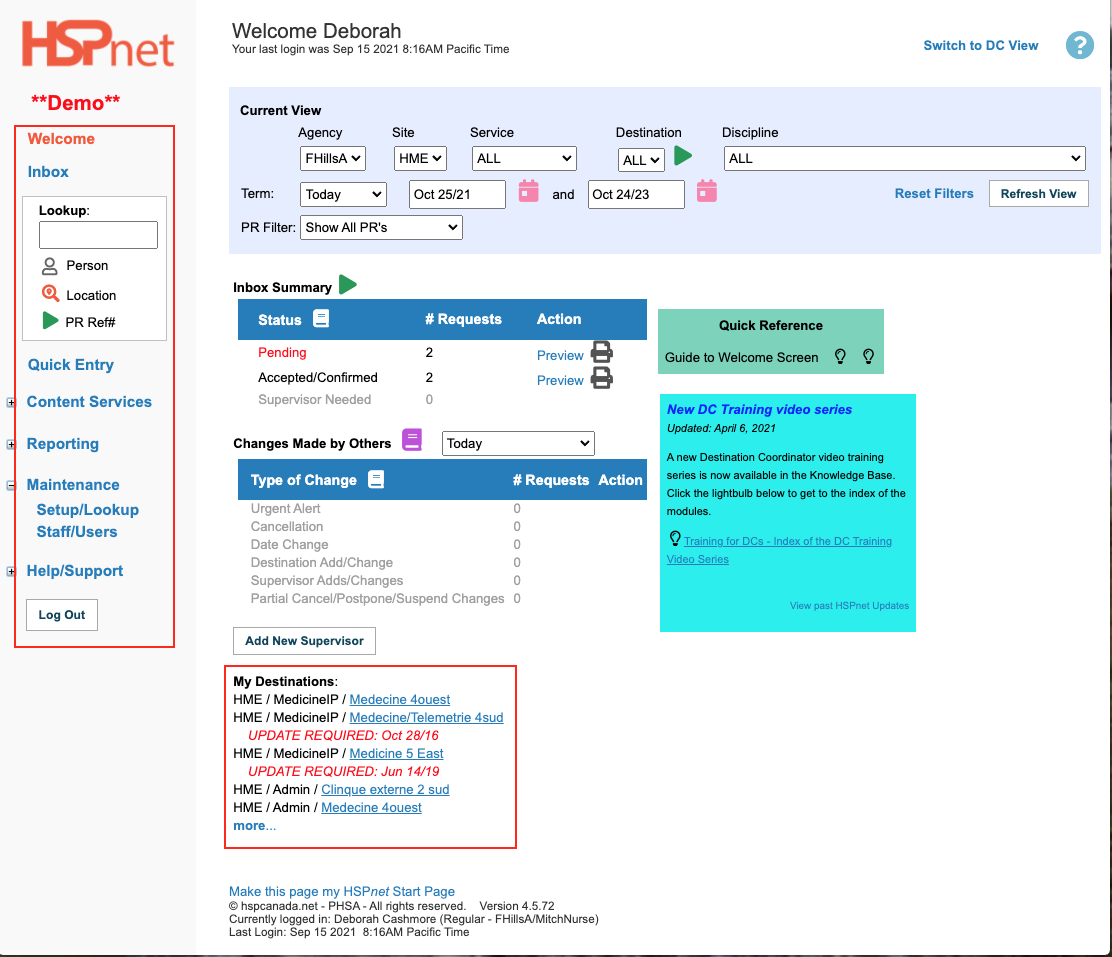
Toward the bottom of the screen links to each of your destinations appear. Click more to view the entire list. You may see the same destination profile listed multiple times! In the example to the right, 4Ouest appears twice. The first time it is listed at the site: HME, the service MedicineIP and then the destination name; the second time it is listed at the site HME, the service Administration and then the destination 4Ouest. These are the same destination and the same link, one link indicates it is for the service of Medicine In Patient (for placing undergraduate nursing students) and the other is the service of administration (for placing clerical students such as Nursing Unit Clerk).
On the left of the screen is the navigation bar (main menu). Welcome is red because it is selected. We can also click to look up a person (student or instructor) - staff are further down the navigation bar! This feature is also used to find locations, or search to go to a specific placement request number. Quick Entry is an optional feature that may not be turned on for you, Content Services may contain information about Affiliation Agreements, E-Orientation or the correspondence module. The Reporting link, takes you to a menu of canned reports and a section where you can use wizards to create more sophisticated Excel reports. Setup/Lookup allows you to look at:
|
|
 .
.
Step 2 – Review Your Welcome Screen
- On login, the Term drop down is filtered to "Today" which shows all placements active today and for the coming two year period. (You may need to change the Term drop down to the term specified in your email from HSPnet (e.g. Spring/Summer or Fall), then click).
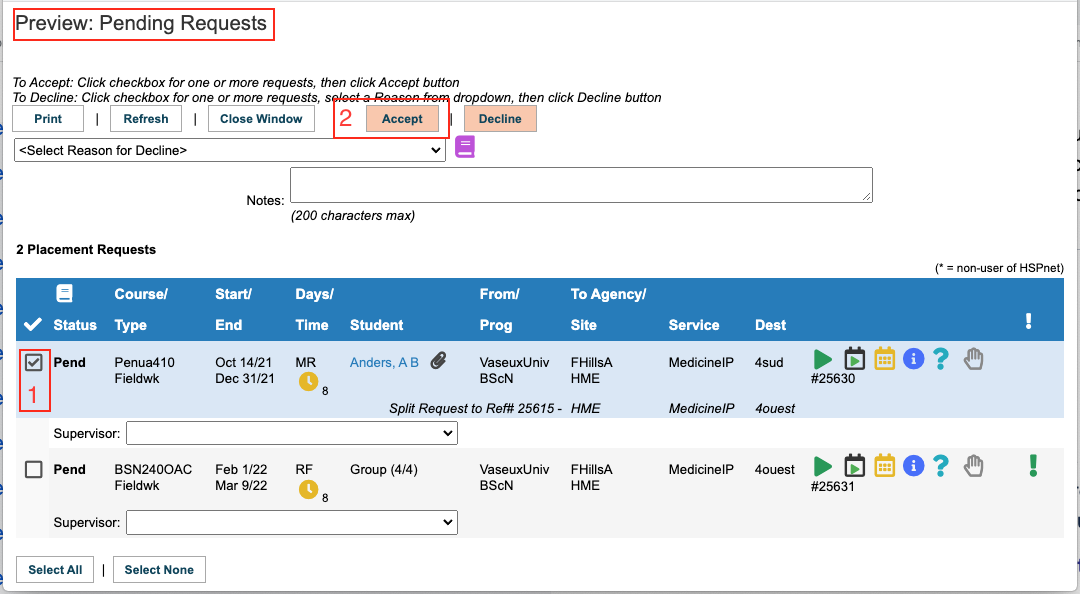
- Incoming placement requests requiring your reply will be indicated as Pending Requests. On your Welcome screen link, click Preview to open the Preview: Pending Requests window.
|
Step 3 – Accept or Decline Placement Requests (you can also do step 4 before step 3, if you already know who you will assign as a supervisor).
|
|
|
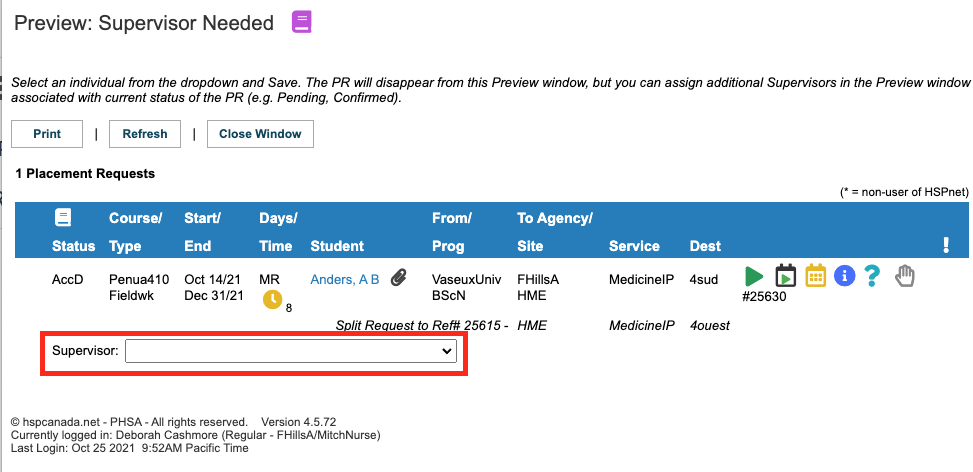
Step 4 – Assign Supervisors / Preceptors
(Supervisors can also be assigned as the first step above, before accepting the placement, if you know who is going to be assigned when you accept the request).
|
|
|
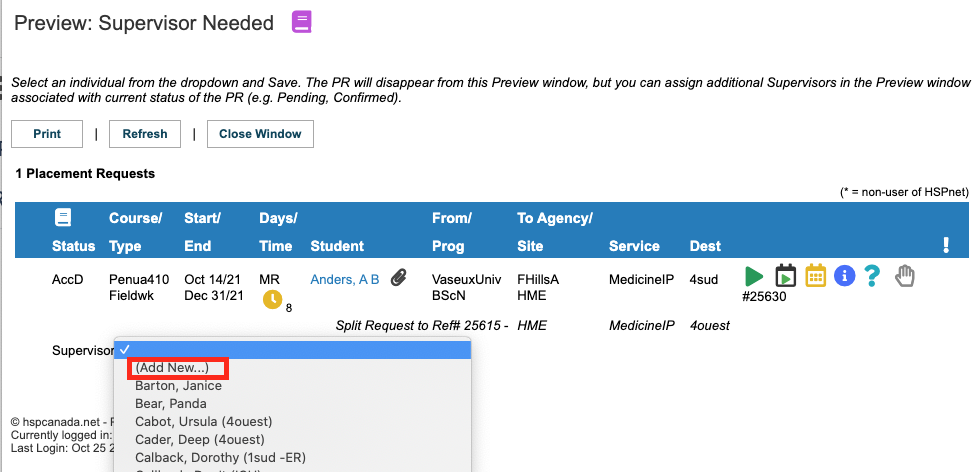
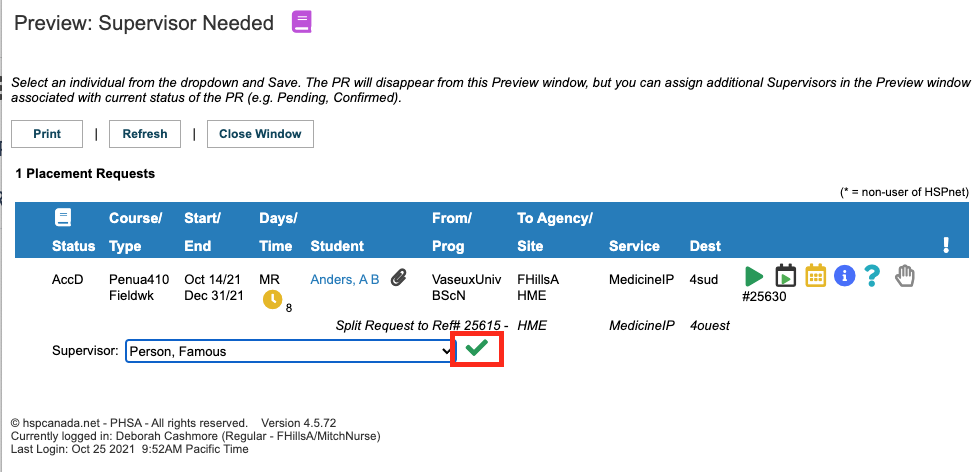
2. Select a supervisor from the drop down list:
When you save the supervisor to the placement request, the placement request will disappear from the Preview Supervisor Needed window because it no longer needs to have a supervisor assigned – it will now be included under "Accepted/Confirmed Requests" on your Welcome screen. If more than one supervisor is needed: please see the guide: Assigning Multiple Supervisors/Preceptors. In brief: you need to open the placement request details
|
|
|
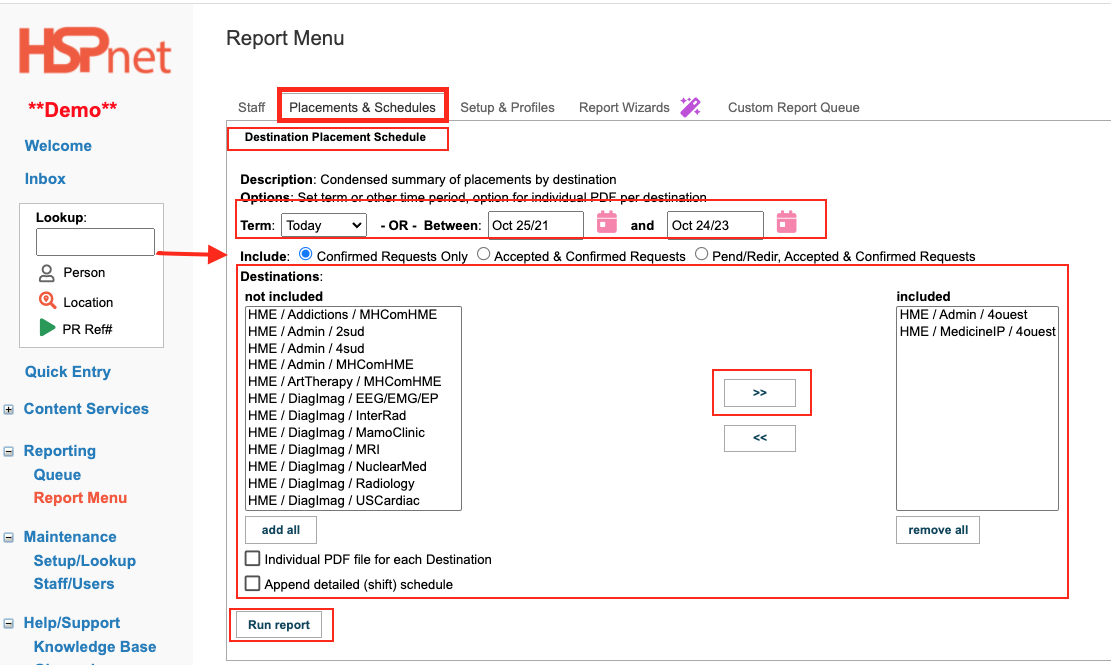
Optional – Print Placement Schedules
If you need to share the student placement schedule (e-mail to others or print and post):
|
|
|
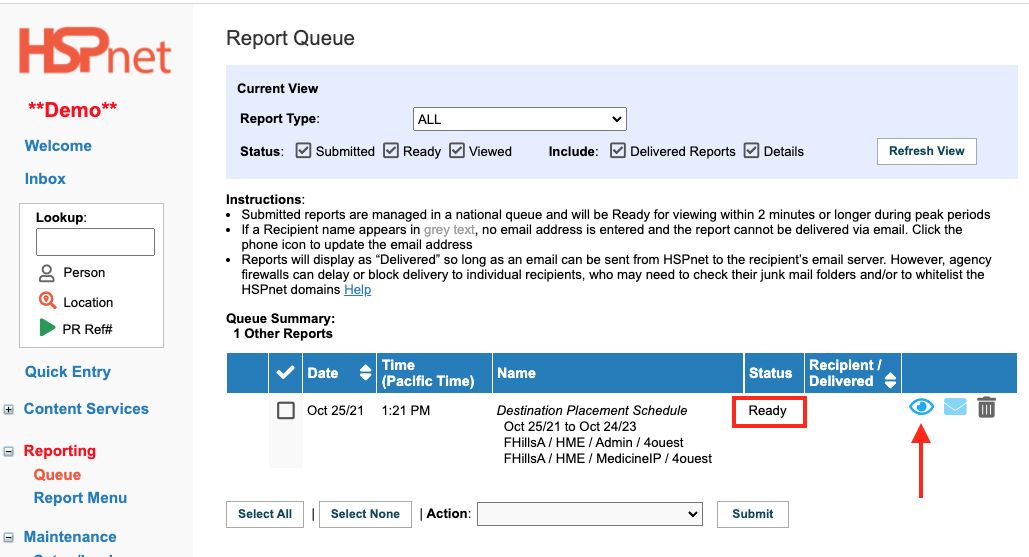
Select Reporting/Queue to go to your print queue.
Your report will be ready in 2 minutes or less. You need to click the button refresh view as the Status will not change from Submitted to Ready without refreshing the screen.
You have now completed 5 steps:
|
|


Additional Icons:
- To view the full details of any placement request, click the Placement Request Details icon
 . Information includes: all contacts, program and course, placement details, comments and alerts, detailed schedule & placement history.
 - In a Preview window, click
 to view requests in Calendar View. This will switch your main (Welcome) screen to the Inbox displayed in Calendar View – you will need to close the open Preview window to view your Inbox. Click Welcome in the left navigation to return to your home screen at any time.


- The Welcome screen displays "active" requests (Accepted/Confirmed) and those needing attention (Pending, Preceptor Needed). Declined and Cancelled requests do not appear on your Welcome Screen, but are retained in your full HSPnet Inbox. If you need to view a Declined or Cancelled request, for example to change a Declined request to Accepted (or vice versa), you can view your full Inbox via the GoTo Inbox button
 .
.
