Campuses - Setup and Management
Placing Agency Related Guide (PARG)
Summary:
An educational program may be offered at more than one campus, and HSPnet offers features to use campuses when managing students and placement requests.
Background
An educational program may be offered at more than one campus – e.g. Downtown and Broadway Campus. HSPnet offers features that allow schools to:- Assign students to a campus- Allocate available placements to a campus- Focus on a specific campus by filtering key screens- Limiting student choices to placement requests that are allocated to their campus
|
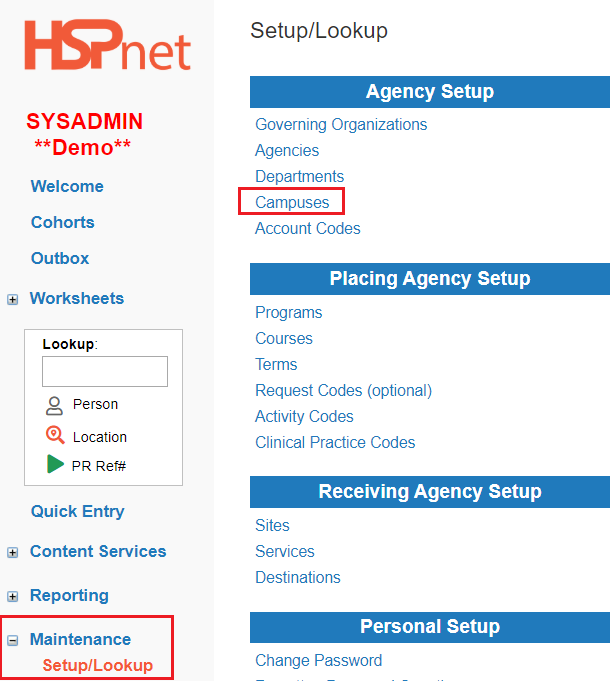
Access Campus Maintenance:
|
|
|
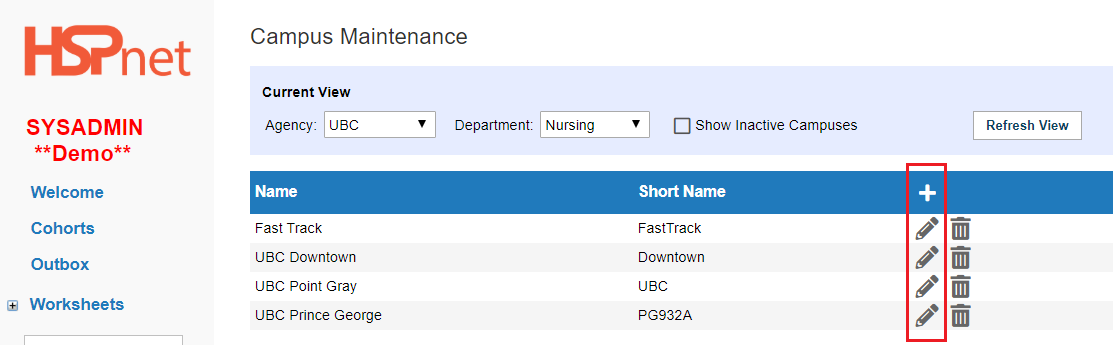
Step 1 – Define Campuses
|
|
|
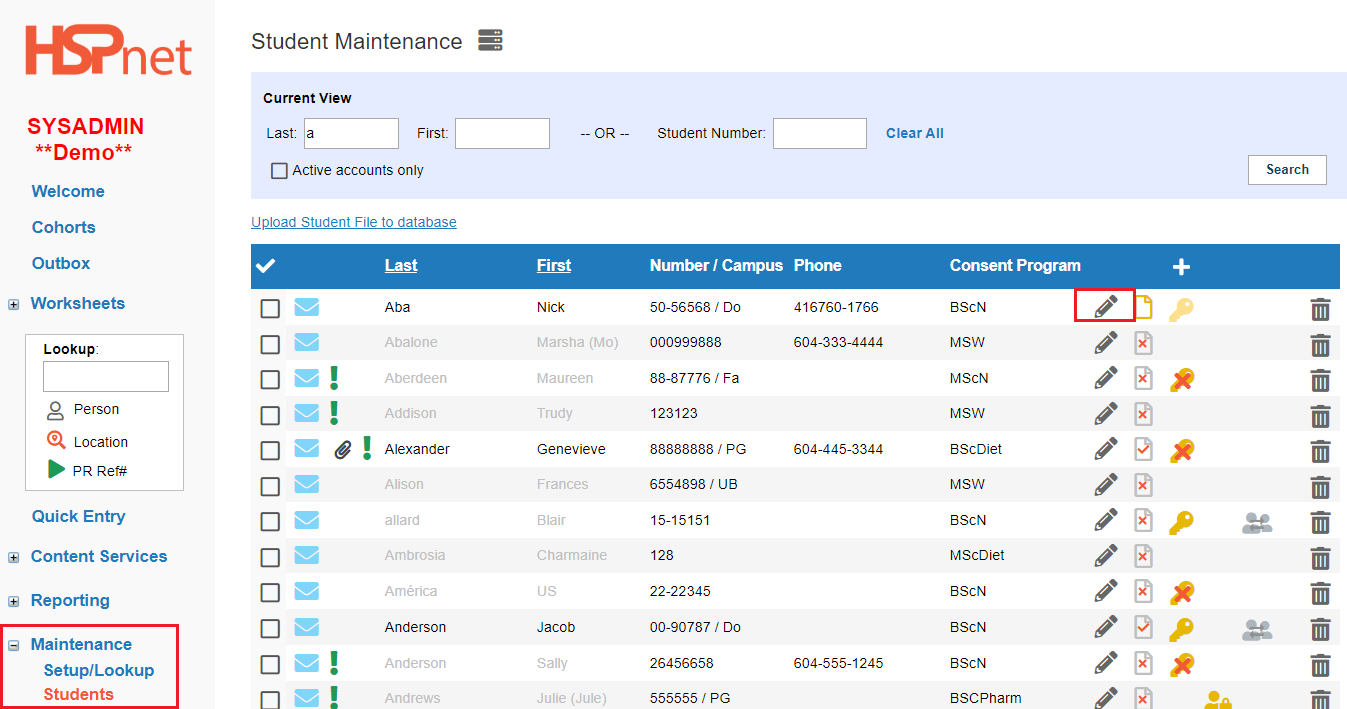
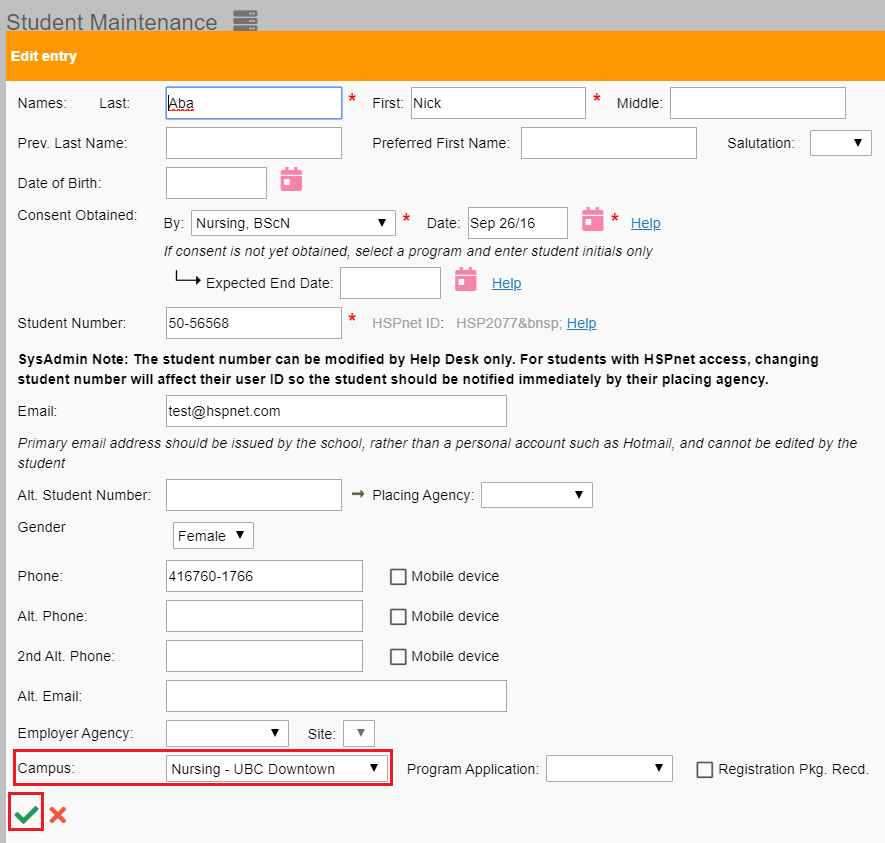
Step 2 – Allocate a Campus to Students
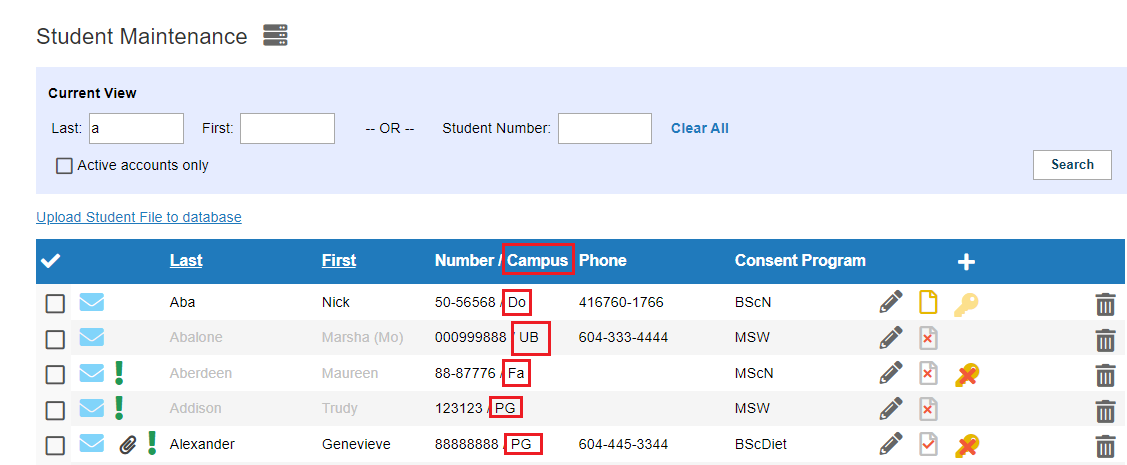
Access Student Maintenance:
|
|
|
|
|
After saving your changes, the first two letters of the allocated campus is displayed after the student number.
Campuses can also be allocated in batches by uploading a spreadsheet via the link in Student Maintenance (for multiple cohorts) or in the Enrollment Worksheet (for students in a single Cohort). The upload file must include a minimum of student last name plus student number, and the associated campus as it appears on Campus Maintenance (full Name or Short Name). Refer to the Quick Reference Guide entitled Staff & Student File Uploads for instructions on uploading student lists. |
|
|
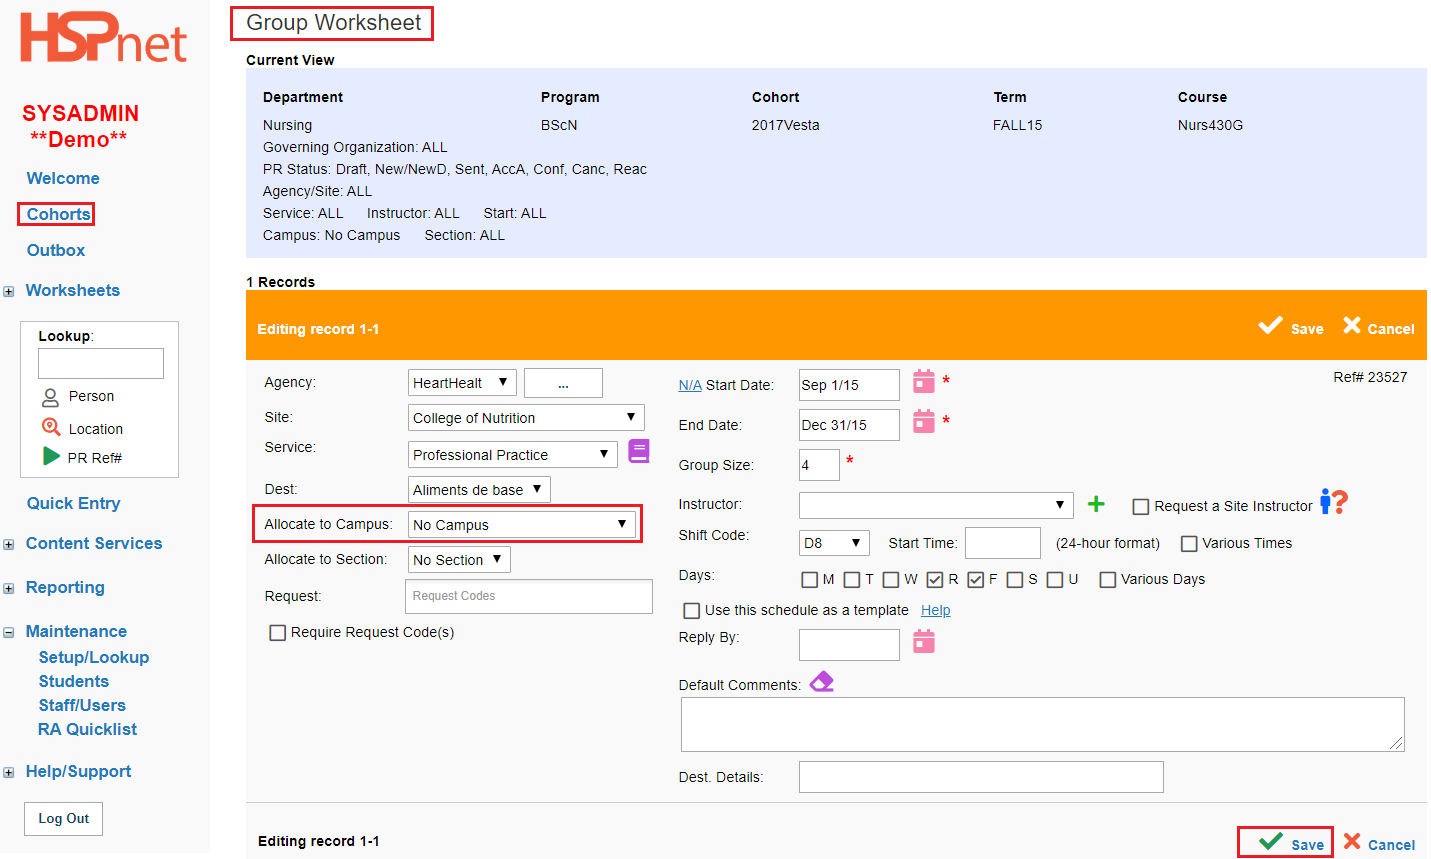
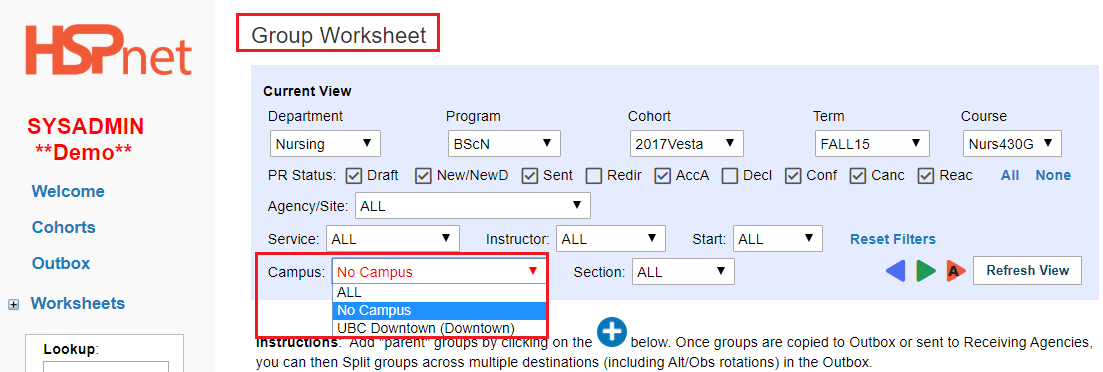
Step 3 – (optional) Allocate a Campus to Placements
Most schools maintain a separate Cohort or Program for each of their campuses, with placement requests that are created by cohort and therefore already "reserved" for students at a campus. However if students from different campuses are mixed within a Cohort, it's still possible to reserve placements by campus.
|
|
|
The saved campus allocation does not display in the worksheet, however you can use the Campus drop down list/filter to focus on entries that are allocated to a specific campus, or on entries not yet allocated ("No Campus").
|
|
|
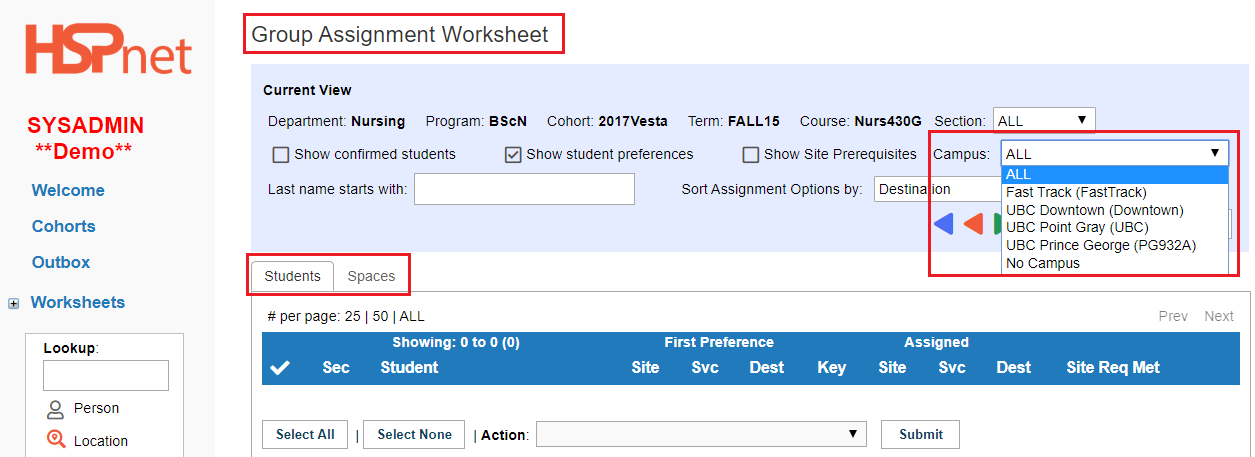
Step 4 – (optional) Using Campuses when Assigning Students
To support manual assignment of students, the Campus filter in the Group or Individual Assignment Worksheet allows you to focus on:
|
|
|
Campus allocations can be applied using the Automated Student Matching feature.
|
|